> ## Documentation Index
> Fetch the complete documentation index at: https://calcs.com/docs/llms.txt
> Use this file to discover all available pages before exploring further.
# Linking Data Between Templates (Load Linking)
> How to implement load linking functionality to import data from one calculation to another
This guide explains how to add the link function in a template, allowing you to import data from another calculation. A common example is the load link feature which allows exporting the reactions of a beam to be used as input for column calculations.
## The Basics
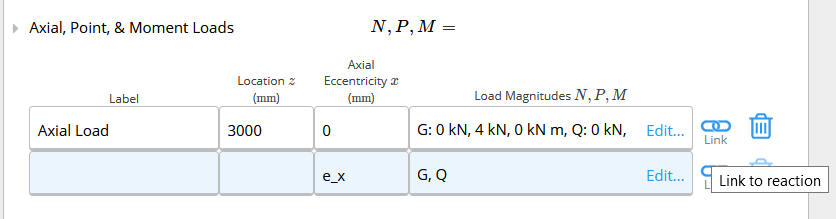
**Figure 1 - Beam calculator with the "link" button**
### Step 1: Create Export Data
First, create a equation widget in the template you want to obtain the data from. This equation widget should be a table (using double square brackets `[[]]`) containing all data you want to export.
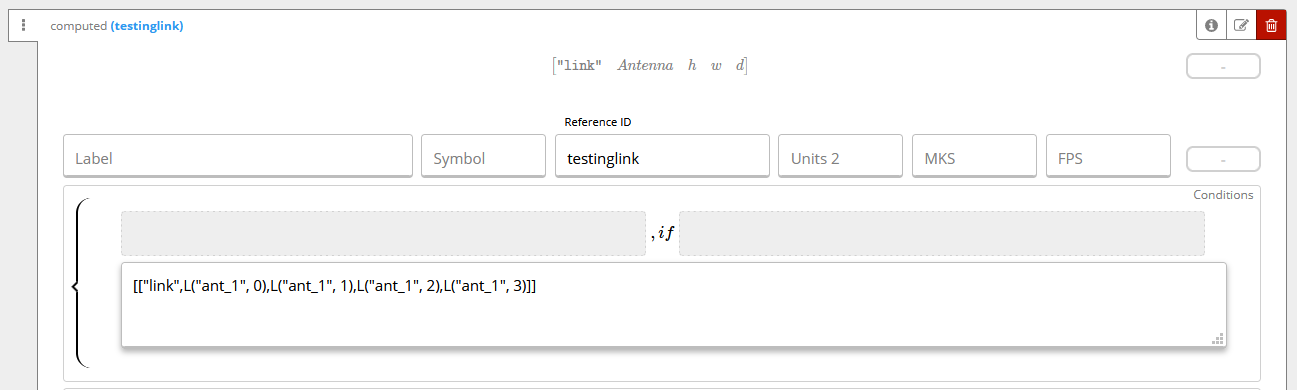
**Figure 2 - Preparing the data for exporting**
Make sure to check the **"Export"** box for this widget:

### Step 2: Create Import Table
Create a table in the destination template where you need the imported data. This table should have the same number of columns as the exported table.
Remember to add `"inputType": "string"` for text columns.
### Step 3: Add Link Function
In the import table, include the following code to create the link function:
```json theme={null}
{
"type": "linkRow",
"mappings": [
{
"sourceColumn": 0,
"targetColumn": 0,
"prependSheetName": true
},
{
"sourceColumn": 1,
"targetColumn": 1
},
{
"sourceColumn": 2,
"targetColumn": 2
},
{
"sourceColumn": 3,
"targetColumn": 3
},
{
"sourceColumn": 4,
"targetColumn": 4
}
],
"description": "Link to MAFI Bracket Calculator",
"referenceId": "testinglink", // ReferenceID from exported sheet
"linkRequired": true, // Required link for calc to be valid?
"sourceDataColumns": [
{
"label": "Label",
"sorted": true
}
]
}
```
## Configuration Parameters
* **`referenceId`**: Must match the reference ID of the exported table
* **`sourceColumn`** and **`targetColumn`**: Refer to the column indices of the exported and imported tables respectively (the imported table can have a different column arrangement)
* **`prependSheetName`**: Set to `true` to include the sheet name in the imported data
* **`linkRequired`**: Set to `true` if the link is required for the calculation to be valid
### Final Configuration
Make sure to check both "Expand" and "Show in Summary" boxes for the linking widget.
A [tutorial video](https://drive.google.com/file/d/1c3jPkhNQSrnJWeYtHMu-GWbRIeUbTwsg/view) is available, created by Brooks while teaching Qiming. Check here.
## Advanced Linking
For more advanced linking concepts, including backend architecture and common pitfalls, refer to this comprehensive learning session:
[Advanced Load Linking Session](https://drive.google.com/file/d/1I0imRkK91oU96elaBzjVOr79XAieMuqR/view?usp=sharing)
This recording covers:
* How load linking works on the backend
* How to design new types of links (not necessarily just loads)
* Common pitfalls and how to avoid them
* Best practices for complex linking scenarios