> ## Documentation Index
> Fetch the complete documentation index at: https://calcs.com/docs/llms.txt
> Use this file to discover all available pages before exploring further.
# Sections & Shared Tables
> How to work with and manage sections in shared tables for Calcs.com templates
## Adding New Sections to Shared Tables
The main purpose of this guide is to help you add new sections to an existing Shared Table.
### Step-by-Step Process
1. **Obtain Section Properties File**
* Ensure you have the file containing all necessary section properties
* This file is typically provided by the user making the request
2. **Navigate to Shared Tables**
* Go to `ClearCalcs/dev-environment/scripts/sharedTables`
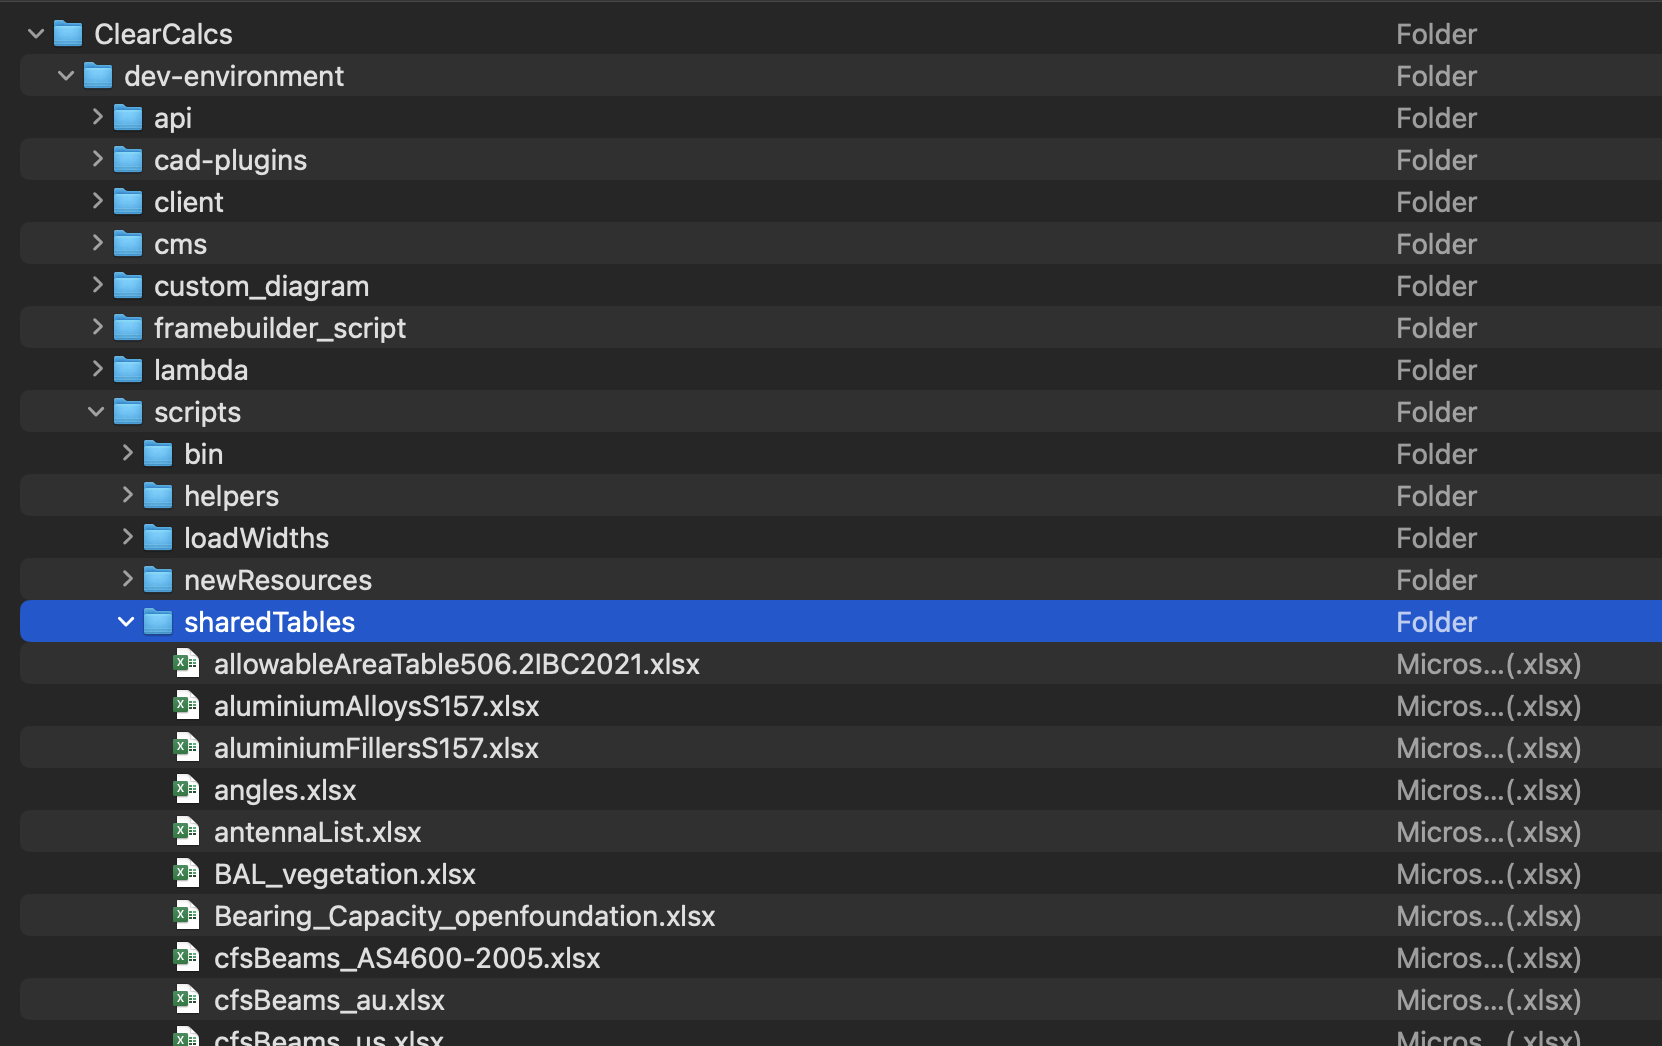
3. **Open Target Excel File**
* Select and open the .xlsx file where you want to add the new sections
4. **Format Section Properties**
* Add the section properties according to the format of the existing Shared Table
It's a good idea to organize the new sections in a separate file first to avoid accidentally modifying other data.
5. **Add Sections to Excel**
* Once organized, copy and paste them into the appropriate spot in the .xlsx file
* Save the file
### Generating the JSON File
There are two ways to generate the JSON file:
1. Open a calculator that uses the sharedTable in the builder
2. Find the lookup that uses the sharedTable and open it
3. Select "Org Shared Table" in the lookup data
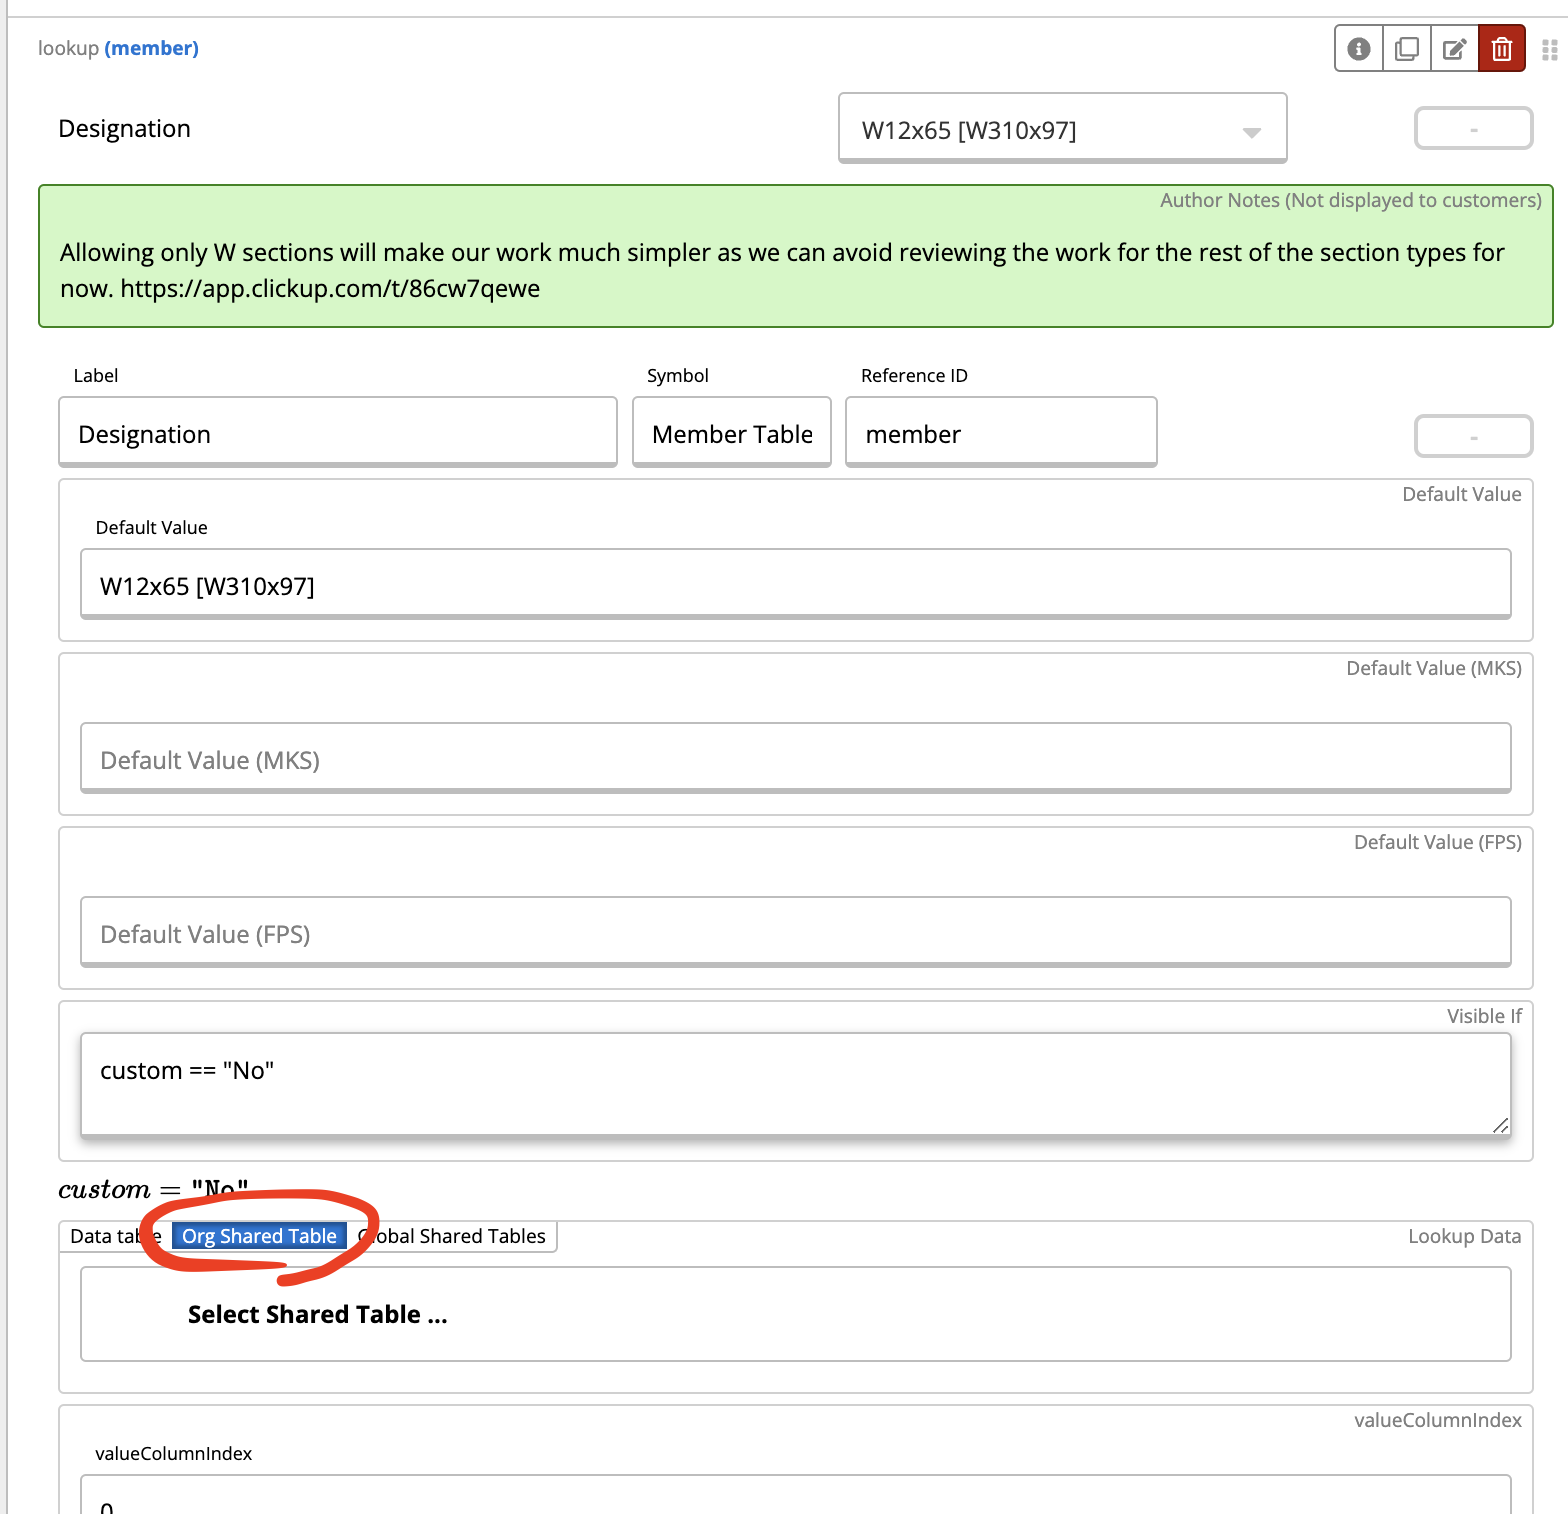
4. Click on "Select Shared Table" and upload the Excel file
5. It'll automatically get added to the calculator (so you can test right away) and download the JSON file
1. Go to the Calculator builder and click on "Show Shared Tables"

2. You'll see a button to upload a sharedTable
3. Once the upload is complete, the JSON file will automatically download

### Final Steps
7. **Pin the New Shared Table Version**
* Follow the instructions for pinning your new shared table version to the templates
8. **Commit Changes**
* Commit all changes including:
* The .xlsx file
* The JSON file
* Any files from the pinning step
## Shared Table Poking
Shared table poking allows you to override values in shared tables for testing and development purposes.
### How It Works
* Shared tables can be "poked" to temporarily override values
* This is useful for testing edge cases or debugging
* Changes are temporary and don't affect the actual shared table
### Common Use Cases
1. **Testing with Different Section Properties**
* Override section dimensions
* Test with different material properties
* Verify calculations with edge cases
2. **Debugging Template Issues**
* Isolate problems by changing specific values
* Test calculation responses to different inputs
## Section Request Workflow
### Upwork Flow for Section Requests
When sections need to be added via external contractors:
1. **Create Clear Specifications**
* List all required section types
* Specify property requirements
* Include relevant standards references
2. **Post on Upwork**
* Use standardized job template
* Include example files
* Set clear deliverables
3. **Review and Validate**
* Check all properties match standards
* Validate against existing sections
* Test in relevant calculators
### Adding & Validating CFS Sections
Cold-formed steel (CFS) sections require special attention:
CFS sections must be validated against appropriate standards before adding to shared tables.
#### Validation Process
1. **Property Verification**
* Check geometric properties
* Verify section modulus calculations
* Confirm moment of inertia values
2. **Standards Compliance**
* Ensure compliance with relevant standards (AISI, AS/NZS, etc.)
* Document standard references
3. **Testing**
* Test in CFS-specific calculators
* Verify capacity calculations
* Check for edge cases
## Importing Tables from Web Sources
### Direct Import from Web to Excel
To import tables directly into Excel from web sources:
1. **Open Excel**
* Create new workbook or open existing
2. **Use Data Import Feature**
* Go to Data → From Web
* Enter the URL containing the table
3. **Select Table**
* Excel will identify tables on the page
* Select the appropriate table
4. **Transform Data**
* Use Power Query to clean and format
* Apply necessary transformations
5. **Load to Worksheet**
* Load the cleaned data
* Save as .xlsx for shared table use
Always verify imported data against original sources before using in shared tables.
## Best Practices
### Organization
* Keep sections organized by type and standard
* Use consistent naming conventions
* Document any custom sections
### Version Control
* Track changes to shared tables
* Document reasons for additions/modifications
* Maintain backwards compatibility
### Testing
* Test new sections in relevant calculators
* Verify all properties are accessible
* Check for conflicts with existing sections
### Documentation
* Document custom sections thoroughly
* Include calculation methods for derived properties
* Reference applicable standards