> ## Documentation Index
> Fetch the complete documentation index at: https://calcs.com/docs/llms.txt
> Use this file to discover all available pages before exploring further.
# Wood Connector (ASD) Overview
**Instantly create a new Wood Connector calculation by clicking here:**
[**Create Wood Connector Calculator**](https://calcs.com/new/sheet/timberConnectorsASD)
*(This link automatically opens a new project and sheet in Calcs.com.)*
This article walks you through [Calcs.com](http://Calcs.com)’s Wood Connectors Calculator. You’ll learn how to set up joist and supporting member properties, select appropriate connectors, review load checks, and take advantage of the powerful load linking feature. Check out an in depth example video at the bottom of an article, and watch an overview of the calculator here:
The Wood Connectors Calculator allows you to quickly verify the compatibility and capacity of joist hangers. You can:
* Define joist size, grade, and loads manually
* Automatically link to an existing joist member in your project.
Results include connector compatibility checks, load capacity verification, required fasteners, and installed cost index comparisons.
## **Setting Up Joist Properties**
On the left side of the calculator, you’ll see the **Joist Properties** section. You have two options:
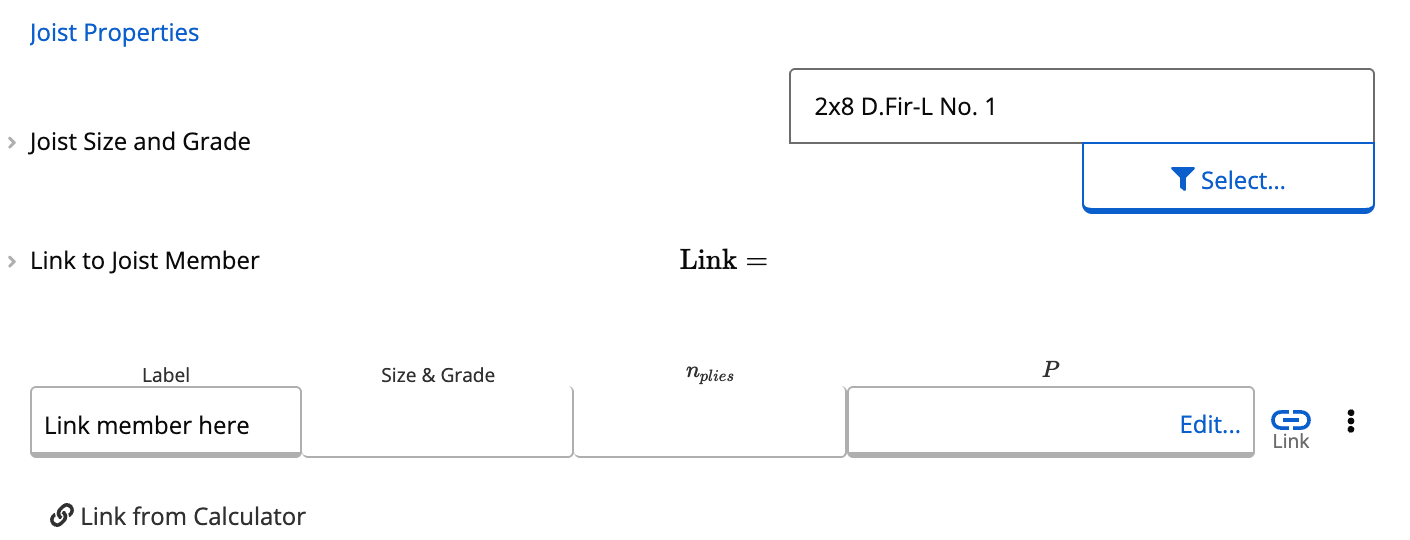 ### **Option A: Manually Select Joist Size and Grade**
1. Open the joist size selector.
2. Choose from the database of wood sections.\
Example: type **“2x8”** → select **Douglas Fir No. 1**.
3. Define the **supporting member**, which can be another wood size/grade.\
Example: **2×8 Douglas Fir No. 1** supporting member.
### **Option B: Link to a Joist Member**
This works the same as how loads link in many of our other calculators. When using **Load Linking**, the calculator automatically imports relevant joist properties and reactions.
### **How to Link**
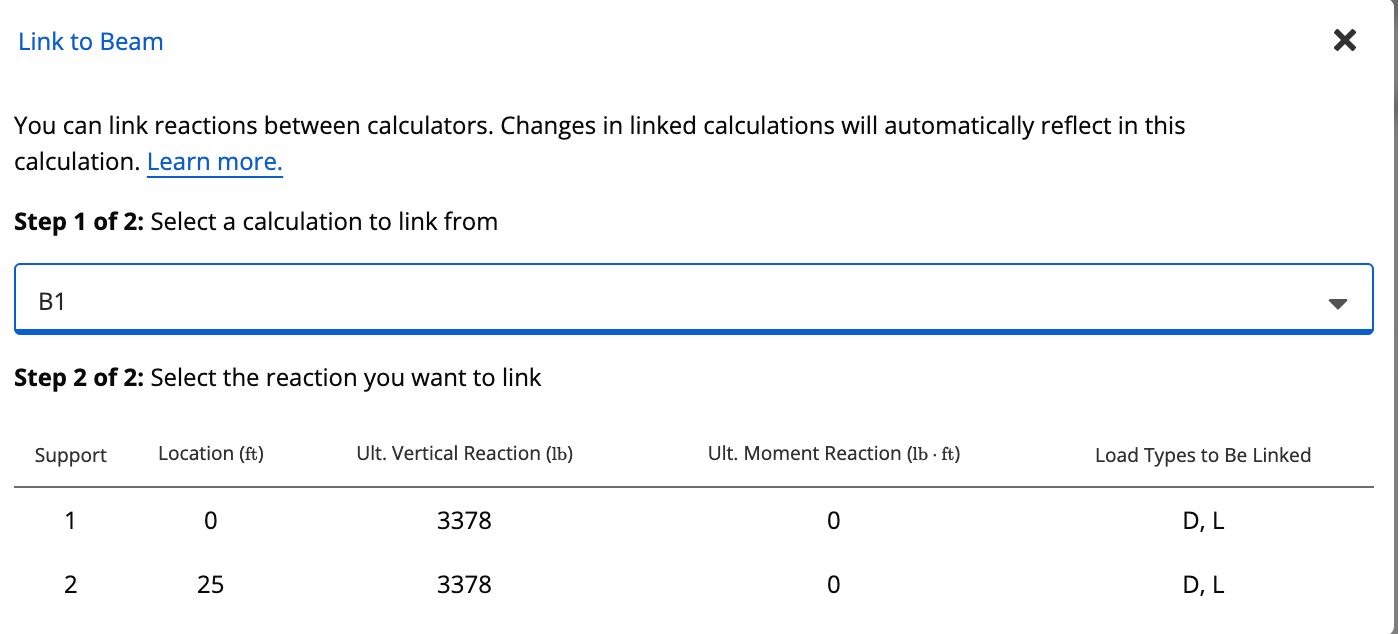
1. Click **Link to Joist Member** → **Link**.
2. Select the appropriate member (e.g., **Beam 1** if previously created).
3. The calculator automatically:
* Pulls in the **joist size and grade**
* Imports the **reaction loads**
* Hides manual joist size and load inputs.
This ensures all values remain consistent with upstream calculations.
### **Option A: Manually Select Joist Size and Grade**
1. Open the joist size selector.
2. Choose from the database of wood sections.\
Example: type **“2x8”** → select **Douglas Fir No. 1**.
3. Define the **supporting member**, which can be another wood size/grade.\
Example: **2×8 Douglas Fir No. 1** supporting member.
### **Option B: Link to a Joist Member**
This works the same as how loads link in many of our other calculators. When using **Load Linking**, the calculator automatically imports relevant joist properties and reactions.
### **How to Link**
1. Click **Link to Joist Member** → **Link**.
2. Select the appropriate member (e.g., **Beam 1** if previously created).
3. The calculator automatically:
* Pulls in the **joist size and grade**
* Imports the **reaction loads**
* Hides manual joist size and load inputs.
This ensures all values remain consistent with upstream calculations.
 ## **Entering Loads**
Below the joist properties is the **Load Input** panel. These inputs represent the **reaction forces** from the joist onto the connector.
Typical loads include:
* Roof live load
* Dead load
* Snow/rain load
* Floor load
Example: entering a **200 lb roof live load**.
Once loads are entered, the calculator evaluates connector options.
## **Entering Loads**
Below the joist properties is the **Load Input** panel. These inputs represent the **reaction forces** from the joist onto the connector.
Typical loads include:
* Roof live load
* Dead load
* Snow/rain load
* Floor load
Example: entering a **200 lb roof live load**.
Once loads are entered, the calculator evaluates connector options.
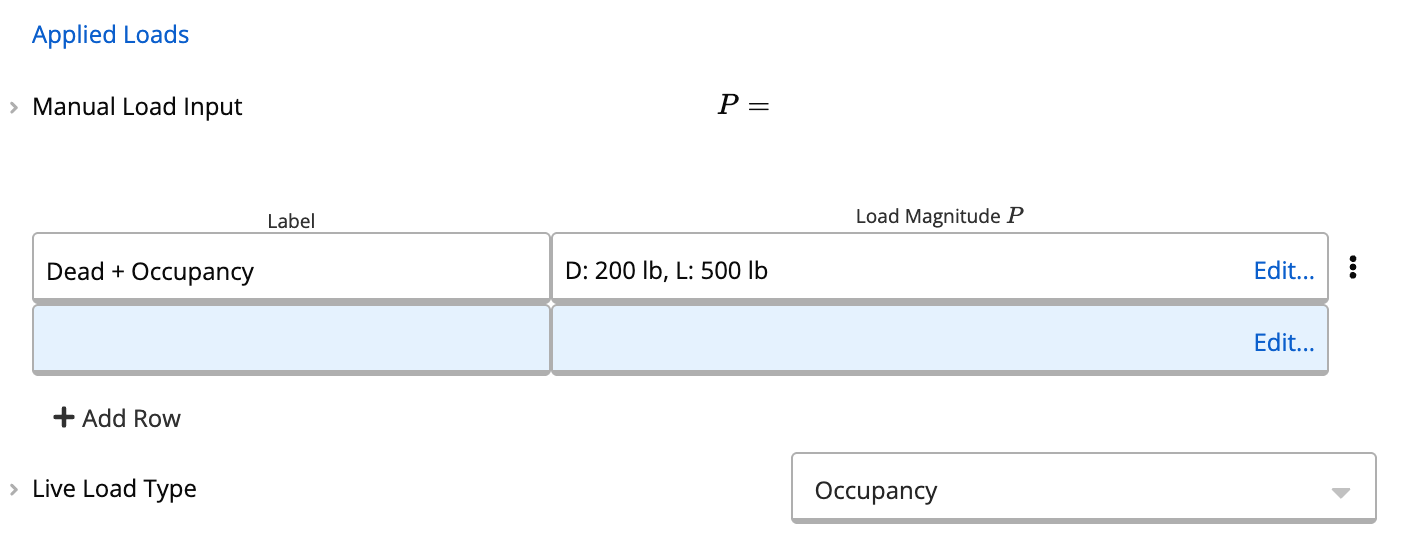 For uplift forces, input these loads as negative values (i.e. -500 lb) so that uplift checks are considered.
## **Selecting a Compatible Connector**
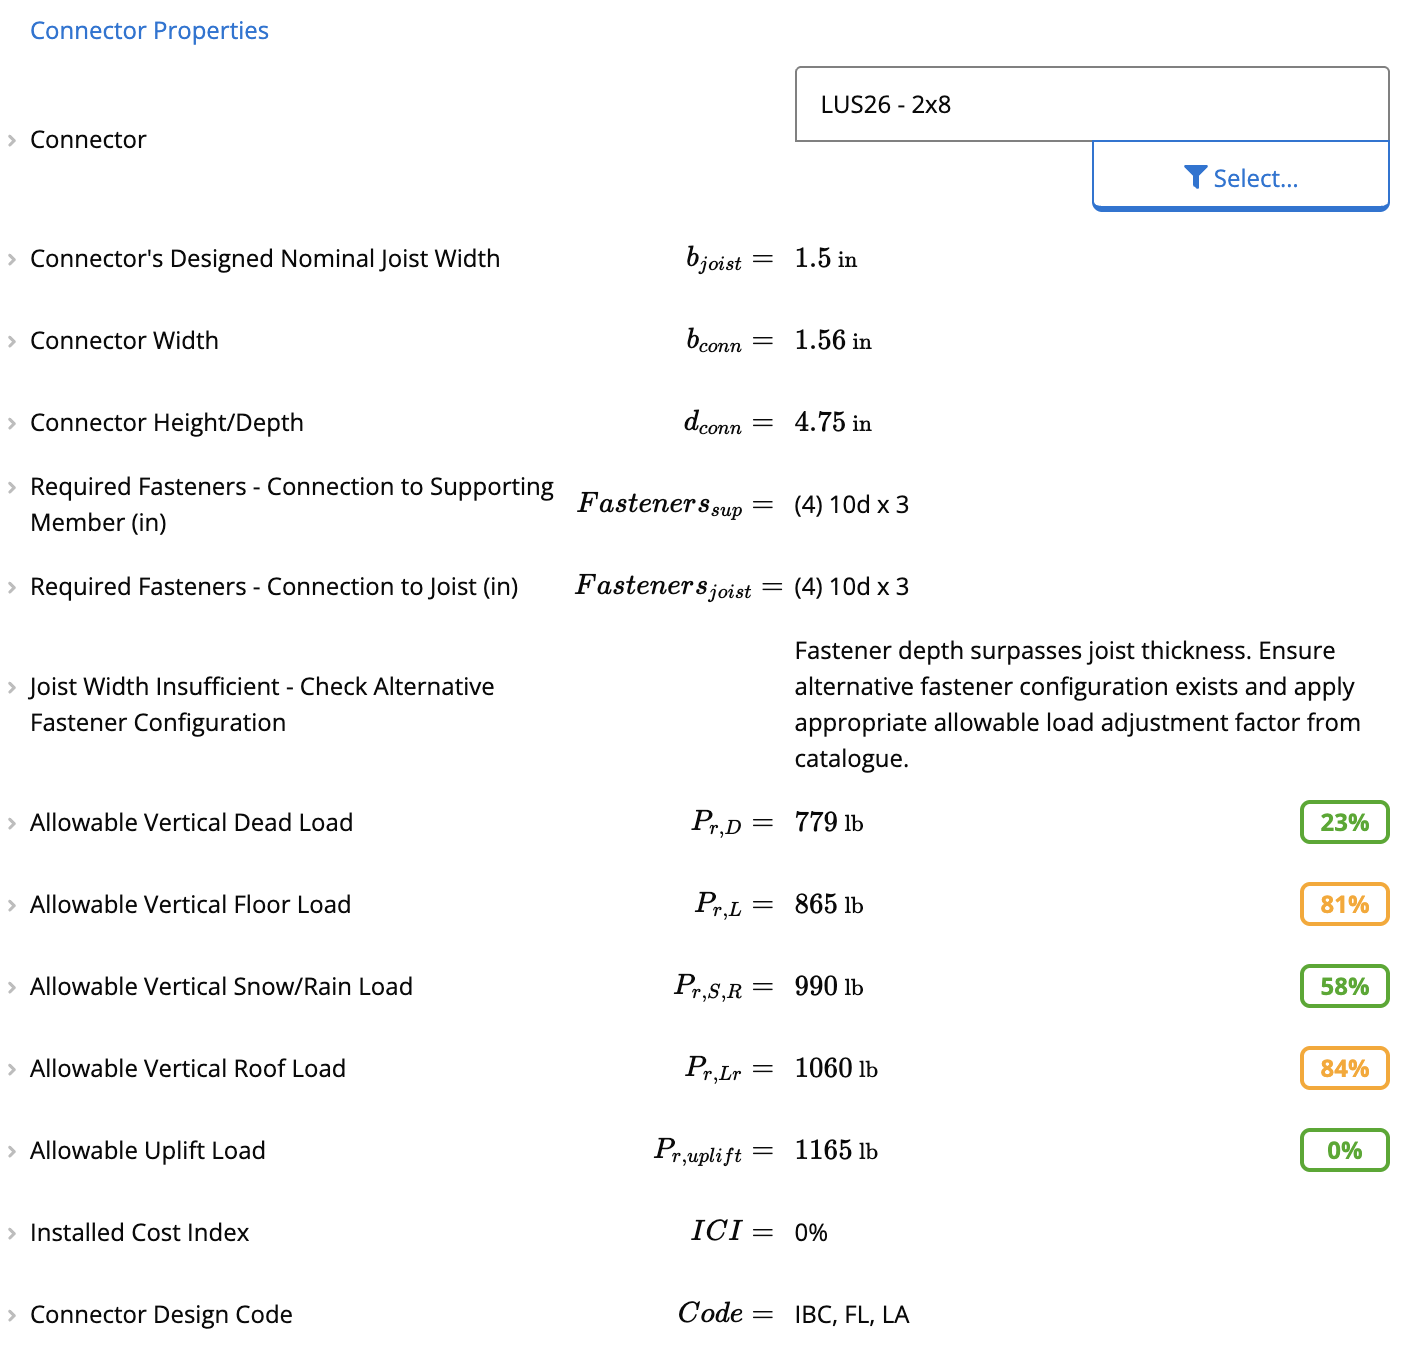
If the initially displayed connector isn’t compatible (e.g., a 2x4 hanger with a 2x8 joist), use the connector selector:
1. Open the **Member Selector**.
2. Type the intended joist depth (e.g., “2x8”).
3. Review available connector models.
Example:\
Selecting **Simpson Strong-Tie LUS26**:
* The calculator confirms that allowable vertical loads (dead, live, snow/rain) all pass.
* Installed Cost Index (ICI) shows **0%**, indicating the lowest-cost option in the library.
* Required fasteners are displayed (e.g., **4× 10d nails** on both joist and supporting member).
This workflow is ideal for **quick standalone connection checks**.
For uplift forces, input these loads as negative values (i.e. -500 lb) so that uplift checks are considered.
## **Selecting a Compatible Connector**
If the initially displayed connector isn’t compatible (e.g., a 2x4 hanger with a 2x8 joist), use the connector selector:
1. Open the **Member Selector**.
2. Type the intended joist depth (e.g., “2x8”).
3. Review available connector models.
Example:\
Selecting **Simpson Strong-Tie LUS26**:
* The calculator confirms that allowable vertical loads (dead, live, snow/rain) all pass.
* Installed Cost Index (ICI) shows **0%**, indicating the lowest-cost option in the library.
* Required fasteners are displayed (e.g., **4× 10d nails** on both joist and supporting member).
This workflow is ideal for **quick standalone connection checks**.
 ## **Adjusting Connector Choice After Linking**
Because linking may change joist depth or loads, the previously selected connector may no longer be compatible.
Example:
* The LUS26 becomes incompatible because the joist hanging depth must be at least **60% of joist depth** to prevent rotation.
* Use the selector to view compatible alternatives:
* **LUS28** (face-mounted) - compatible and lowest ICI (Installed Cost Index).
* **JB210A** - works for certain conditions.
* **HU210TF** - available but may not pass load checks.
Once selected, the calculator displays:
* Governing checks
* Required fasteners (e.g., **6 fasteners** into supporting member, **4** into joist)
* Load verification results
## **Completing the Design**
After linking and selecting a suitable hanger:
* Confirm all governing load checks pass.
* Review fastener requirements.
You now have a fully validated joist-to-hanger connection based on live data from your joist design!
## Example Video:
This video shows an in depth example for the wood connector calculator in action
## **Adjusting Connector Choice After Linking**
Because linking may change joist depth or loads, the previously selected connector may no longer be compatible.
Example:
* The LUS26 becomes incompatible because the joist hanging depth must be at least **60% of joist depth** to prevent rotation.
* Use the selector to view compatible alternatives:
* **LUS28** (face-mounted) - compatible and lowest ICI (Installed Cost Index).
* **JB210A** - works for certain conditions.
* **HU210TF** - available but may not pass load checks.
Once selected, the calculator displays:
* Governing checks
* Required fasteners (e.g., **6 fasteners** into supporting member, **4** into joist)
* Load verification results
## **Completing the Design**
After linking and selecting a suitable hanger:
* Confirm all governing load checks pass.
* Review fastener requirements.
You now have a fully validated joist-to-hanger connection based on live data from your joist design!
## Example Video:
This video shows an in depth example for the wood connector calculator in action