United StatesASCE 7-16Chapter 7
 ## Method & scope
| Property | Detail |
| ---------------- | ---------------------------------------------------------------------------------------------------------------------- |
| Design standards | ASCE 7-16, Chapter 7 |
| Regions | United States |
| Who it's for | US structural engineers calculating roof snow loads to ASCE 7-16 for framing design. |
| What it checks | Flat roof snow load, Sloped roof (balanced) snow load, Rain-on-snow surcharge, Unbalanced snow loads, Snow drift loads |
#### What it calculates
US structural engineers calculating roof snow loads to ASCE 7-16 for framing design. Covers ground-to-roof conversion, balanced and unbalanced loads, drift loads on lower roofs, and rain-on-snow surcharge flagging in a single calculation.
Apply ground-to-roof snow load factors in one step, reviewed by an external engineer for defensible use.
#### Calculation method
The Snow Loads (ASCE 7-16) calculator computes balanced and unbalanced roof snow loads, drift loads, and rain-on-snow surcharges per ASCE 7-16 Chapter 7.
##### Flat roof snow load
The base calculation converts ground snow load (p\_g) to flat roof snow load (p\_f) using three adjustment factors:
**p\_f = 0.7 × C\_e × C\_t × I\_s × p\_g**
* **C\_e**, roof exposure factor (0.9 fully exposed, 1.0 partially exposed, 1.2 sheltered)
* **C\_t**, thermal factor (1.0 for heated buildings, up to 1.3 for cold structures)
* **I\_s**, importance factor (0.8 to 1.2 based on risk category)
A minimum roof snow load p\_m = I\_s × p\_g is also enforced for low-sloped roofs.
##### Sloped roof (balanced) snow load
The balanced design snow load on sloped roofs applies the roof slope factor (C\_s):
**p\_s = C\_s × p\_f**
C\_s is determined separately for warm roofs, cool roofs, and cold roofs based on roof pitch and thermal condition. The governing design load is max(p\_s, p\_m).
##### Rain-on-snow surcharge
For roofs with p\_g not exceeding 20 psf and slopes below the minimum threshold, a rain-on-snow surcharge of 5 psf is added to the balanced snow load per ASCE 7-16 Cl. 7.10.
##### Unbalanced snow loads
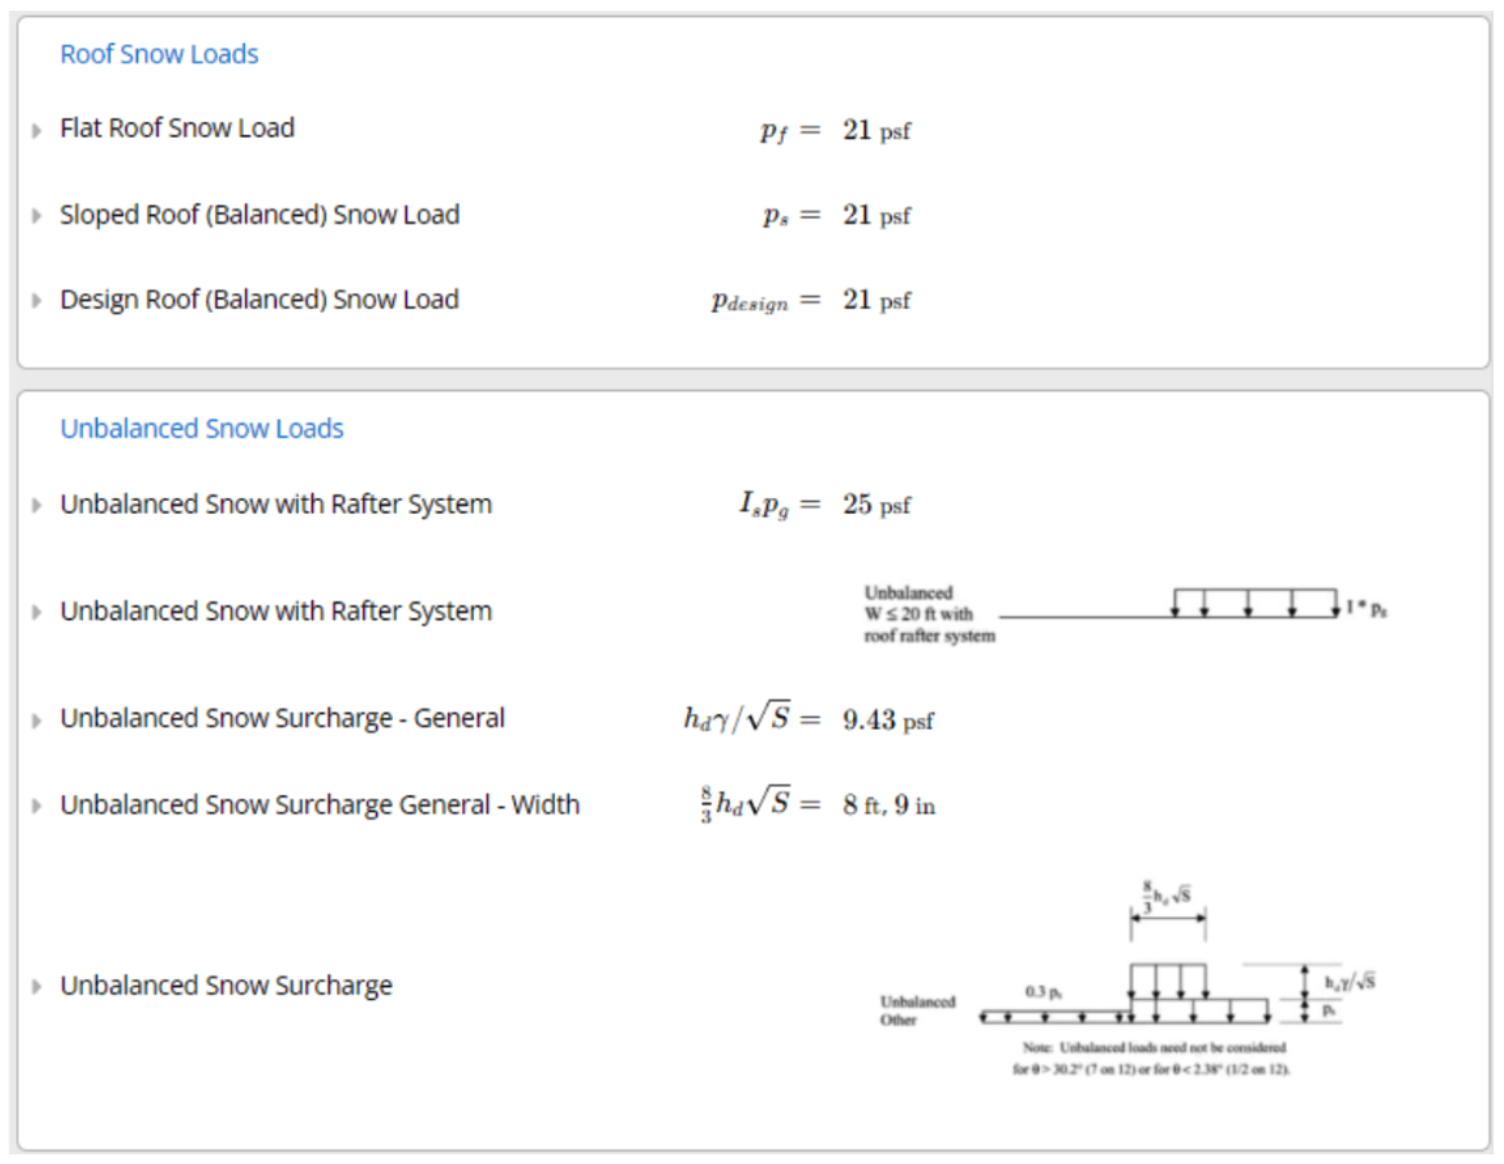
Unbalanced loading is checked for gable roofs with pitches between 0.5:12 and 7:12. The windward side carries a reduced load while the leeward side carries an increased load. For rafter-supported roofs the leeward surcharge magnitude is **h\_d × gamma / sqrt(S)** where gamma is snow density and S is roof slope run per unit rise. Unbalanced loads are not required outside the 0.5:12 to 7:12 pitch range.
##### Snow drift loads
Leeward and windward drifts on lower roofs and at roof projections are calculated from the ASCE 7-16 Figure 7.6-1 parabolic drift height curves. The drift height h\_d is a function of the upwind fetch length and ground snow load. Drift surcharge pressure is h\_d × gamma, tapering over a width of 4 × h\_d from the step. Drift calculations are not required where the projection height is less than 15 ft.
##### Outputs
The calculator reports p\_f, p\_s, p\_design, rain-on-snow surcharge flag, unbalanced leeward and windward pressures, and drift heights and pressures for each lower roof or projection entered. All values reference the governing ASCE 7-16 clause.
## How to use it
## Method & scope
| Property | Detail |
| ---------------- | ---------------------------------------------------------------------------------------------------------------------- |
| Design standards | ASCE 7-16, Chapter 7 |
| Regions | United States |
| Who it's for | US structural engineers calculating roof snow loads to ASCE 7-16 for framing design. |
| What it checks | Flat roof snow load, Sloped roof (balanced) snow load, Rain-on-snow surcharge, Unbalanced snow loads, Snow drift loads |
#### What it calculates
US structural engineers calculating roof snow loads to ASCE 7-16 for framing design. Covers ground-to-roof conversion, balanced and unbalanced loads, drift loads on lower roofs, and rain-on-snow surcharge flagging in a single calculation.
Apply ground-to-roof snow load factors in one step, reviewed by an external engineer for defensible use.
#### Calculation method
The Snow Loads (ASCE 7-16) calculator computes balanced and unbalanced roof snow loads, drift loads, and rain-on-snow surcharges per ASCE 7-16 Chapter 7.
##### Flat roof snow load
The base calculation converts ground snow load (p\_g) to flat roof snow load (p\_f) using three adjustment factors:
**p\_f = 0.7 × C\_e × C\_t × I\_s × p\_g**
* **C\_e**, roof exposure factor (0.9 fully exposed, 1.0 partially exposed, 1.2 sheltered)
* **C\_t**, thermal factor (1.0 for heated buildings, up to 1.3 for cold structures)
* **I\_s**, importance factor (0.8 to 1.2 based on risk category)
A minimum roof snow load p\_m = I\_s × p\_g is also enforced for low-sloped roofs.
##### Sloped roof (balanced) snow load
The balanced design snow load on sloped roofs applies the roof slope factor (C\_s):
**p\_s = C\_s × p\_f**
C\_s is determined separately for warm roofs, cool roofs, and cold roofs based on roof pitch and thermal condition. The governing design load is max(p\_s, p\_m).
##### Rain-on-snow surcharge
For roofs with p\_g not exceeding 20 psf and slopes below the minimum threshold, a rain-on-snow surcharge of 5 psf is added to the balanced snow load per ASCE 7-16 Cl. 7.10.
##### Unbalanced snow loads
Unbalanced loading is checked for gable roofs with pitches between 0.5:12 and 7:12. The windward side carries a reduced load while the leeward side carries an increased load. For rafter-supported roofs the leeward surcharge magnitude is **h\_d × gamma / sqrt(S)** where gamma is snow density and S is roof slope run per unit rise. Unbalanced loads are not required outside the 0.5:12 to 7:12 pitch range.
##### Snow drift loads
Leeward and windward drifts on lower roofs and at roof projections are calculated from the ASCE 7-16 Figure 7.6-1 parabolic drift height curves. The drift height h\_d is a function of the upwind fetch length and ground snow load. Drift surcharge pressure is h\_d × gamma, tapering over a width of 4 × h\_d from the step. Drift calculations are not required where the projection height is less than 15 ft.
##### Outputs
The calculator reports p\_f, p\_s, p\_design, rain-on-snow surcharge flag, unbalanced leeward and windward pressures, and drift heights and pressures for each lower roof or projection entered. All values reference the governing ASCE 7-16 clause.
## How to use it
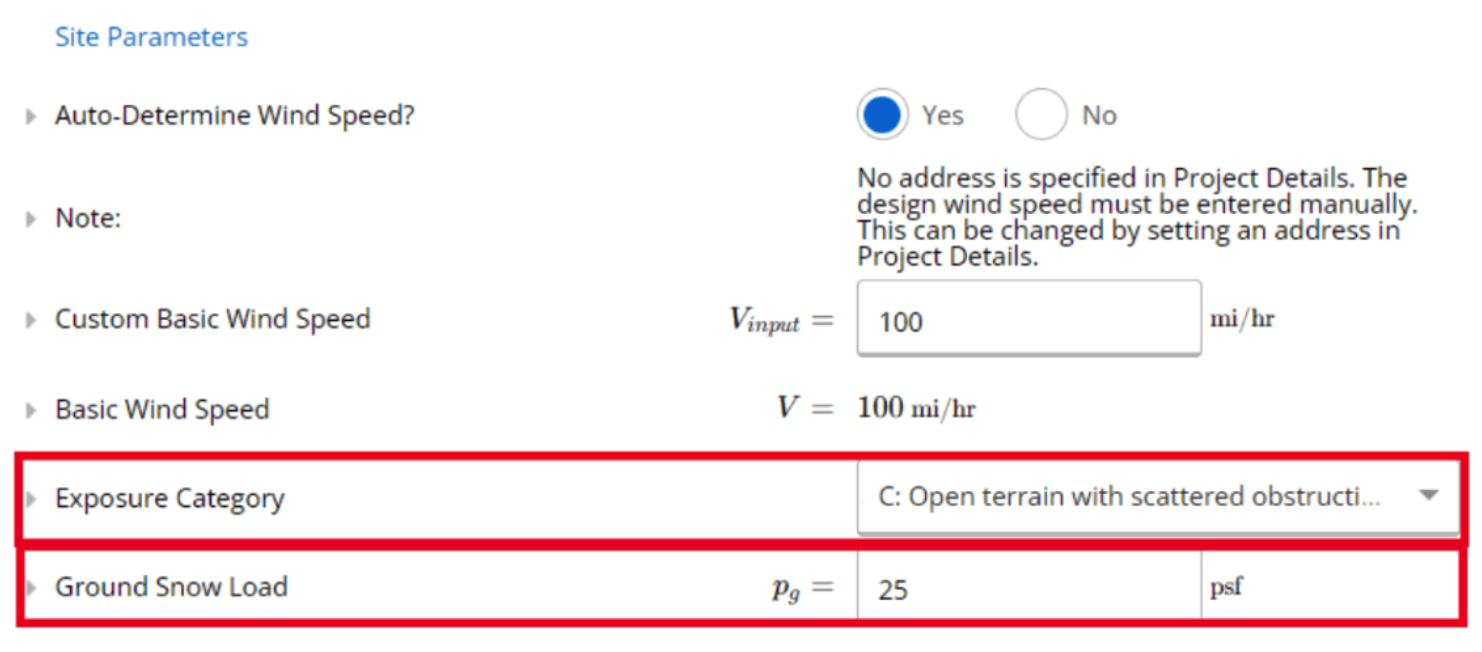
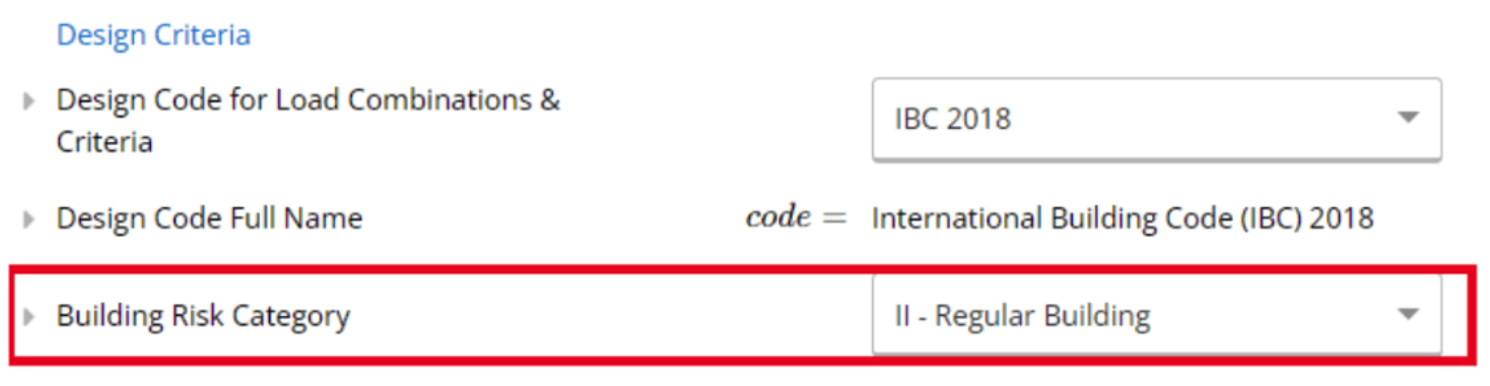
 From here, the important values for snow loads calculations will be entering the exposure category and ground snow load. For our example, we will assume our building is located in the city and use exposure category B, so that we are using the most conservative roughness category. This determines the fully exposed, partially exposed and sheltered factors. We can enter in our ground snow load here, as 25 psf.
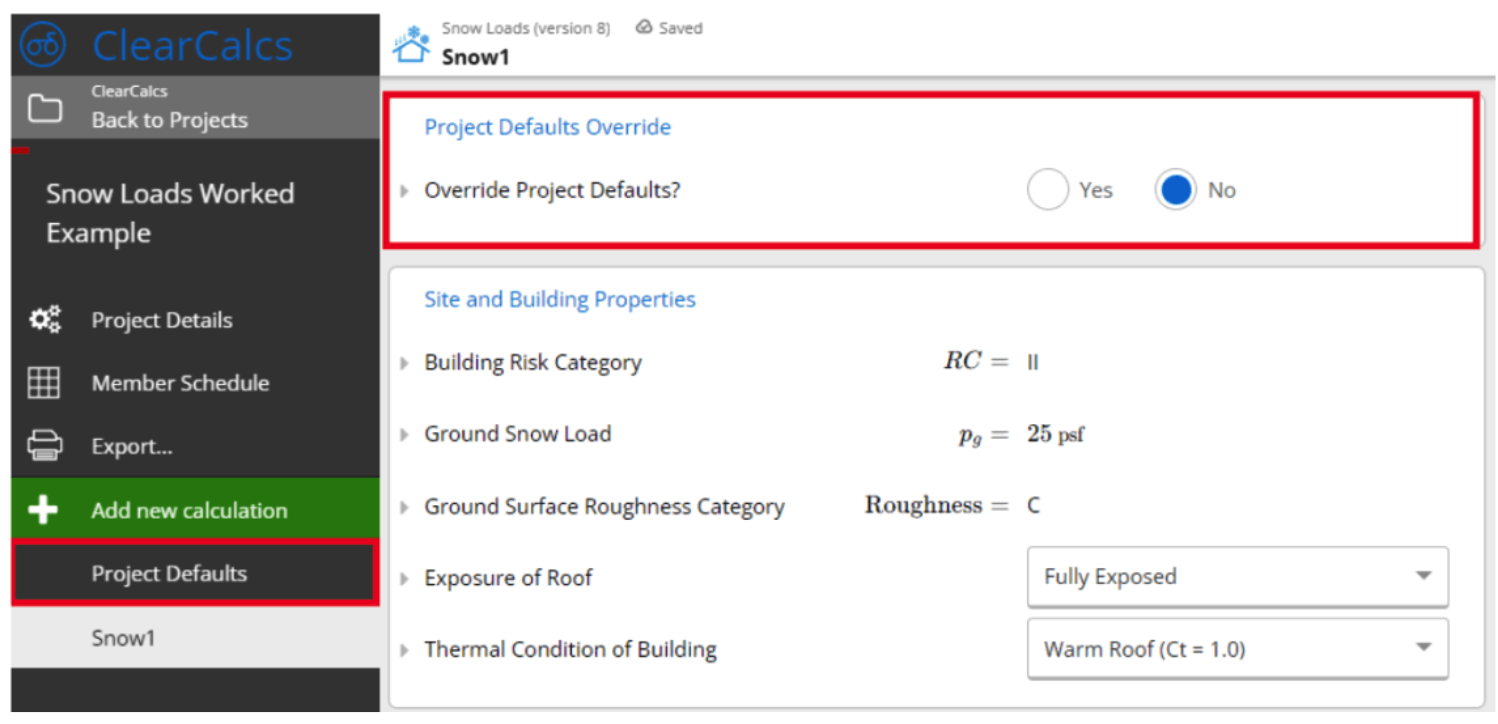
 Still in Project Defaults, the building risk category can be set as II - Regular Building.
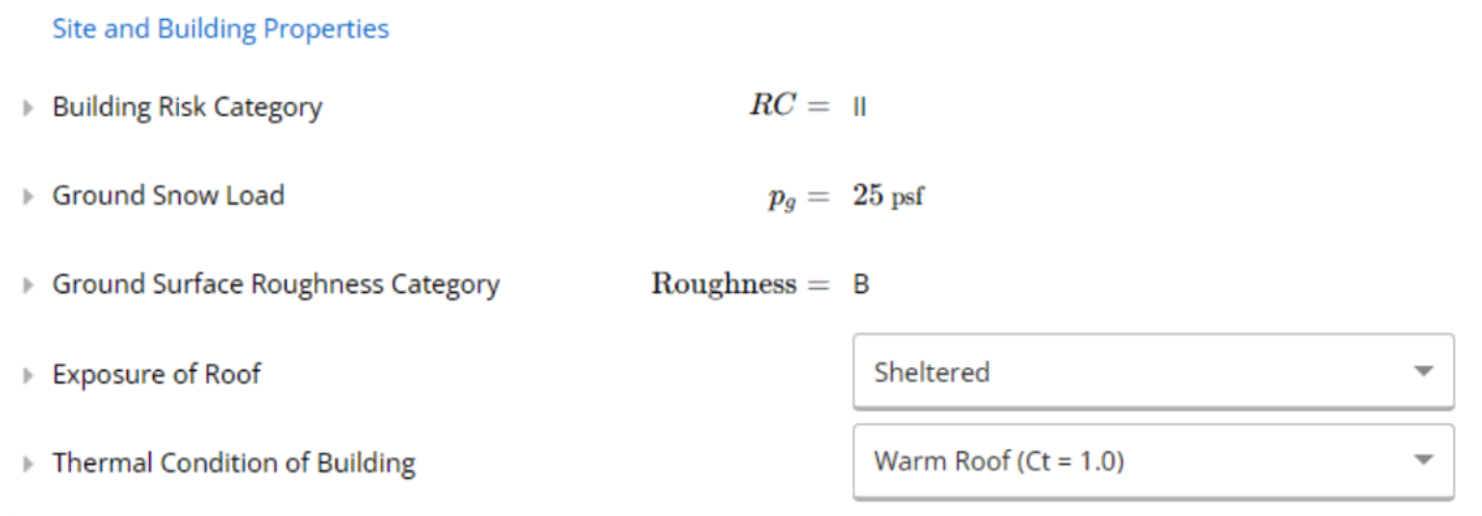
 Moving back to the snow loads calculator, our roof exposure can be set to sheltered, since we are designing to be located in the city with other buildings as nearby obstructions. Last, we will assume our thermal condition of the roof is warm.
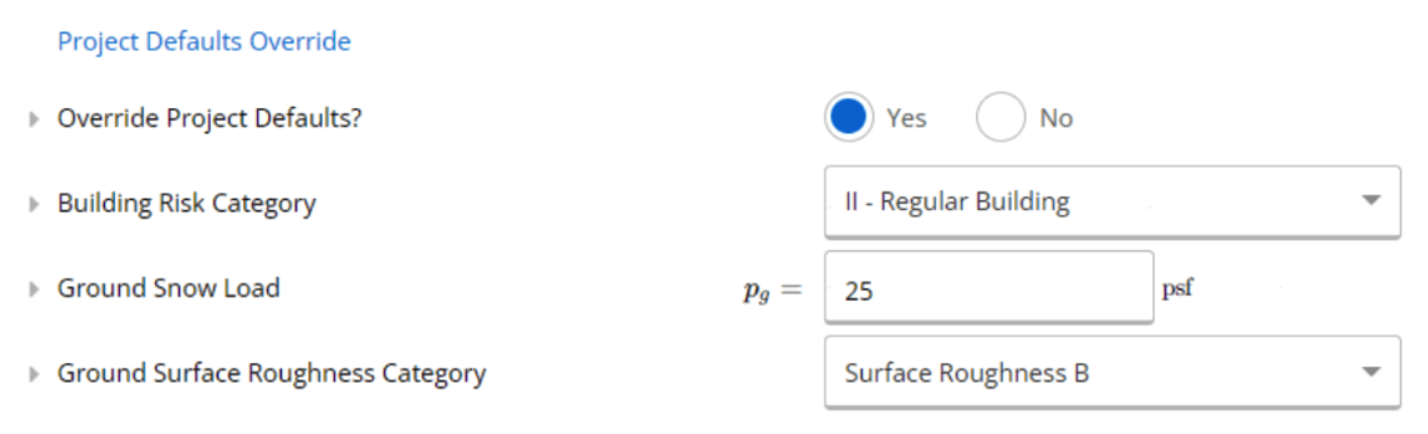
 If you want to override the project default properties in the snow load calculator, you can input these values as shown in the image below. You may want to do this if you wanted to calculate a snow load with different conditions than the rest of your design. The values for the rest of the load calculations will be taken from Project Defaults unless the override option is set to “Yes”.
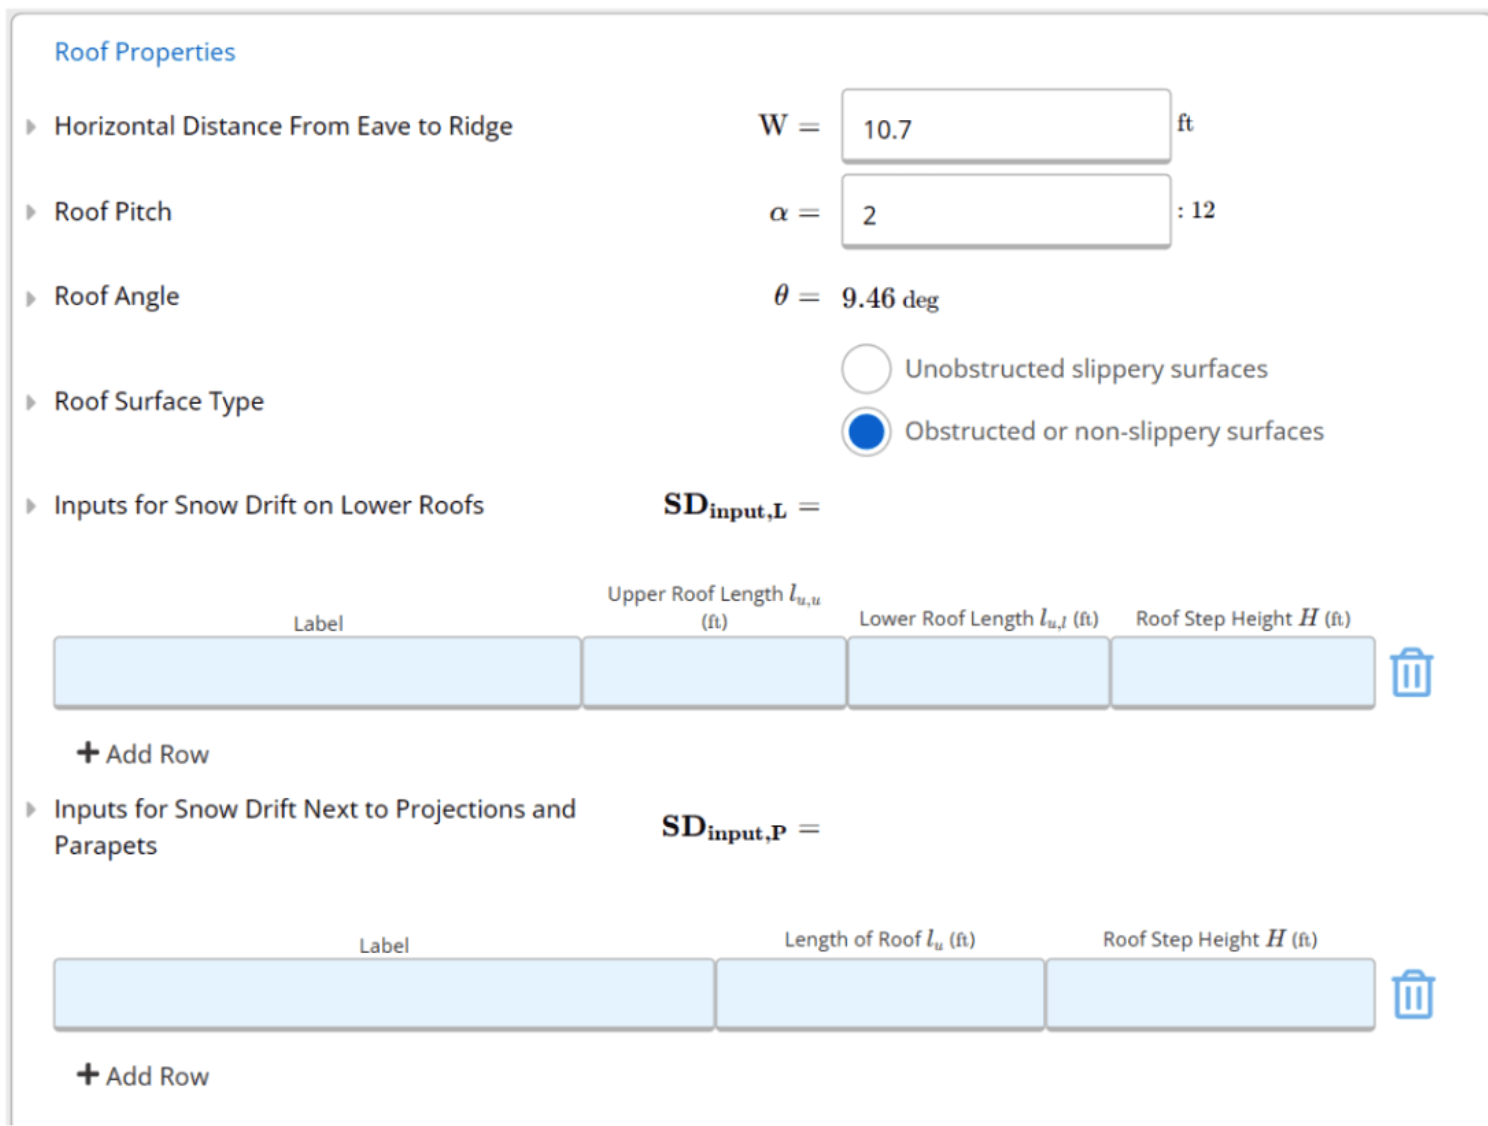
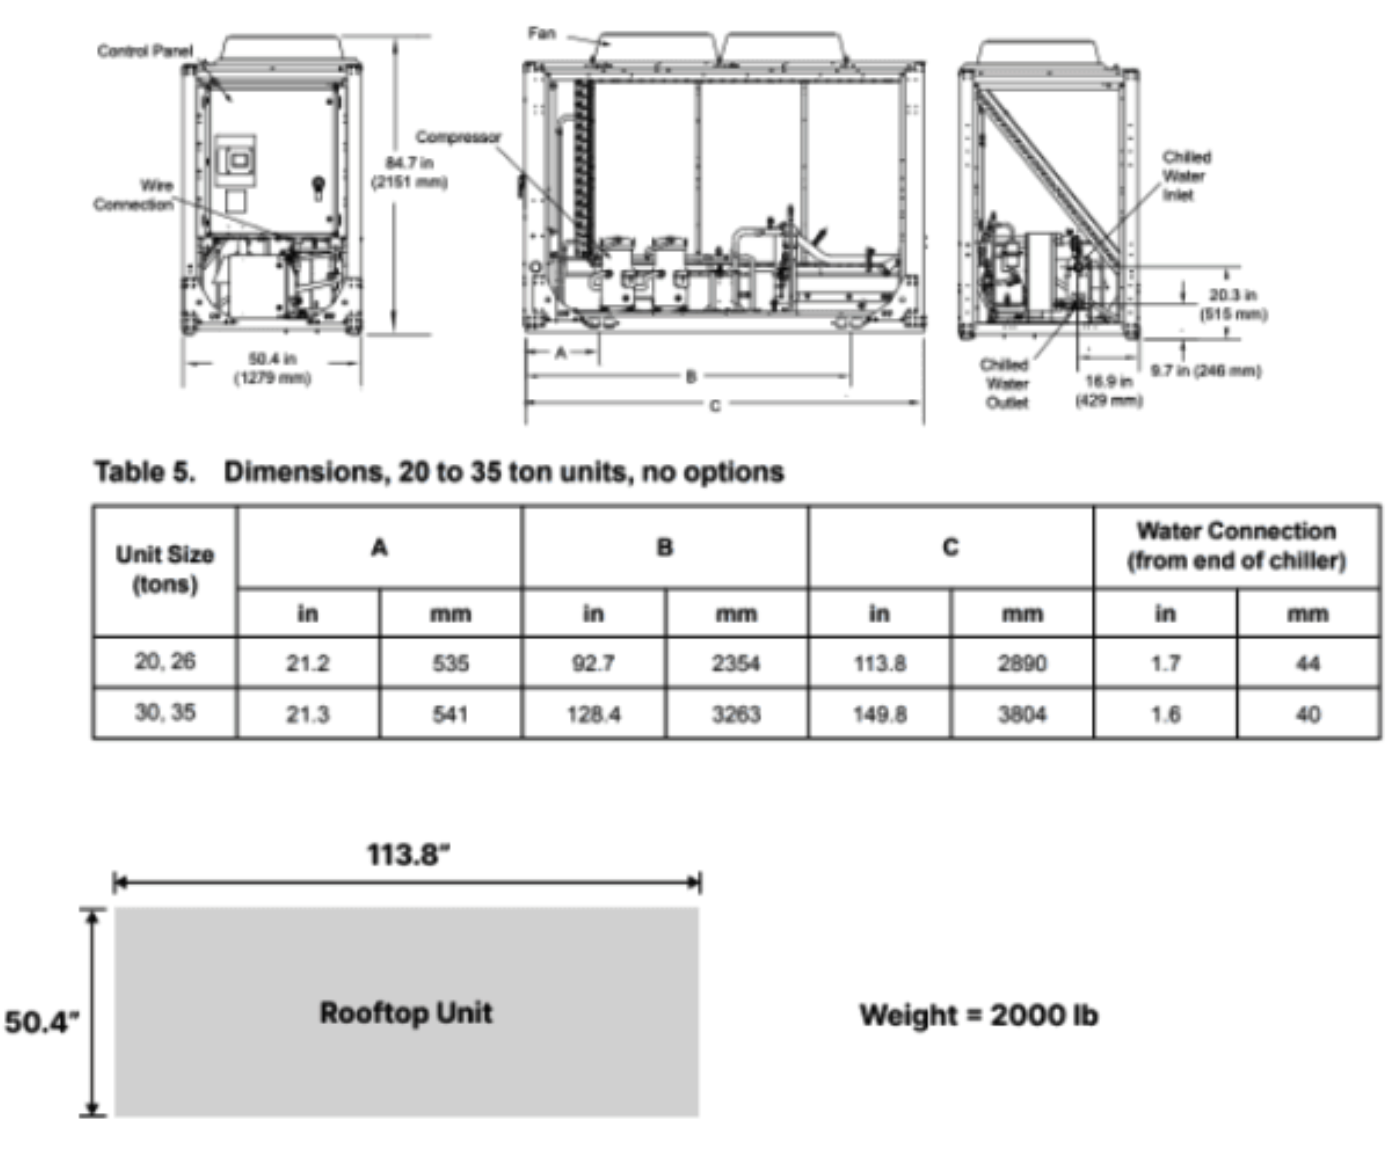
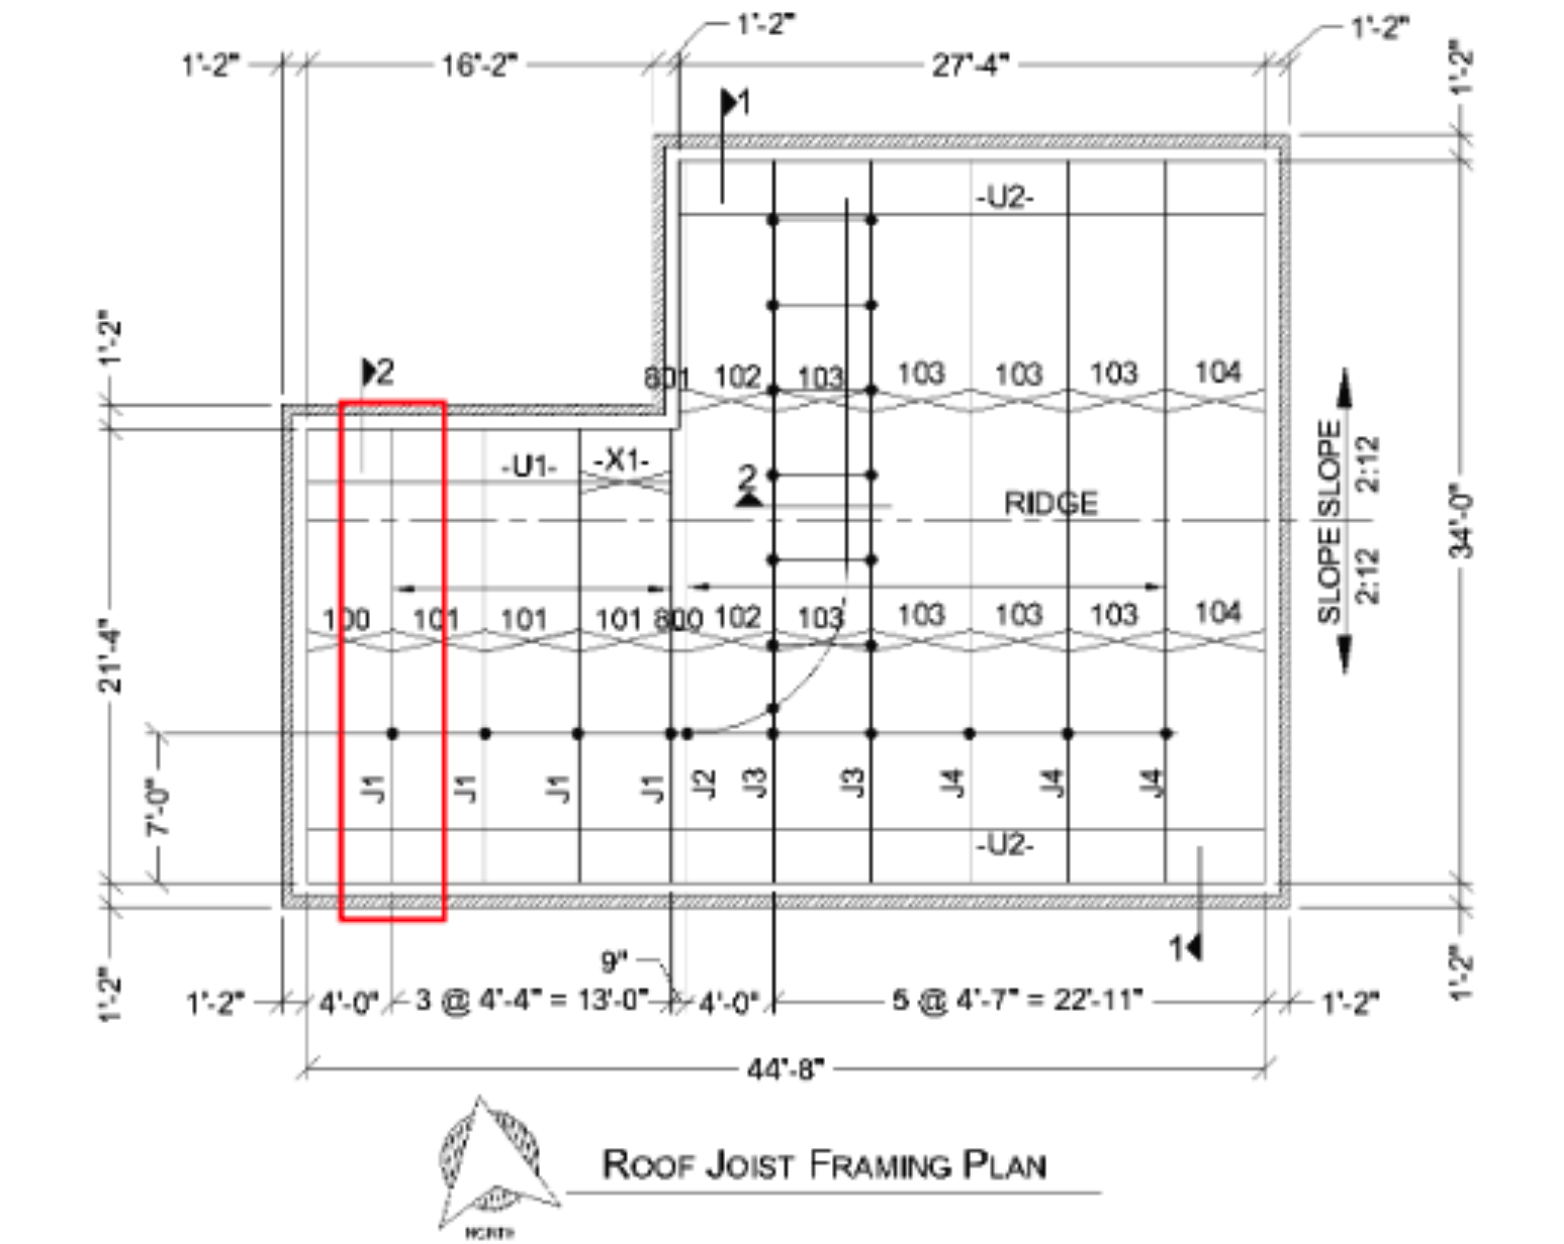
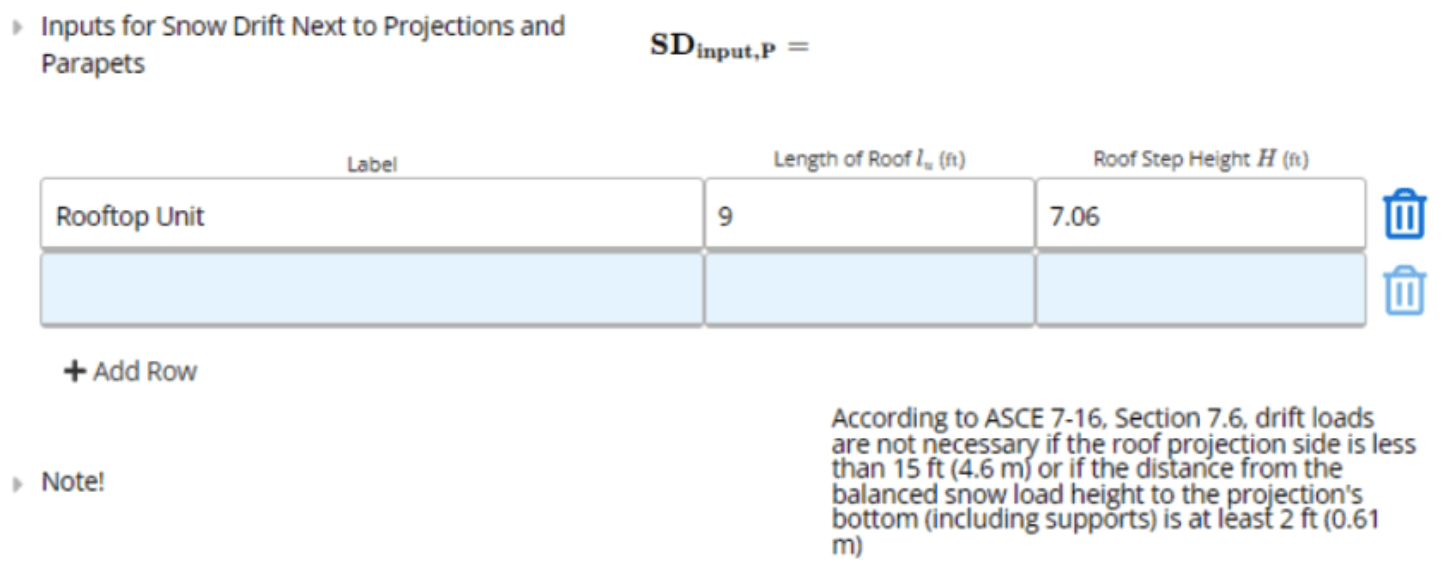
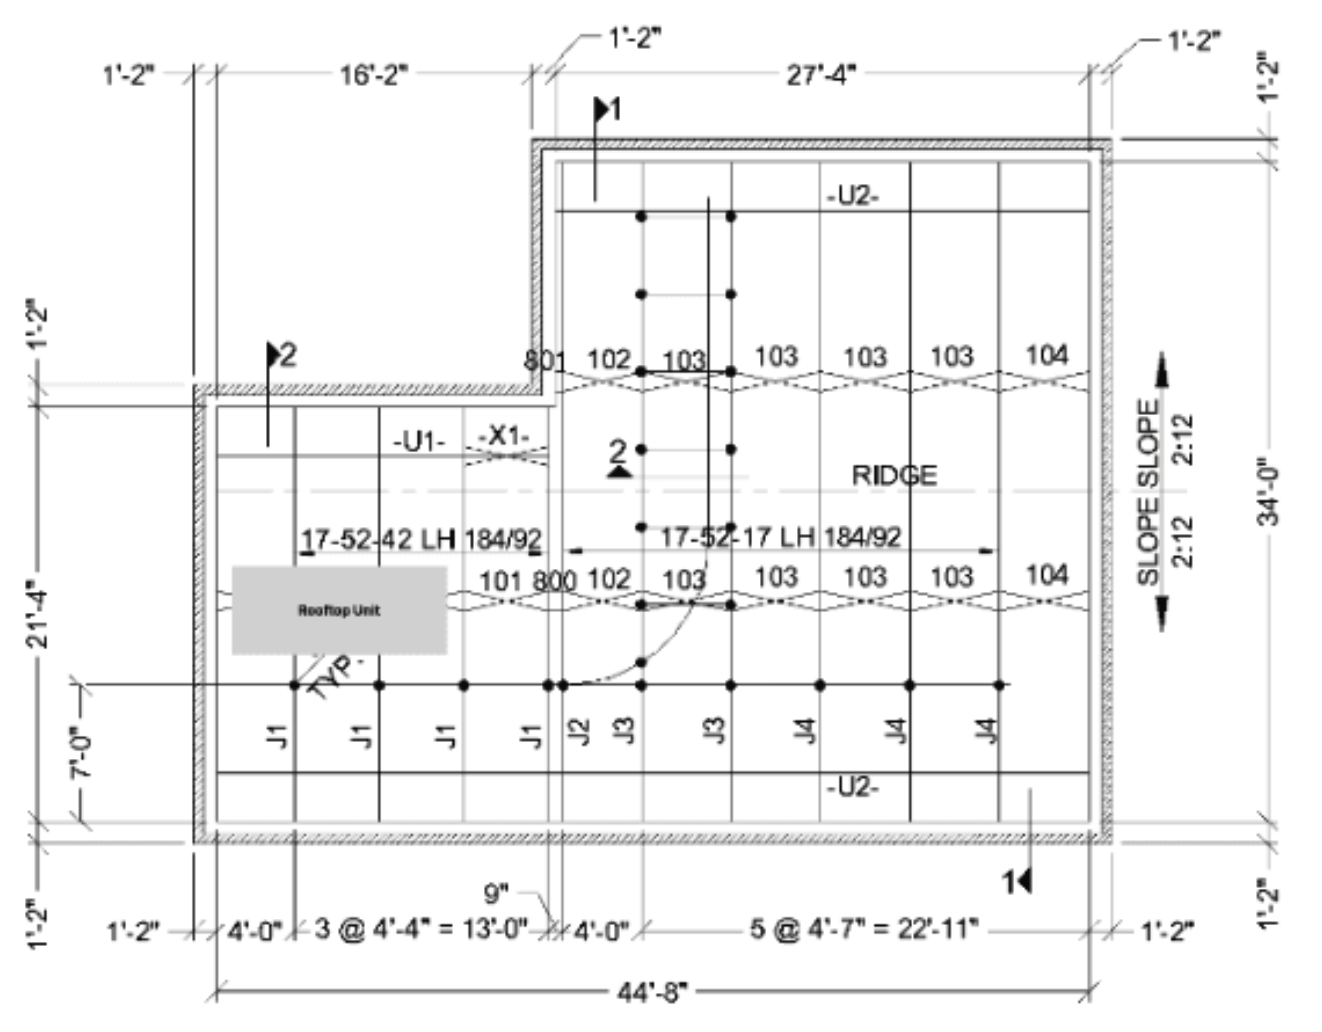 For the second part of this example, let’s consider the same scenario but with an additional rooftop unit. The roof joist design would require a triangular load added to our existing snow load. To add this, we can go to our inputs for snow drift next to projections and parapets. Our length of roof is from the edge of the building to the rooftop unit, and our roof step height is indicated on the drawings as 84.7 in
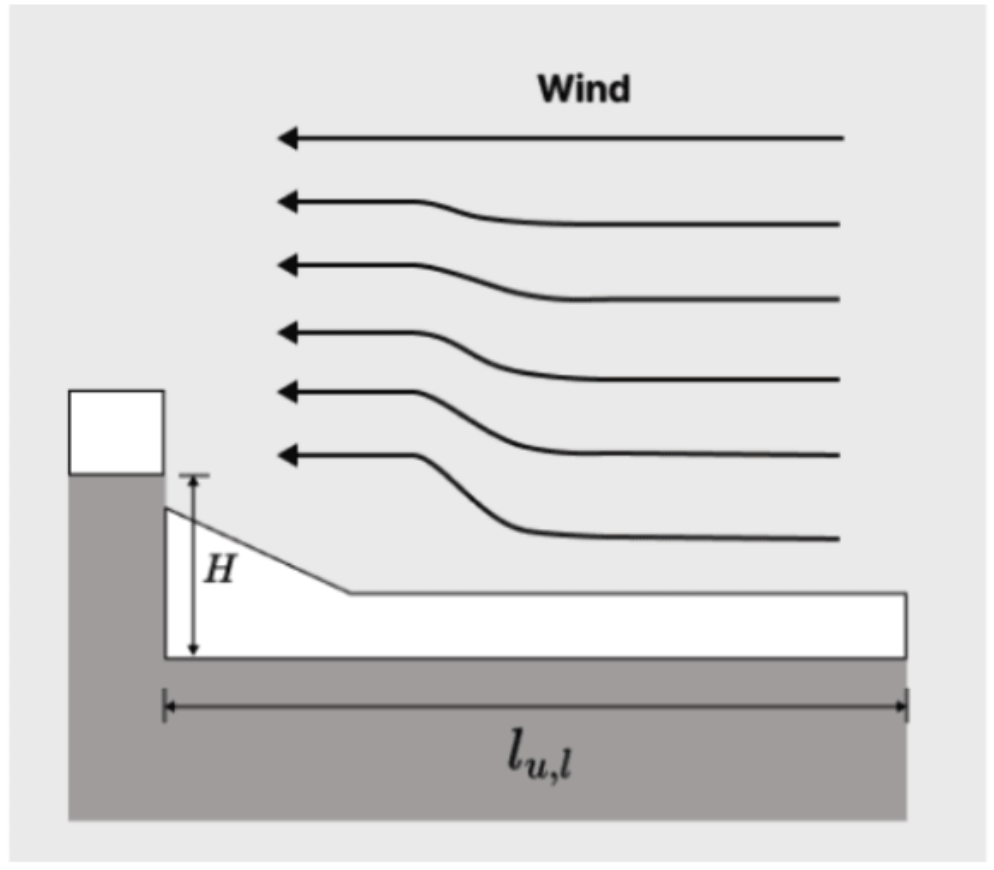
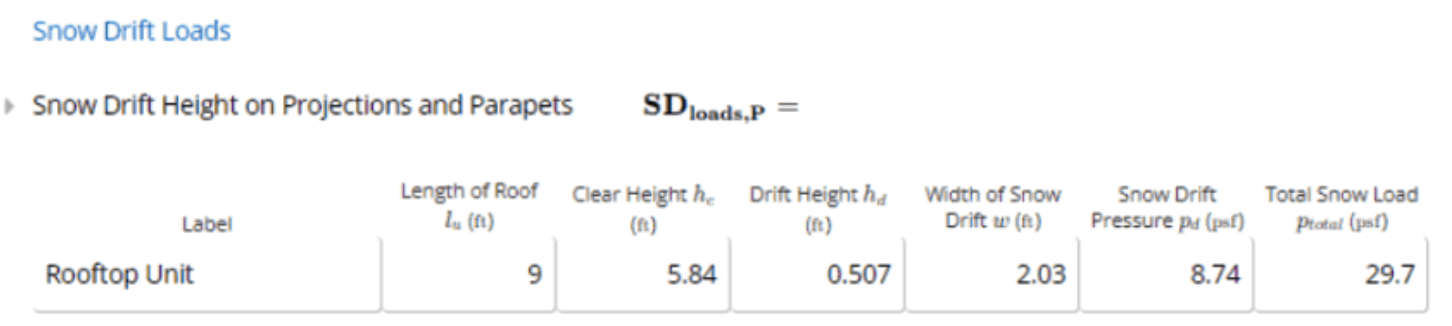
 In our results, we now have a section for snow drift loads. Leeward and windward drift are reported in **two independent tables** (each with its own drift width, drift height (capped at the clear height $h_c$ per §7.7.1), snow drift pressure, and total snow load) so that the two directions can be checked separately rather than combined into a single value. Either direction can end up governing the design of different members. The important values that we may want to consider in our design would be the snow drift pressure, which is the additional pressure caused by snow drift, to be added on top of the existing balanced snow load (8.74 psf), as well as the width of snow drift. For a joist design for example, we would apply an additional 8.74 psf for a distance of 2.03 ft from the edge of the rooftop units, on both sides.
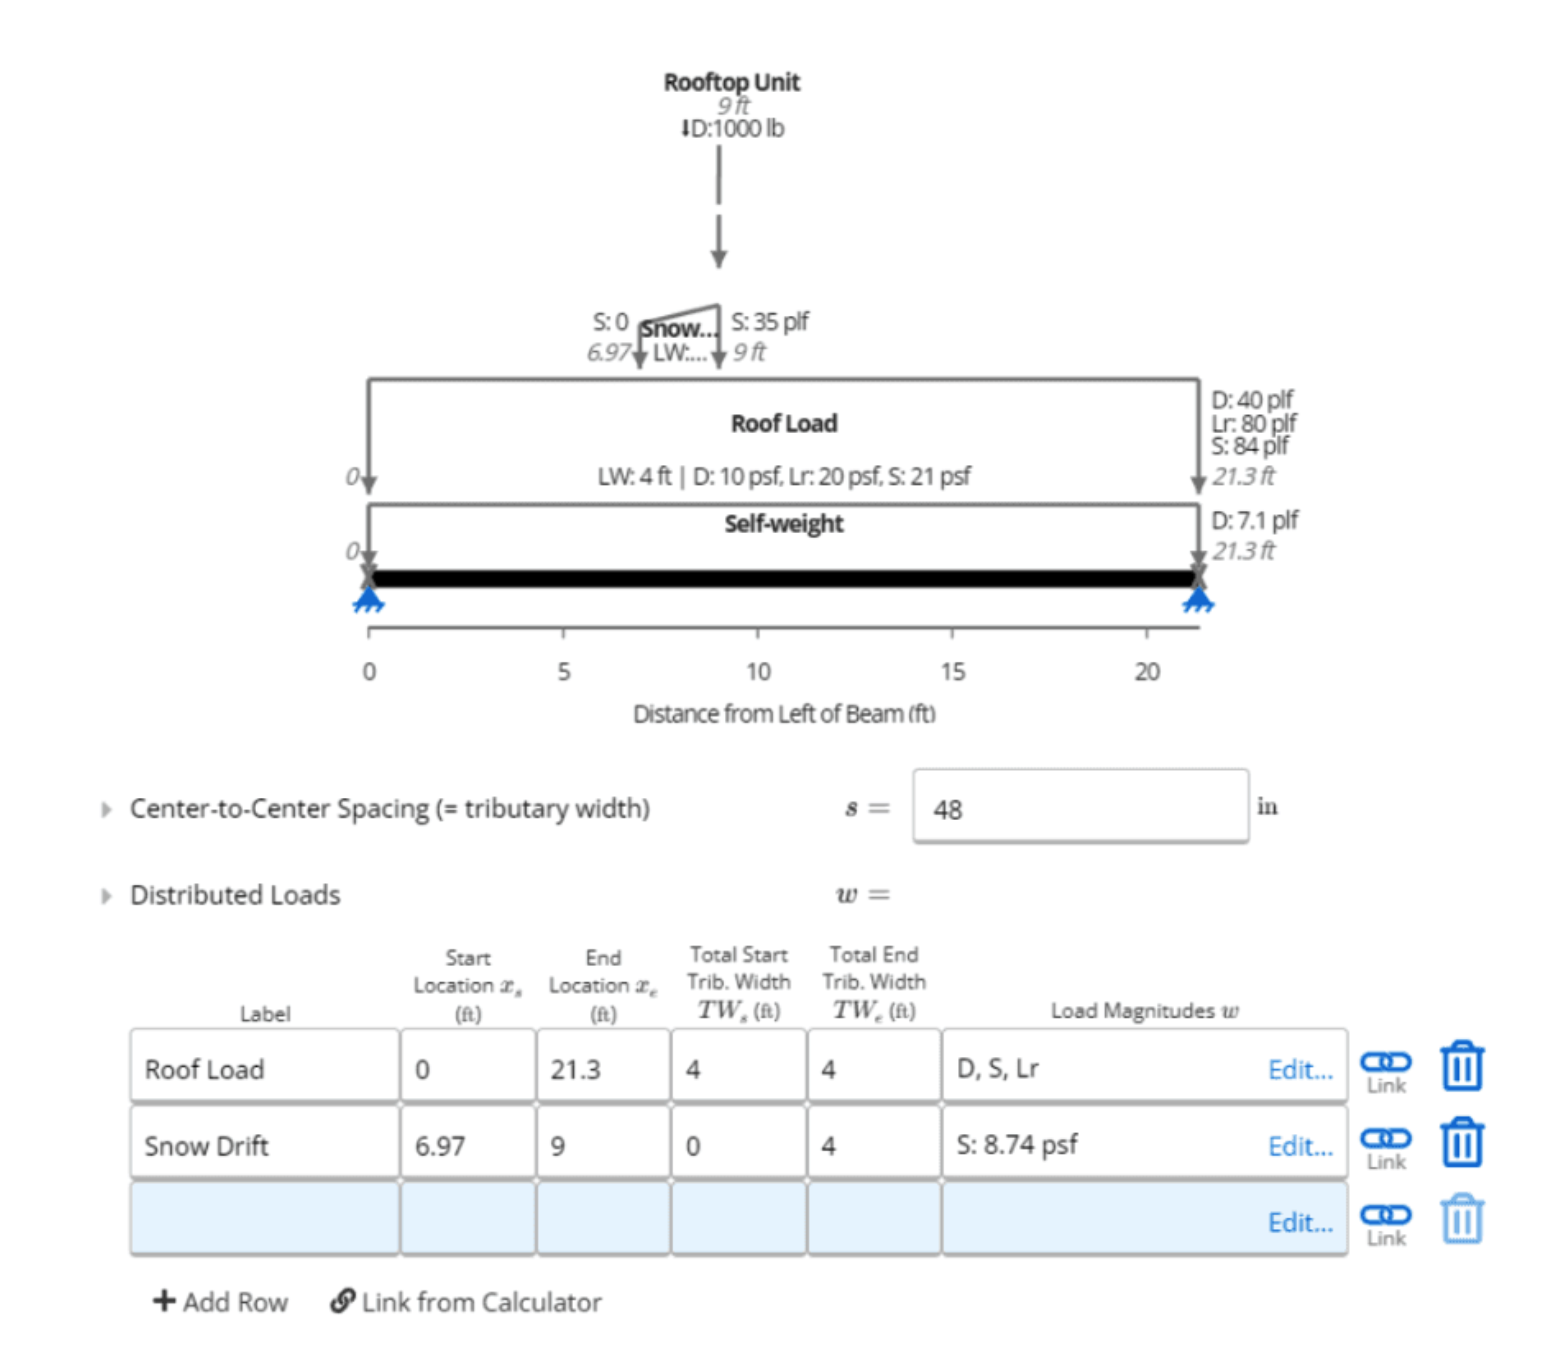
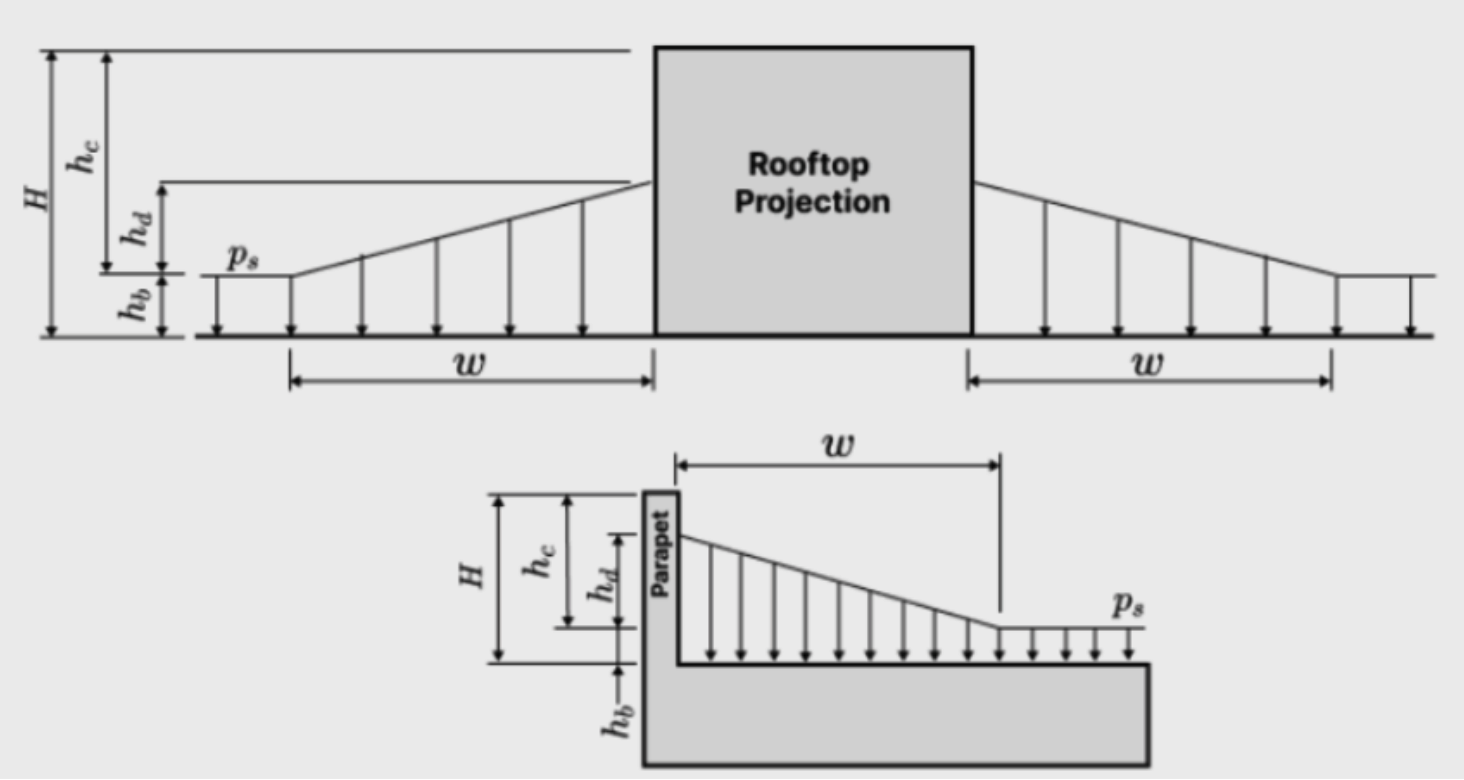 Switching to the joist calculator, you can input the triangular loading based on the tributary width. Adding to our balanced snow load on the roof, we can set the load from 6.97 ft (9-2.03 ft) to 9 ft. To replicate the triangular load, we can use a starting tributary width of 0 ft and an ending tributary width of 4 ft, equivalent to the joist spacing. Our snow load magnitude will be 8.74 psf, as defined by the snow loads calculator. Our final loading on the roof joist will be as follows: