What Is a Shared Table?
An Organisation Shared Table is a reusable data table that you can reference from a lookup widget in Calcs Builder. It lets you store properties for a family of elements (e.g. bolts, sections, anchors) and then pull those properties into your calculations.
For example, the table below stores bolt properties such as:
- Diameter
- Minimum edge distance
- Nominal hole dimensions
- And more
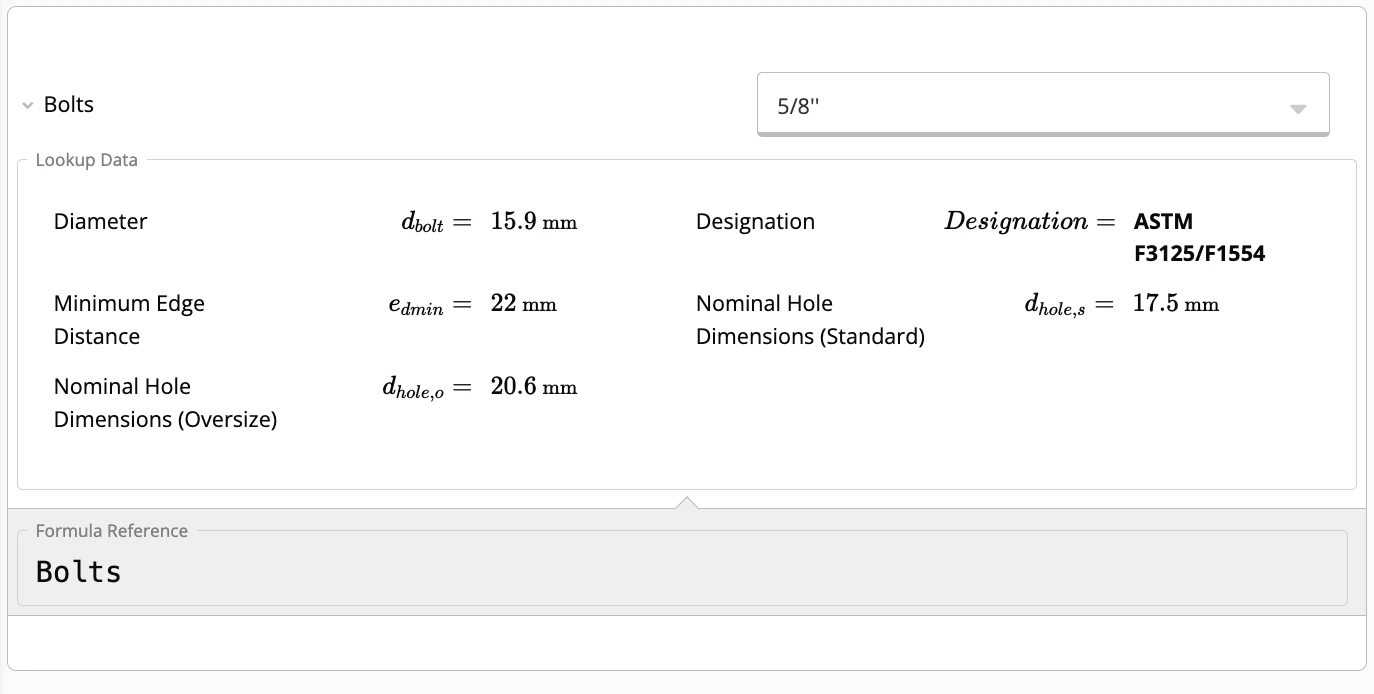 Once created, you can upload the Excel file as an Organisation Shared Table and use it across multiple templates.
Step 1 – Build the Shared Table in Excel
Important: To work correctly in Calcs Builder, your Excel file must follow a specific structure.
| label |
|---|
| symbol |
| units |
| referenceID |
| reference |
1.2 What Each Row Means
-
label
User-friendly name shown in the table, e.g. Diameter, Nominal Dimension, Minimum Edge Distance.
-
symbol
Symbol shown in the preview (LaTeX format).
- Example: for bolt diameter you might use
d_{bolt}.
-
units
Unit for that property (e.g. mm, kN, MPa). Can be left blank if not applicable.
-
referenceID
Internal variable name used in equations and in the L() function.
- Usually similar to the symbol but without LaTeX formatting.
- Example: symbol
d_{bolt} → referenceID d_bolt.
-
reference (optional)
Source of the data for that property.
- Example:
AISC 360-22, CSA, or a specific handbook.
For more on symbols and reference IDs, see the Calcs Builder Quick Start Guide.
Here is an example for a bolt shared table:
| label | Nominal Dimension | Diameter | Designation | Minimum Edge Distance | Nominal Hole Dimensions (Standard) | Nominal Hole Dimensions (Oversize) |
|---|
| symbol | d_dim | d_bolt | designation | e_dmin | d_hole_s | d_hole_o |
| units | | mm | | mm | mm | mm |
| referenceID | d_dim | d_bolt | designation | e_dmin | d_hole_s | d_hole_o |
| reference | | CSA | | CSA | CSA | CSA |
- Each column is one property.
- Each row defines how that property is displayed and used.
Step 3 – Add Data Rows
Below the header rows, add the actual data:
| label | Nominal Dimension | Diameter | Designation | Minimum Edge Distance | Nominal Hole Dimensions (Standard) | Nominal Hole Dimensions (Oversize) |
|---|
| symbol | d_dim | d_bolt | designation | e_dmin | d_hole_s | d_hole_o |
| units | | mm | | mm | mm | mm |
| referenceID | d_dim | d_bolt | designation | e_dmin | d_hole_s | d_hole_o |
| reference | | CSA | | CSA | CSA | CSA |
| 5/8” | 15.875 | ASTM F3125/F1554 | 22 | 17.4625 | 20.6375 |
| 3/4” | 19.05 | ASTM F3125/F1554 | 25 | 20.6375 | 23.8125 |
| 7/8” | 22.225 | ASTM F3125/F1554 | 28 | 23.8125 | 26.9875 |
| 1” | 25.4 | ASTM F3125/F1554 | 32 | 28.575 | 31.75 |
| 1-1/8” | 28.575 | ASTM F3125/F1554 | 38 | 31.75 | 36.5125 |
| M16 | 16 | ASTM F3125/F1554 | 22 | 18 | 20 |
| M20 | 20 | ASTM F3125/F1554 | 26 | 22 | 24 |
| M22 | 22 | ASTM F3125/F1554 | 28 | 24 | 28 |
| M24 | 24 | ASTM F3125/F1554 | 30 | 27 | 30 |
| M27 | 27 | ASTM F3125/F1554 | 34 | 30 | 35 |
The first four rows define the structure. All rows below them are data entries.
steelBoltsCA.xlsx ✅steel bolts CA.xlsx ❌
Step 4 – Upload the Shared Table to Calcs Builder
-
Create or open a lookup widget

-
Select “Organisation Shared Table”
-
Click “Upload a shared table” and choose your Excel file.
-
Confirm it appears in the list

That’s it, your shared table is now available in your calculator.
To use values from your shared table inside equations, call the L() function.
L("lookup_reference_id", "property_reference_id")
5.2 Example
If your lookup has:
- Lookup referenceId:
Bolts
- Property referenceID:
d_dim
Use:
This returns the Nominal Dimension for the selected bolt.
Download Example File
If you want to test everything above, you can download the example file here:
👉 steelBoltsCA.xlsx (Google Sheets Link)
You can download it as .xlsx and upload it into your Organisation Shared Tables to try the workflow yourself.