Background
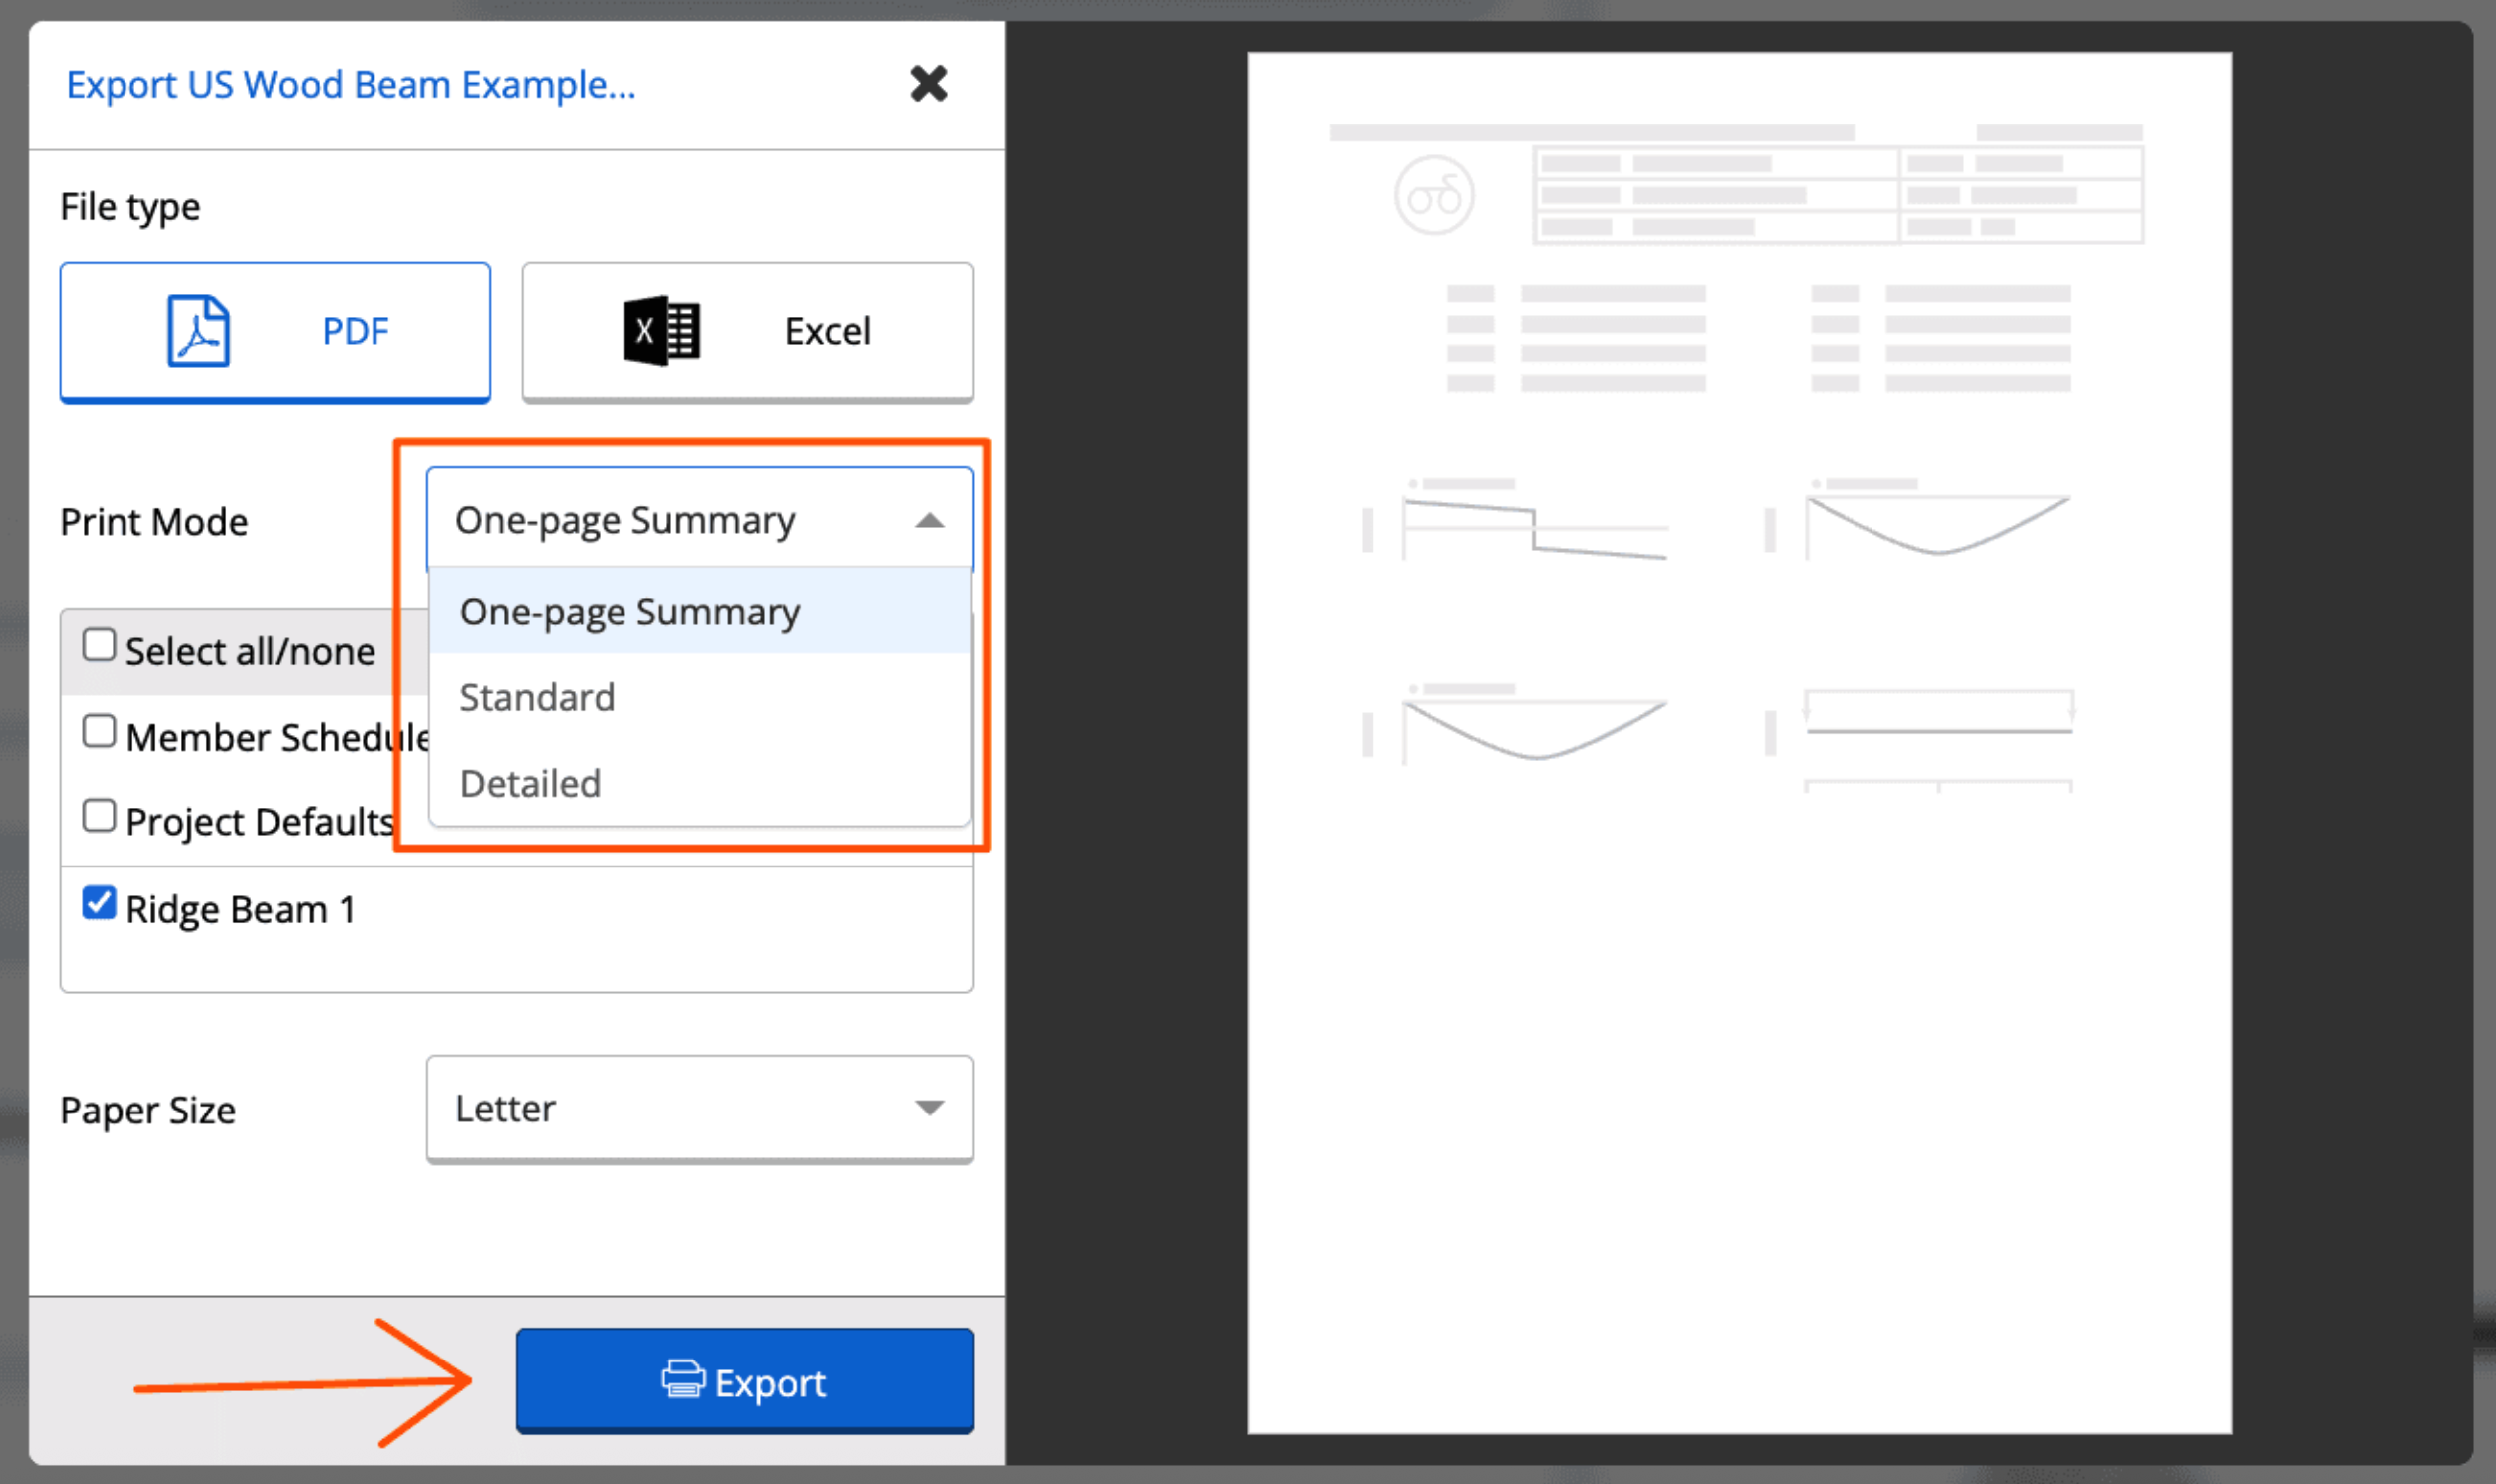
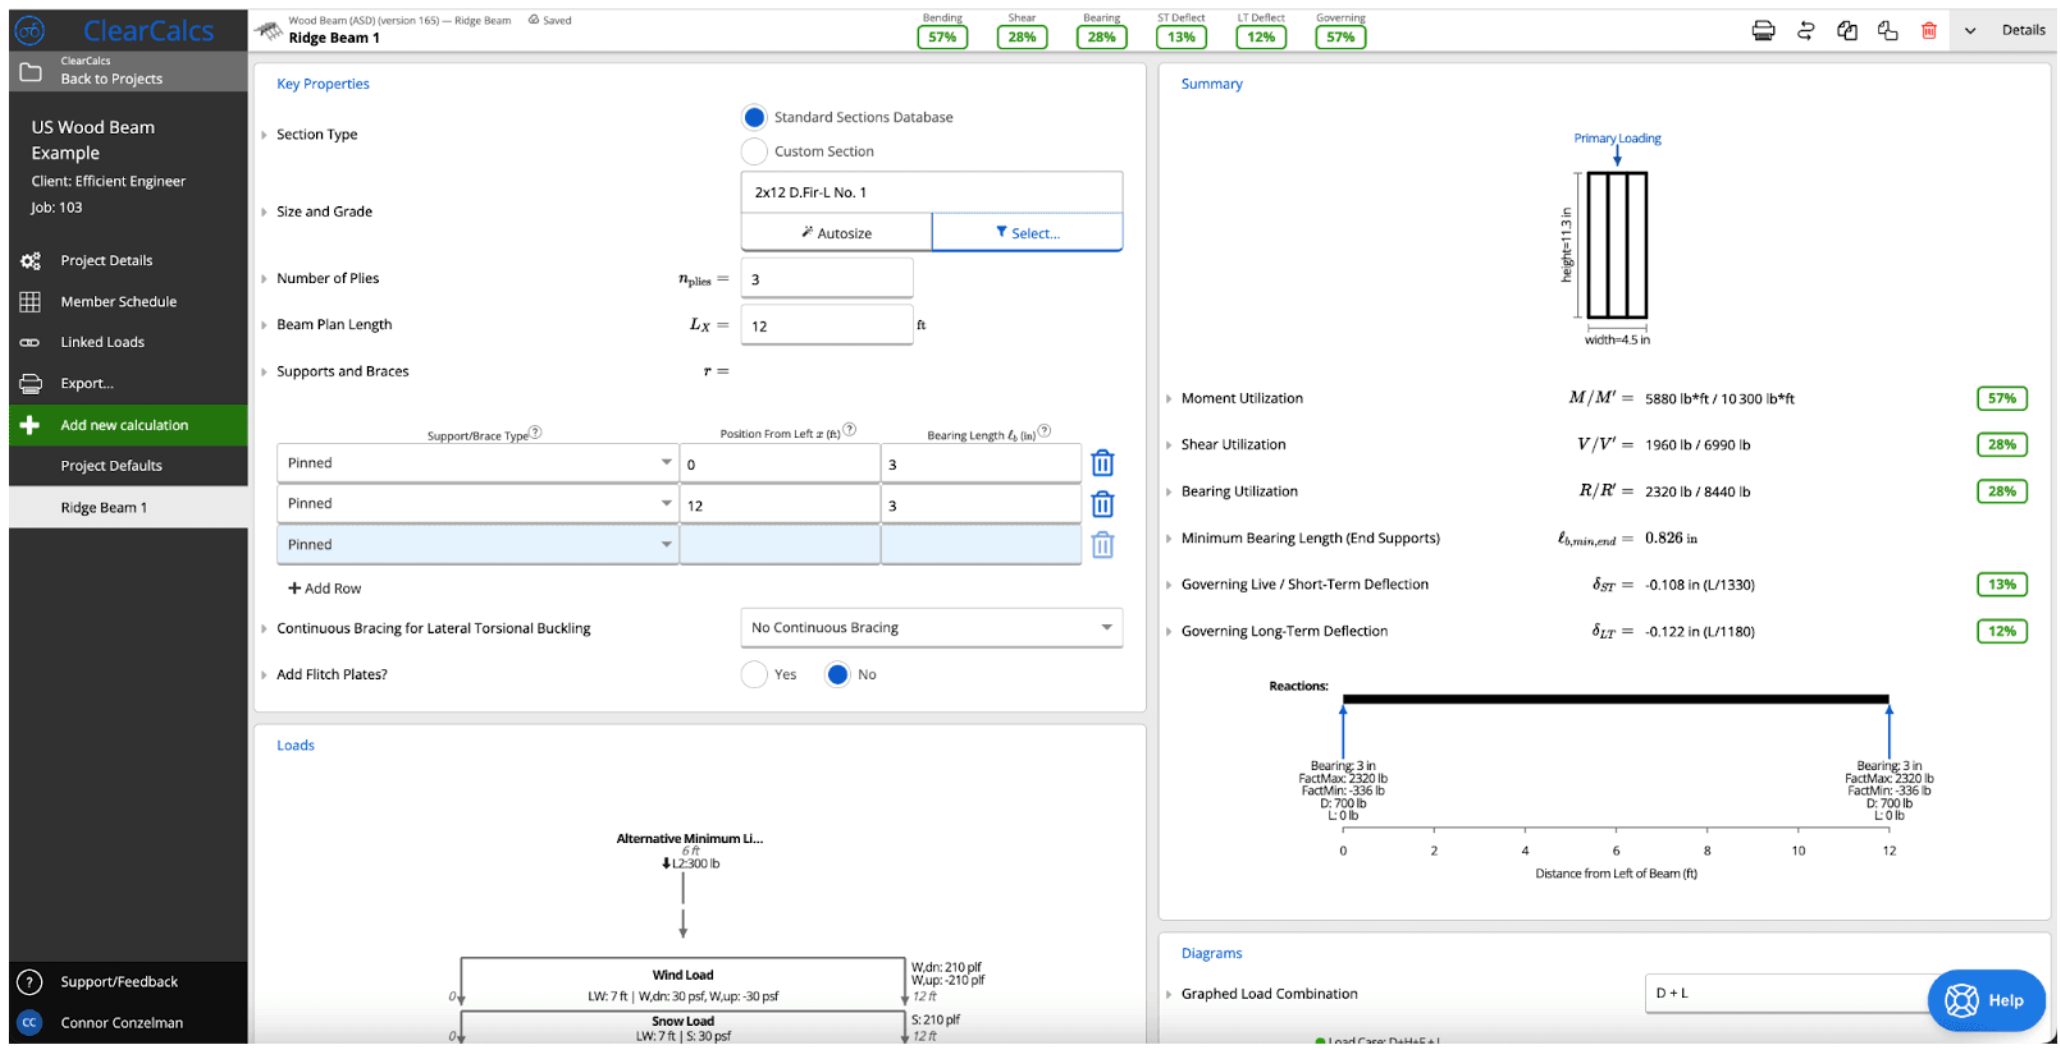
In this worked example, we’ll go through the design process of a multi-span ridge beam. Note that this references our one-page worked example for a US Wood Beam - Ridge Beam. You can download the one-page PDF to follow along. If you’d prefer to follow along with the video tutorial, check out the video below.Given Information
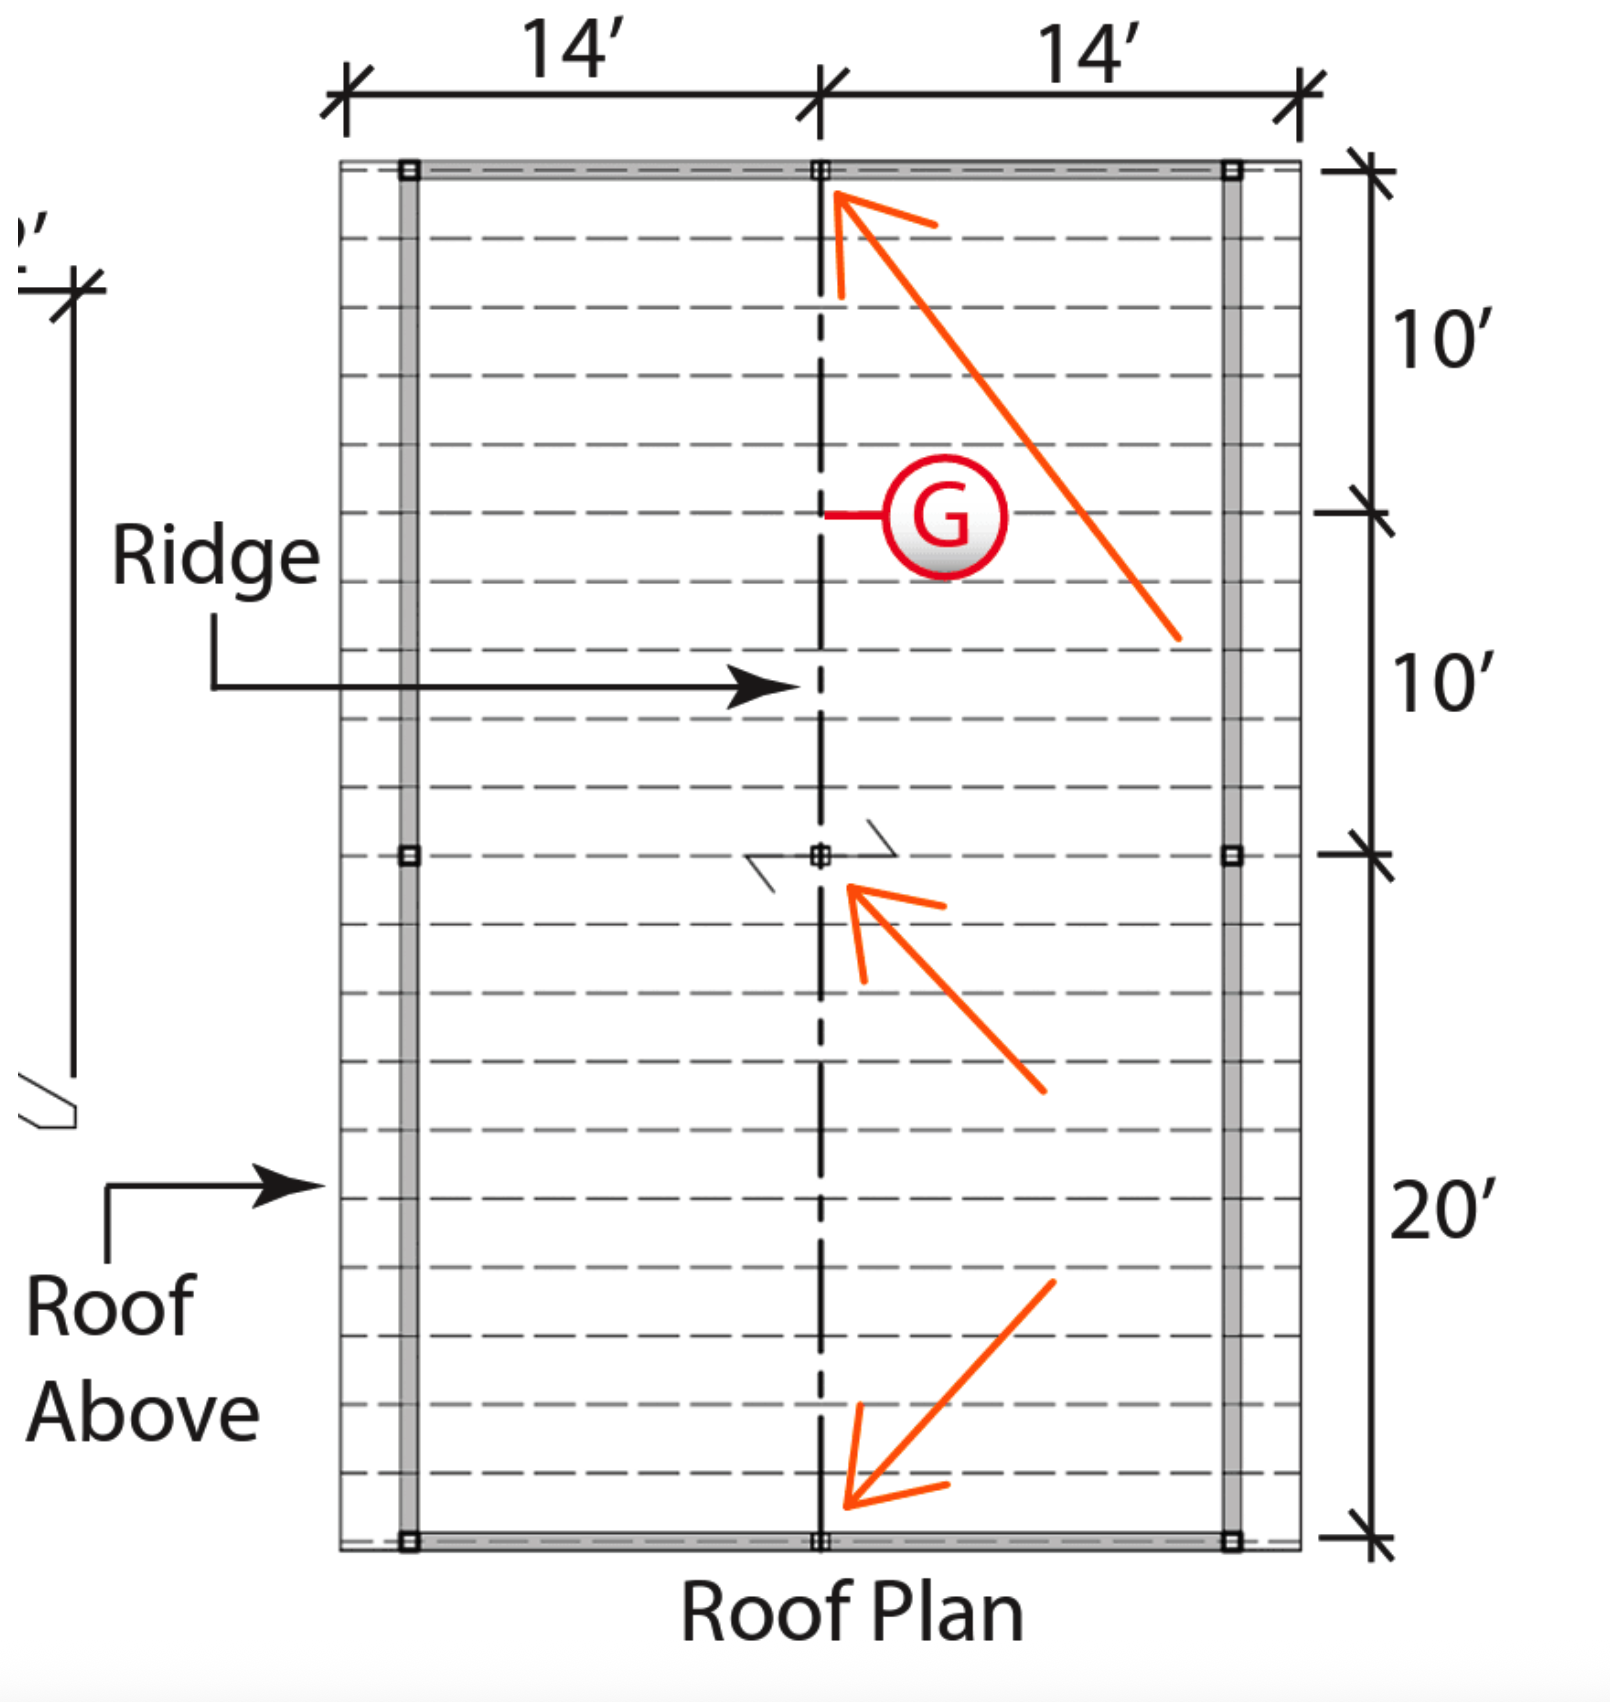
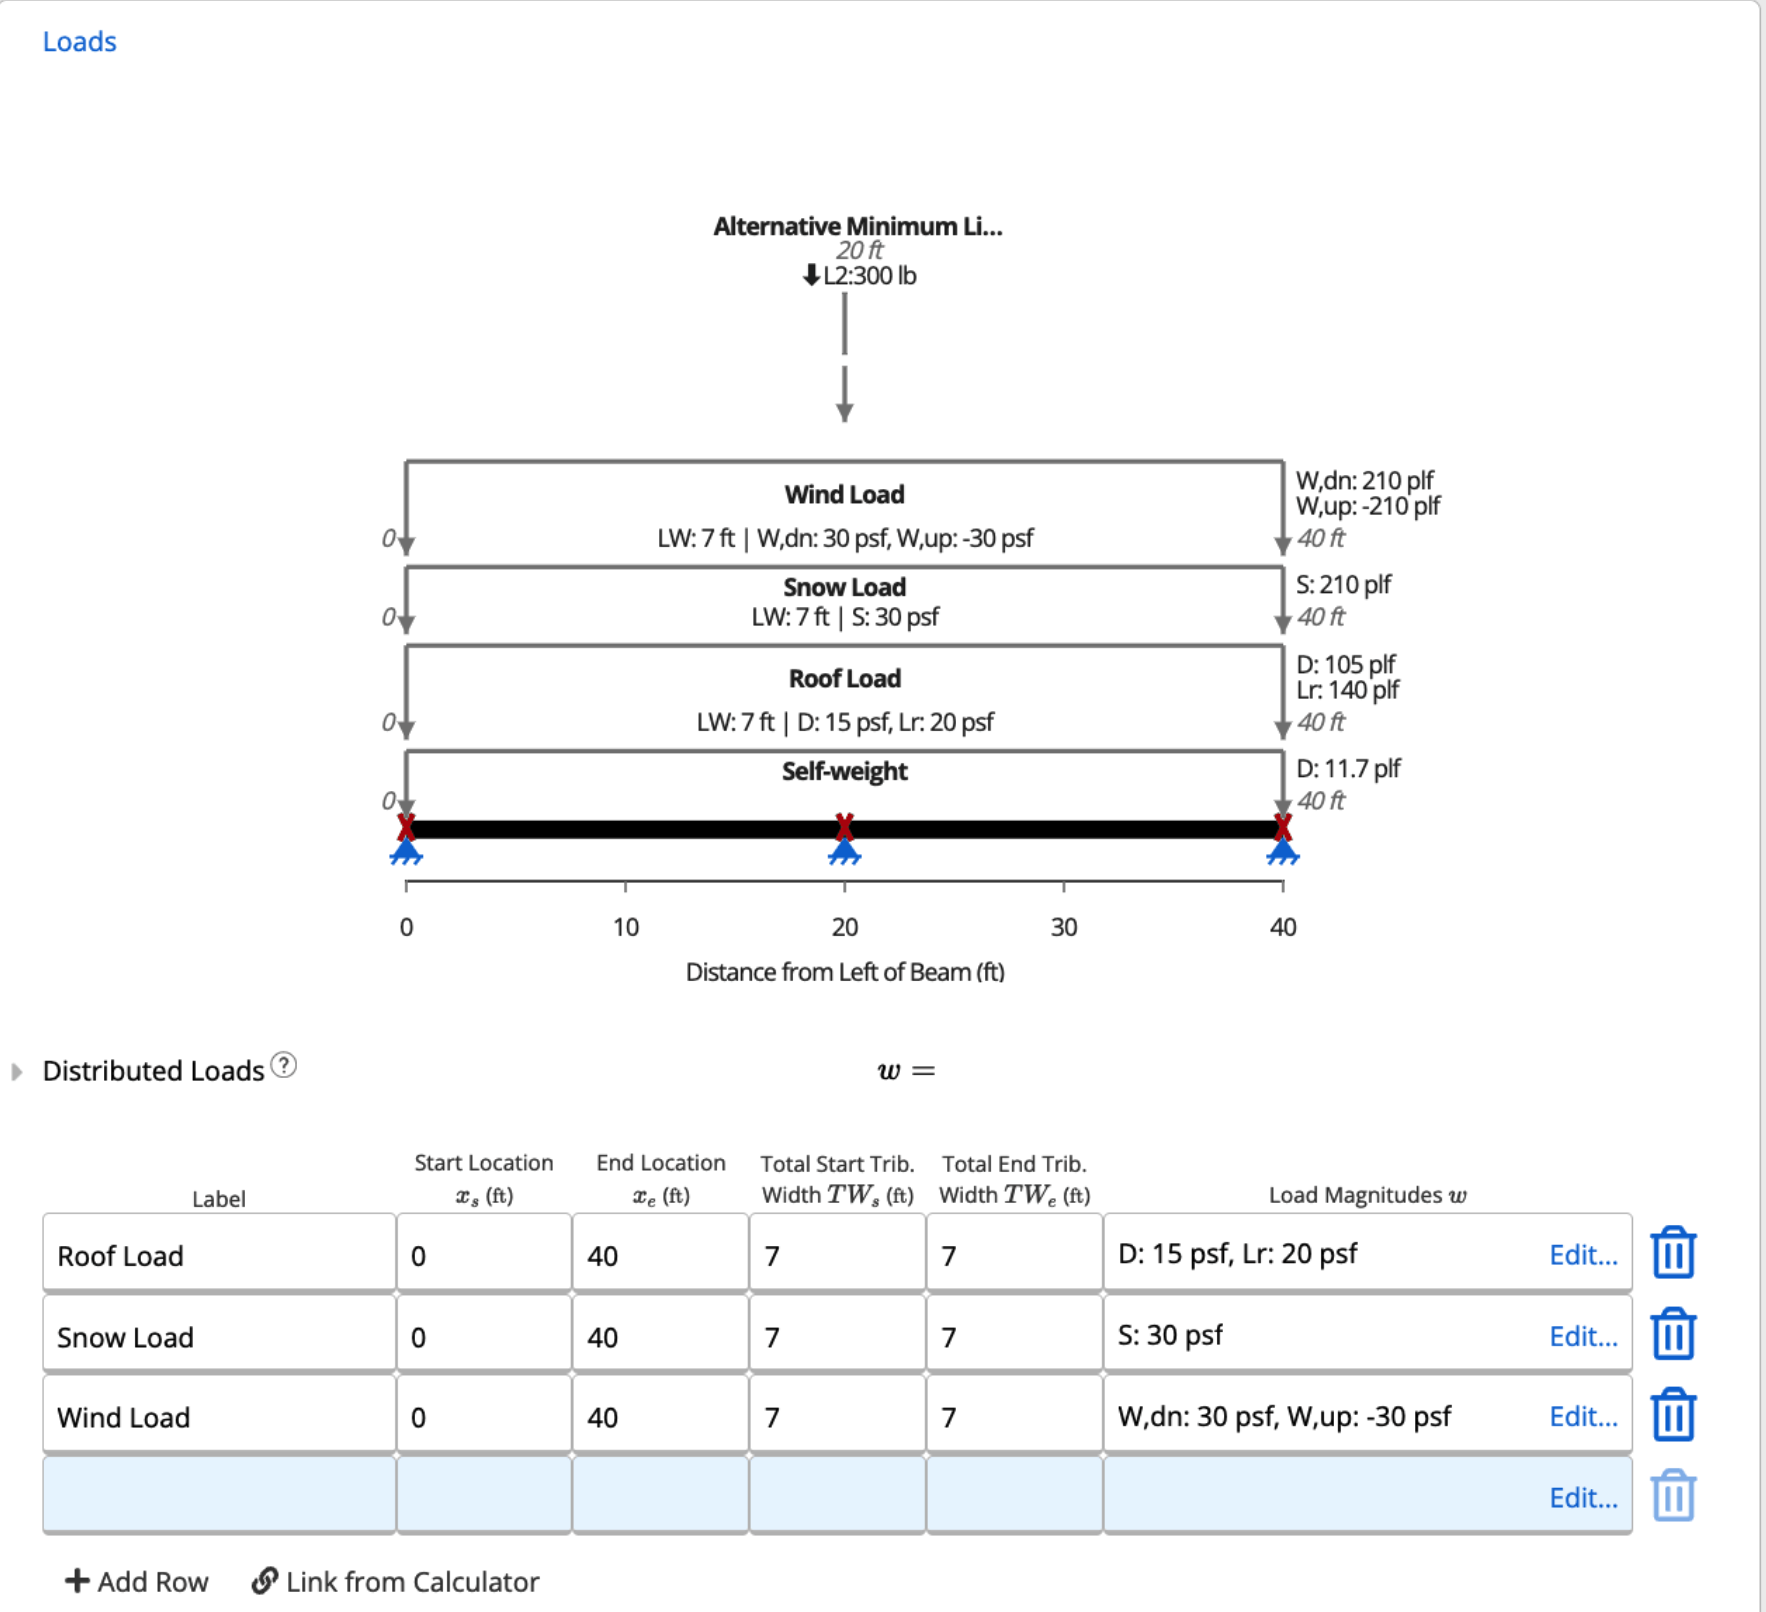
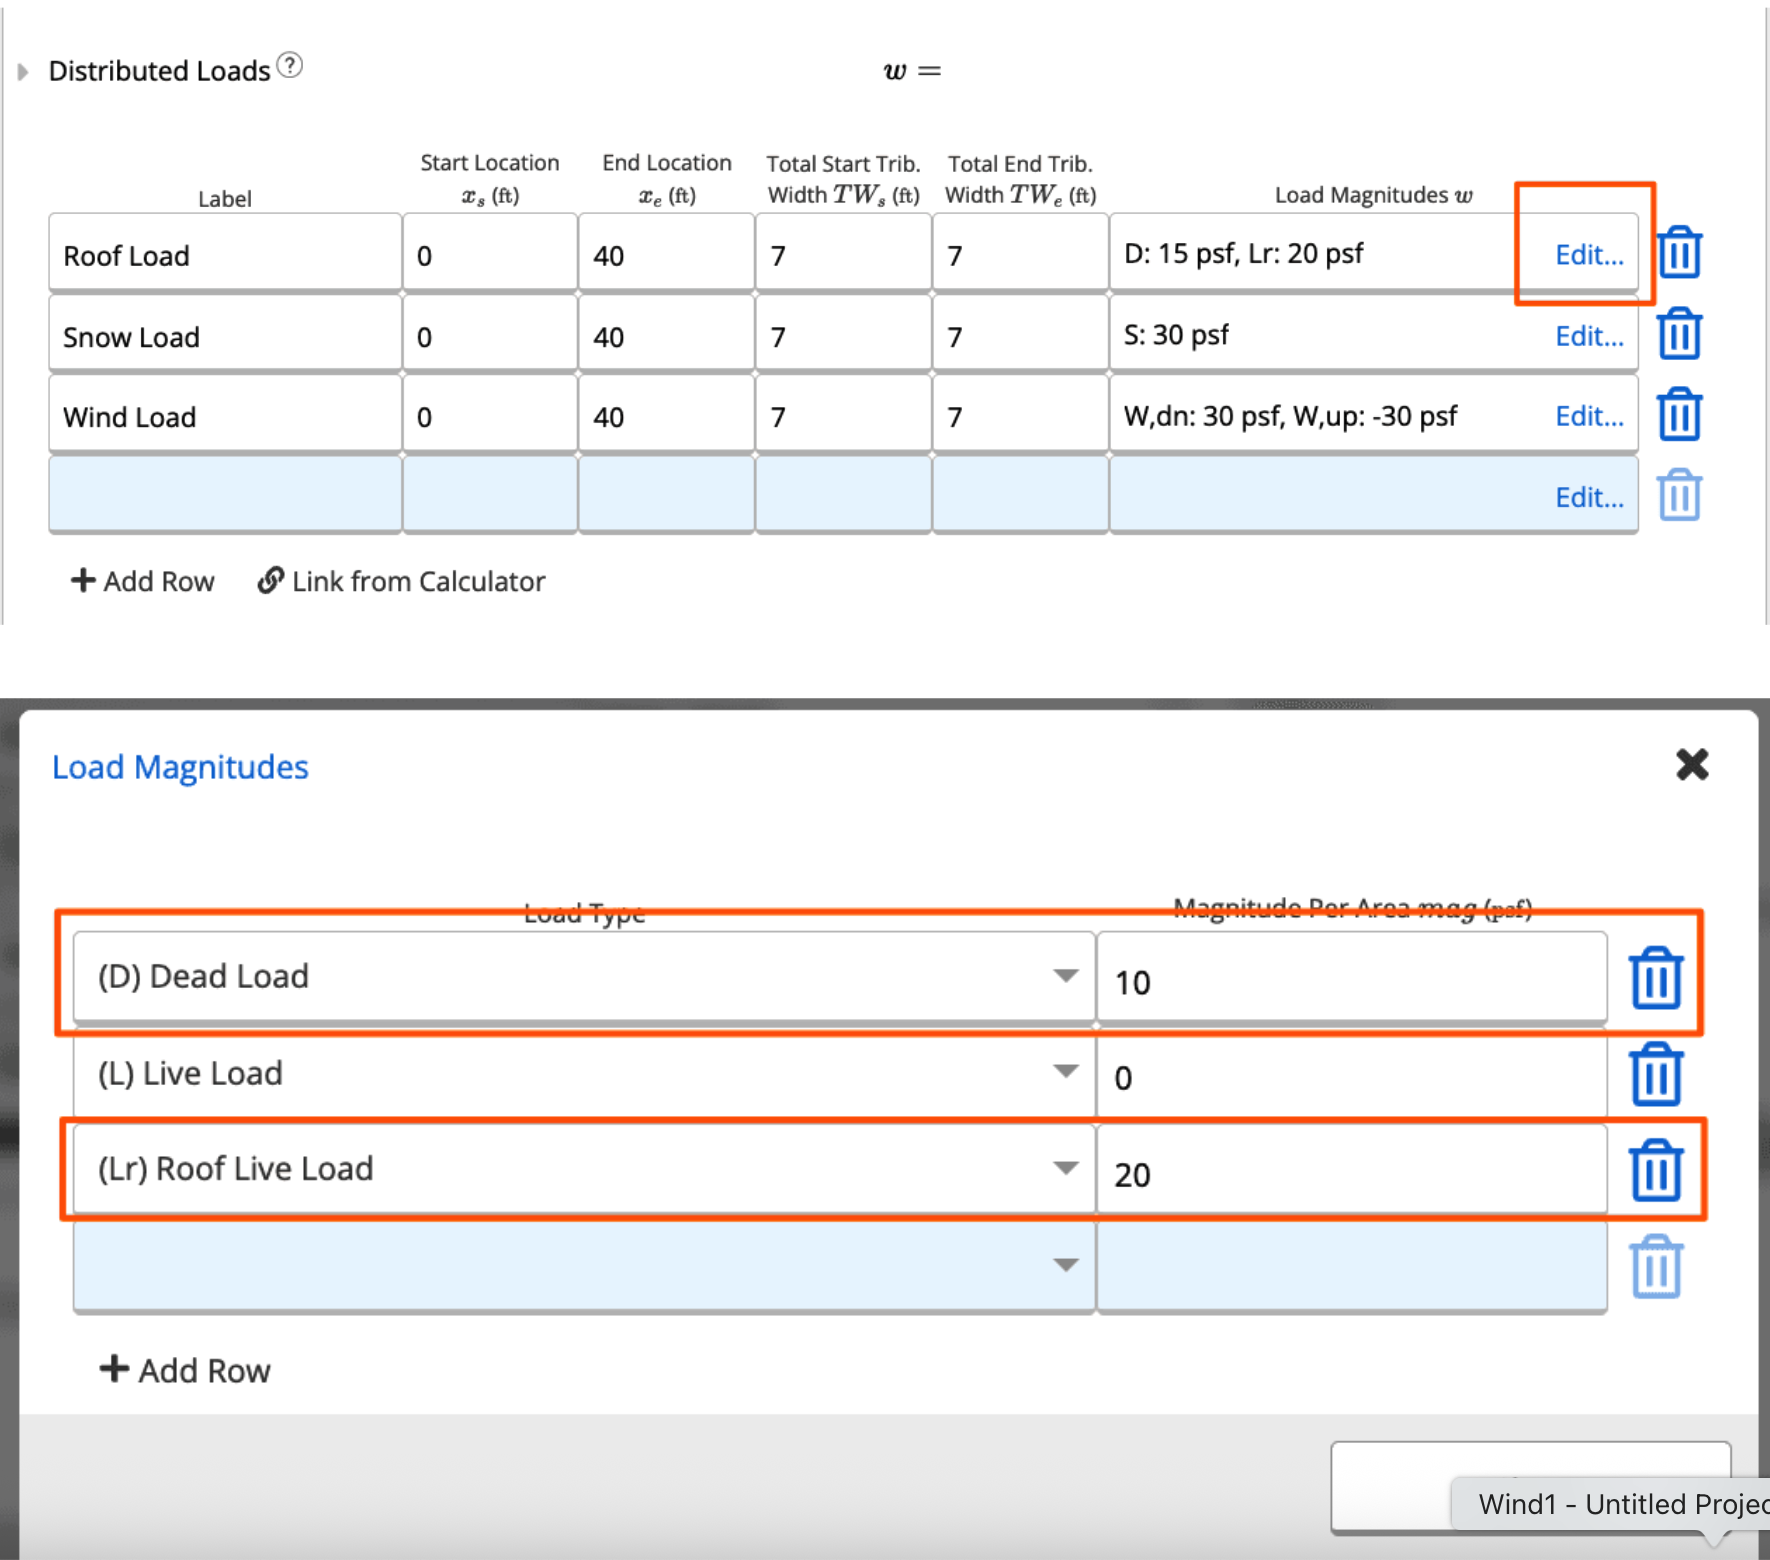
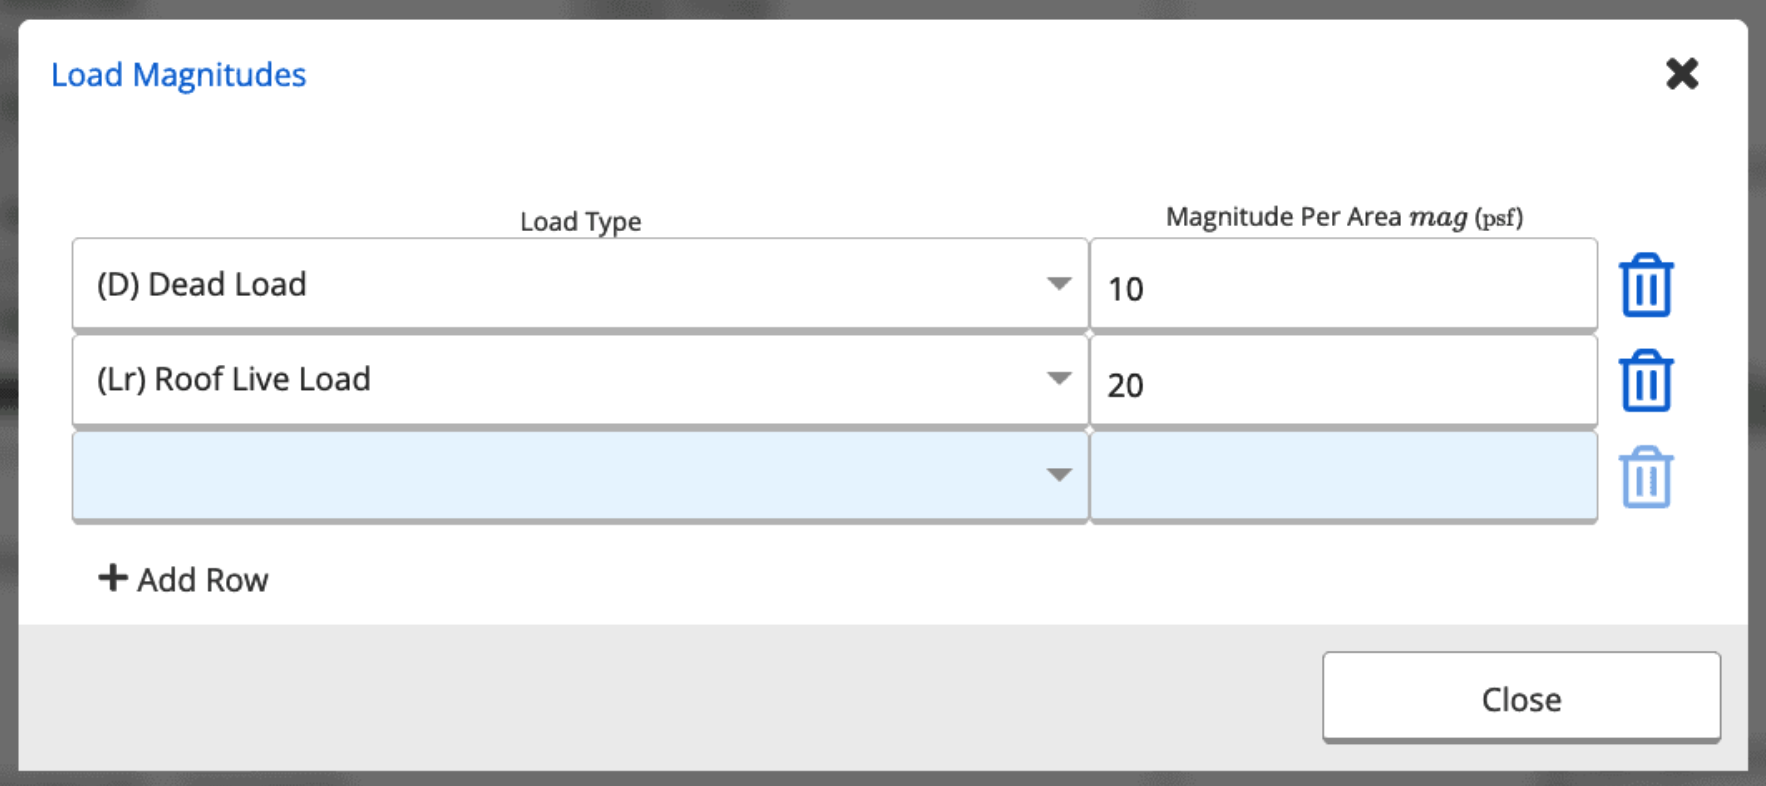
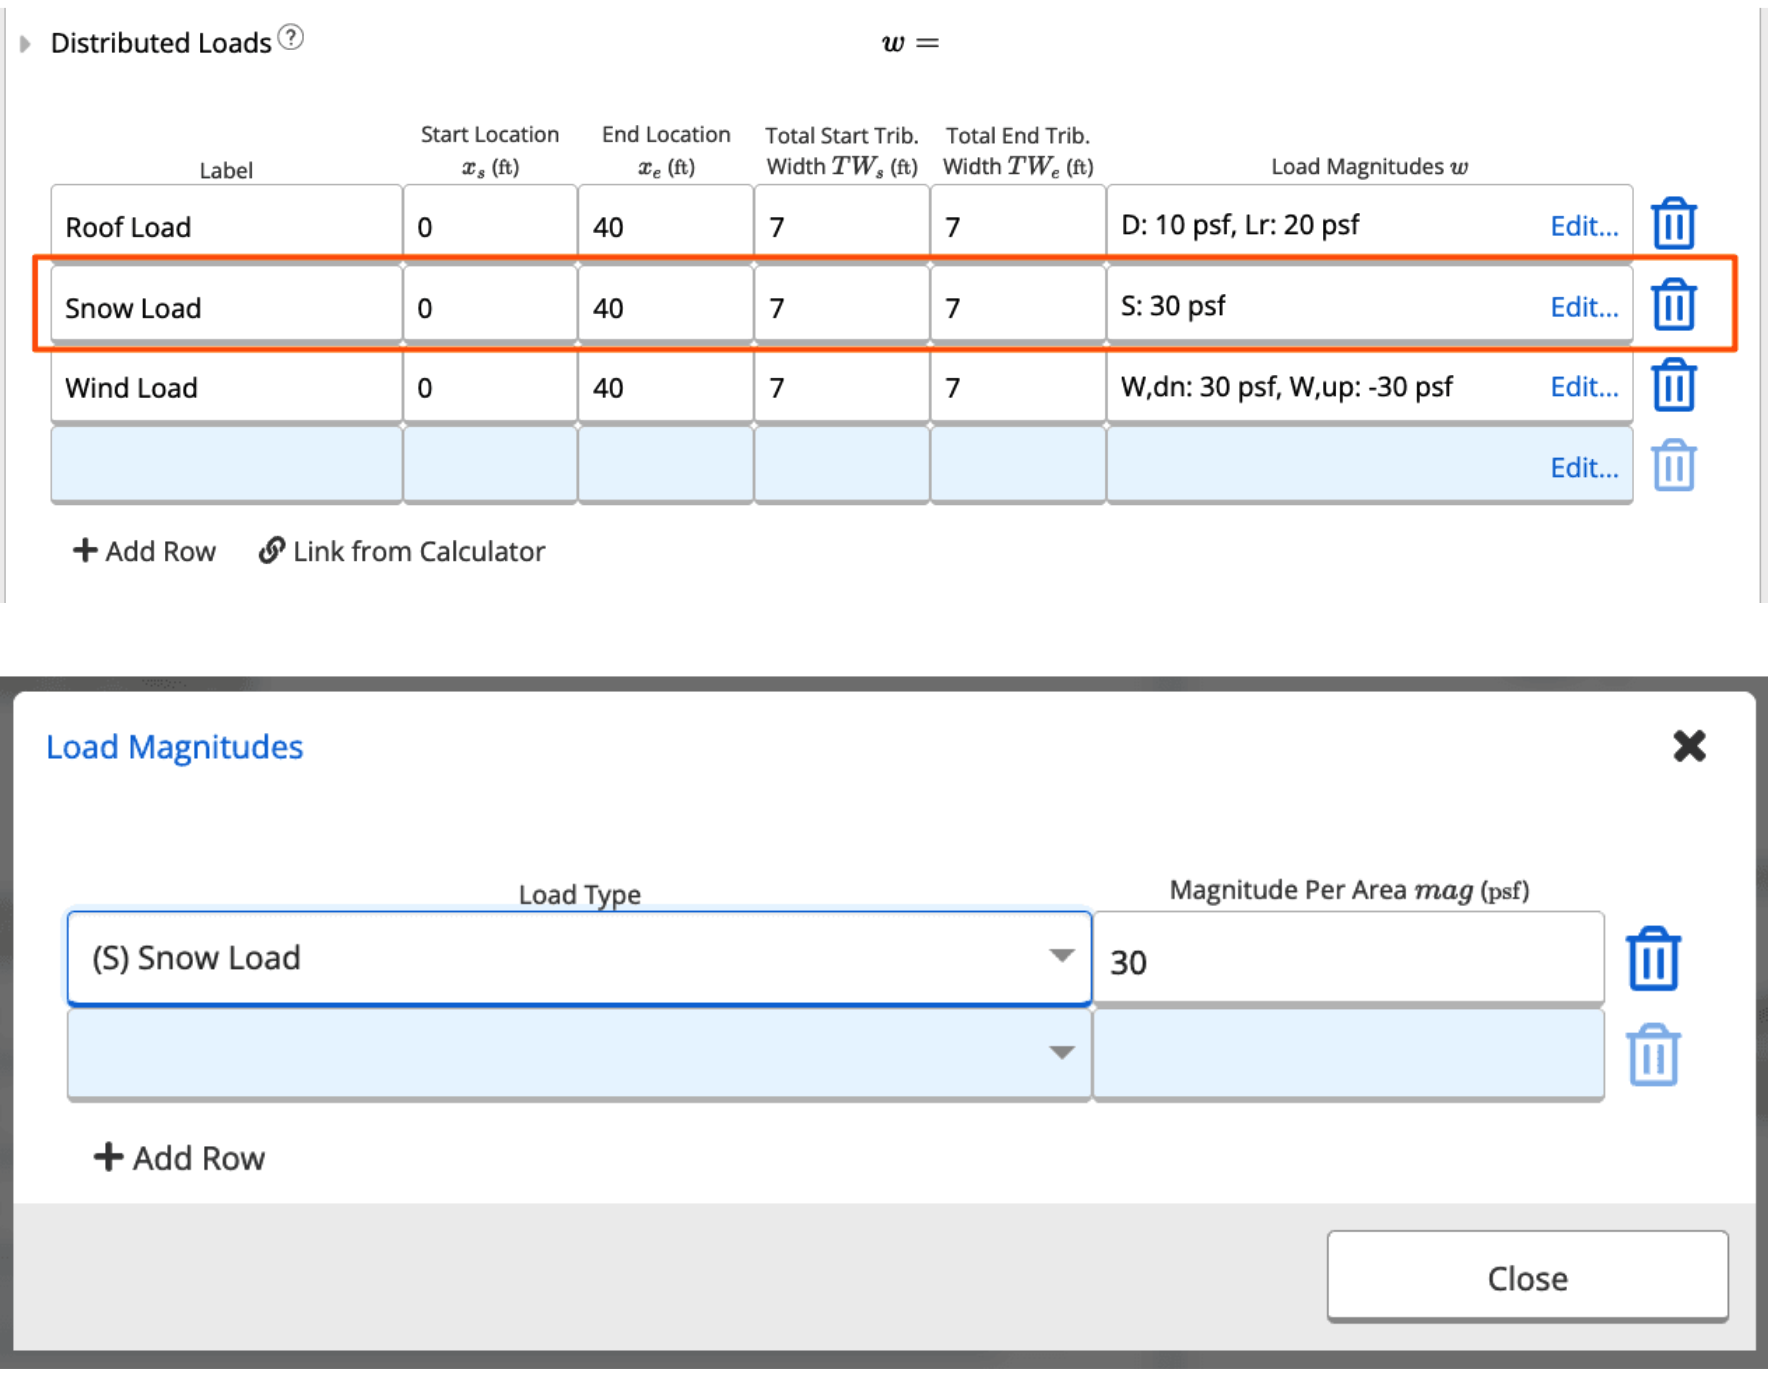
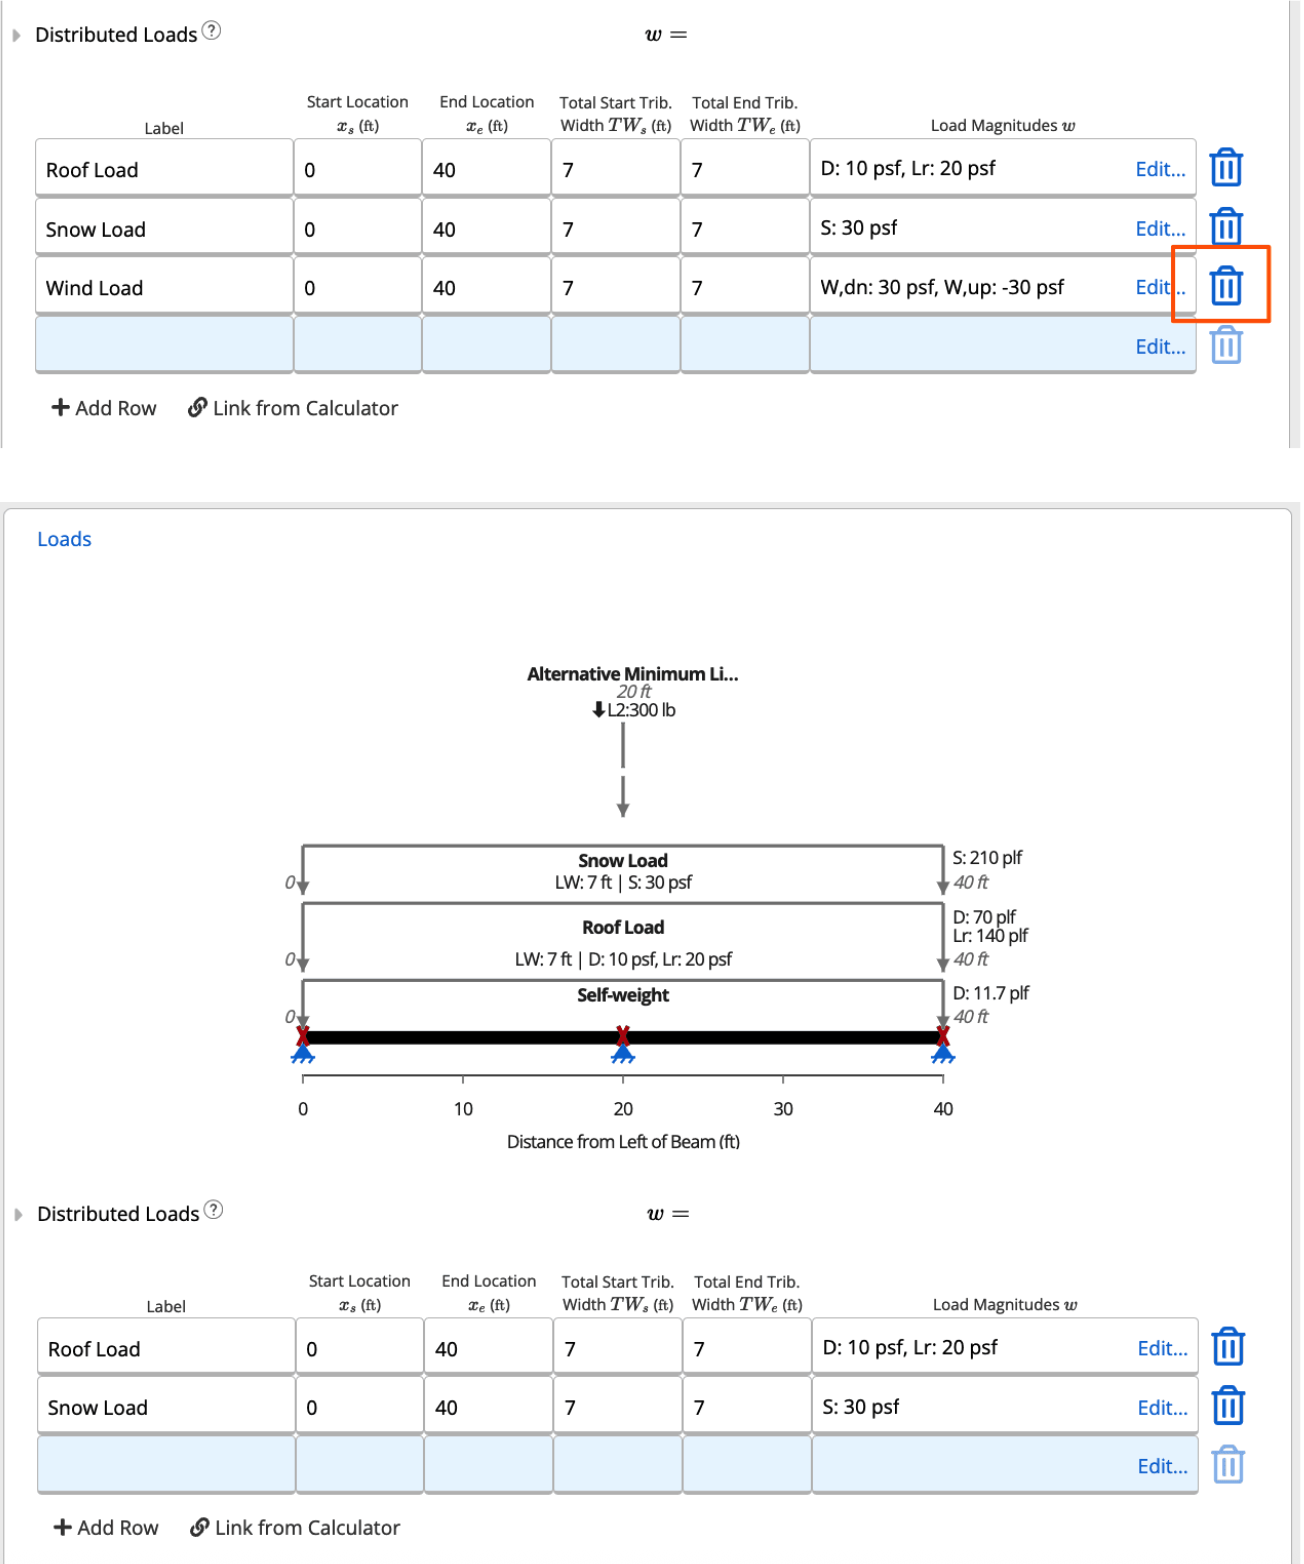
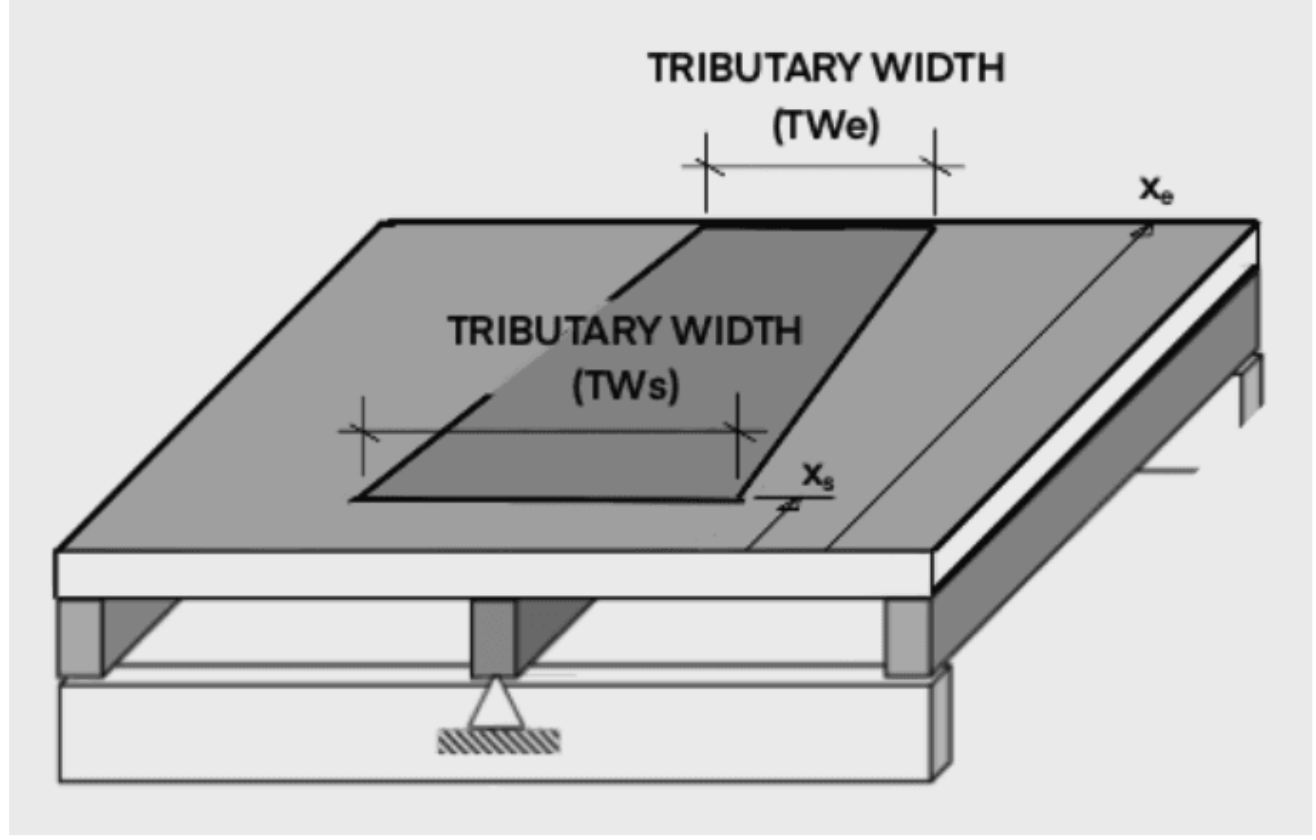
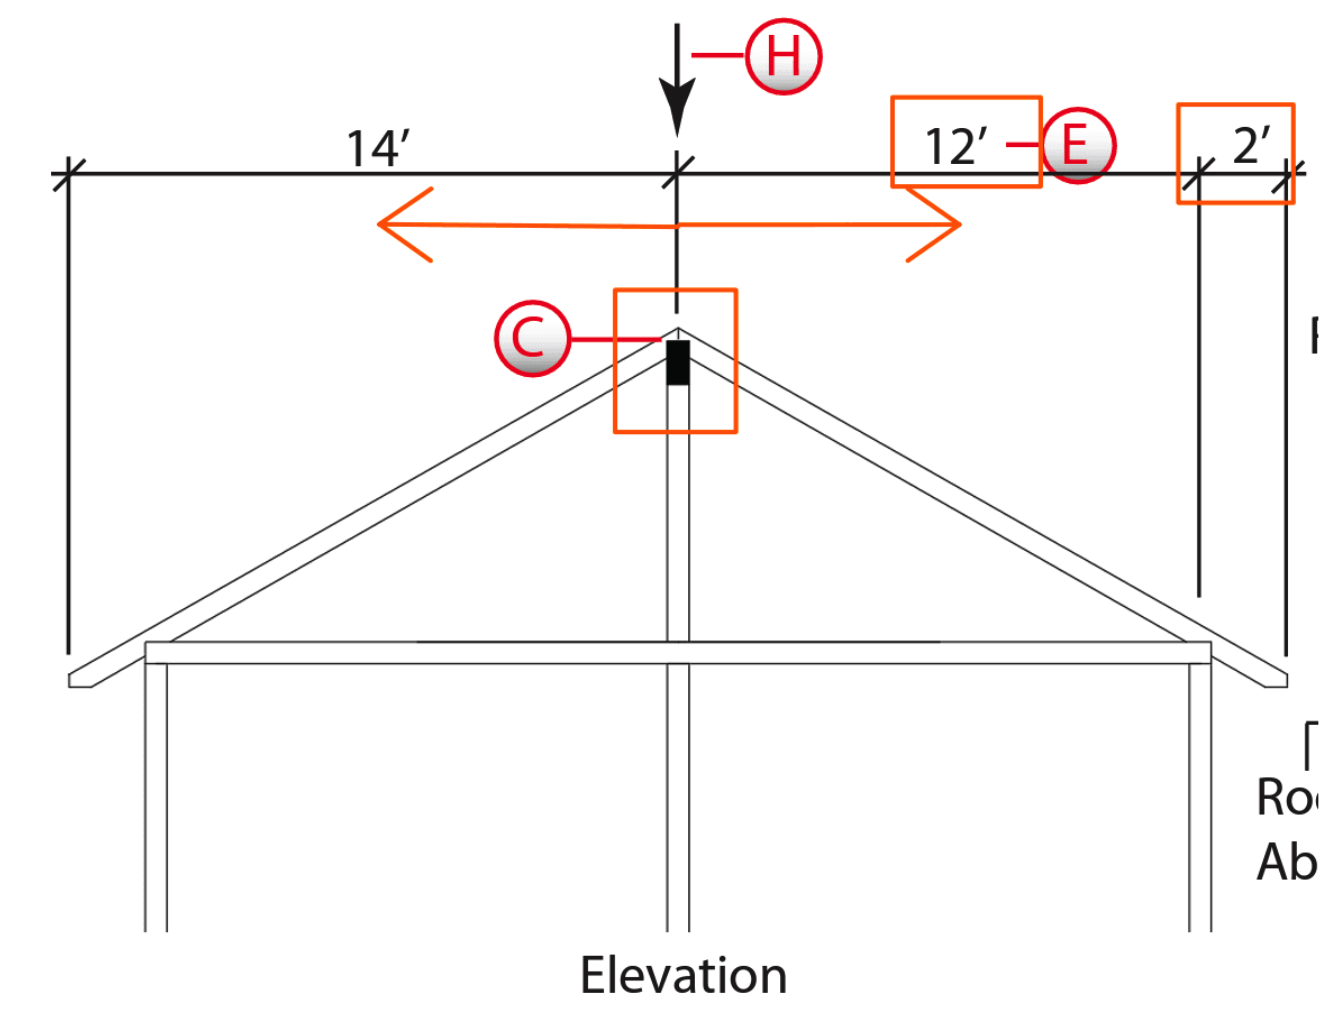
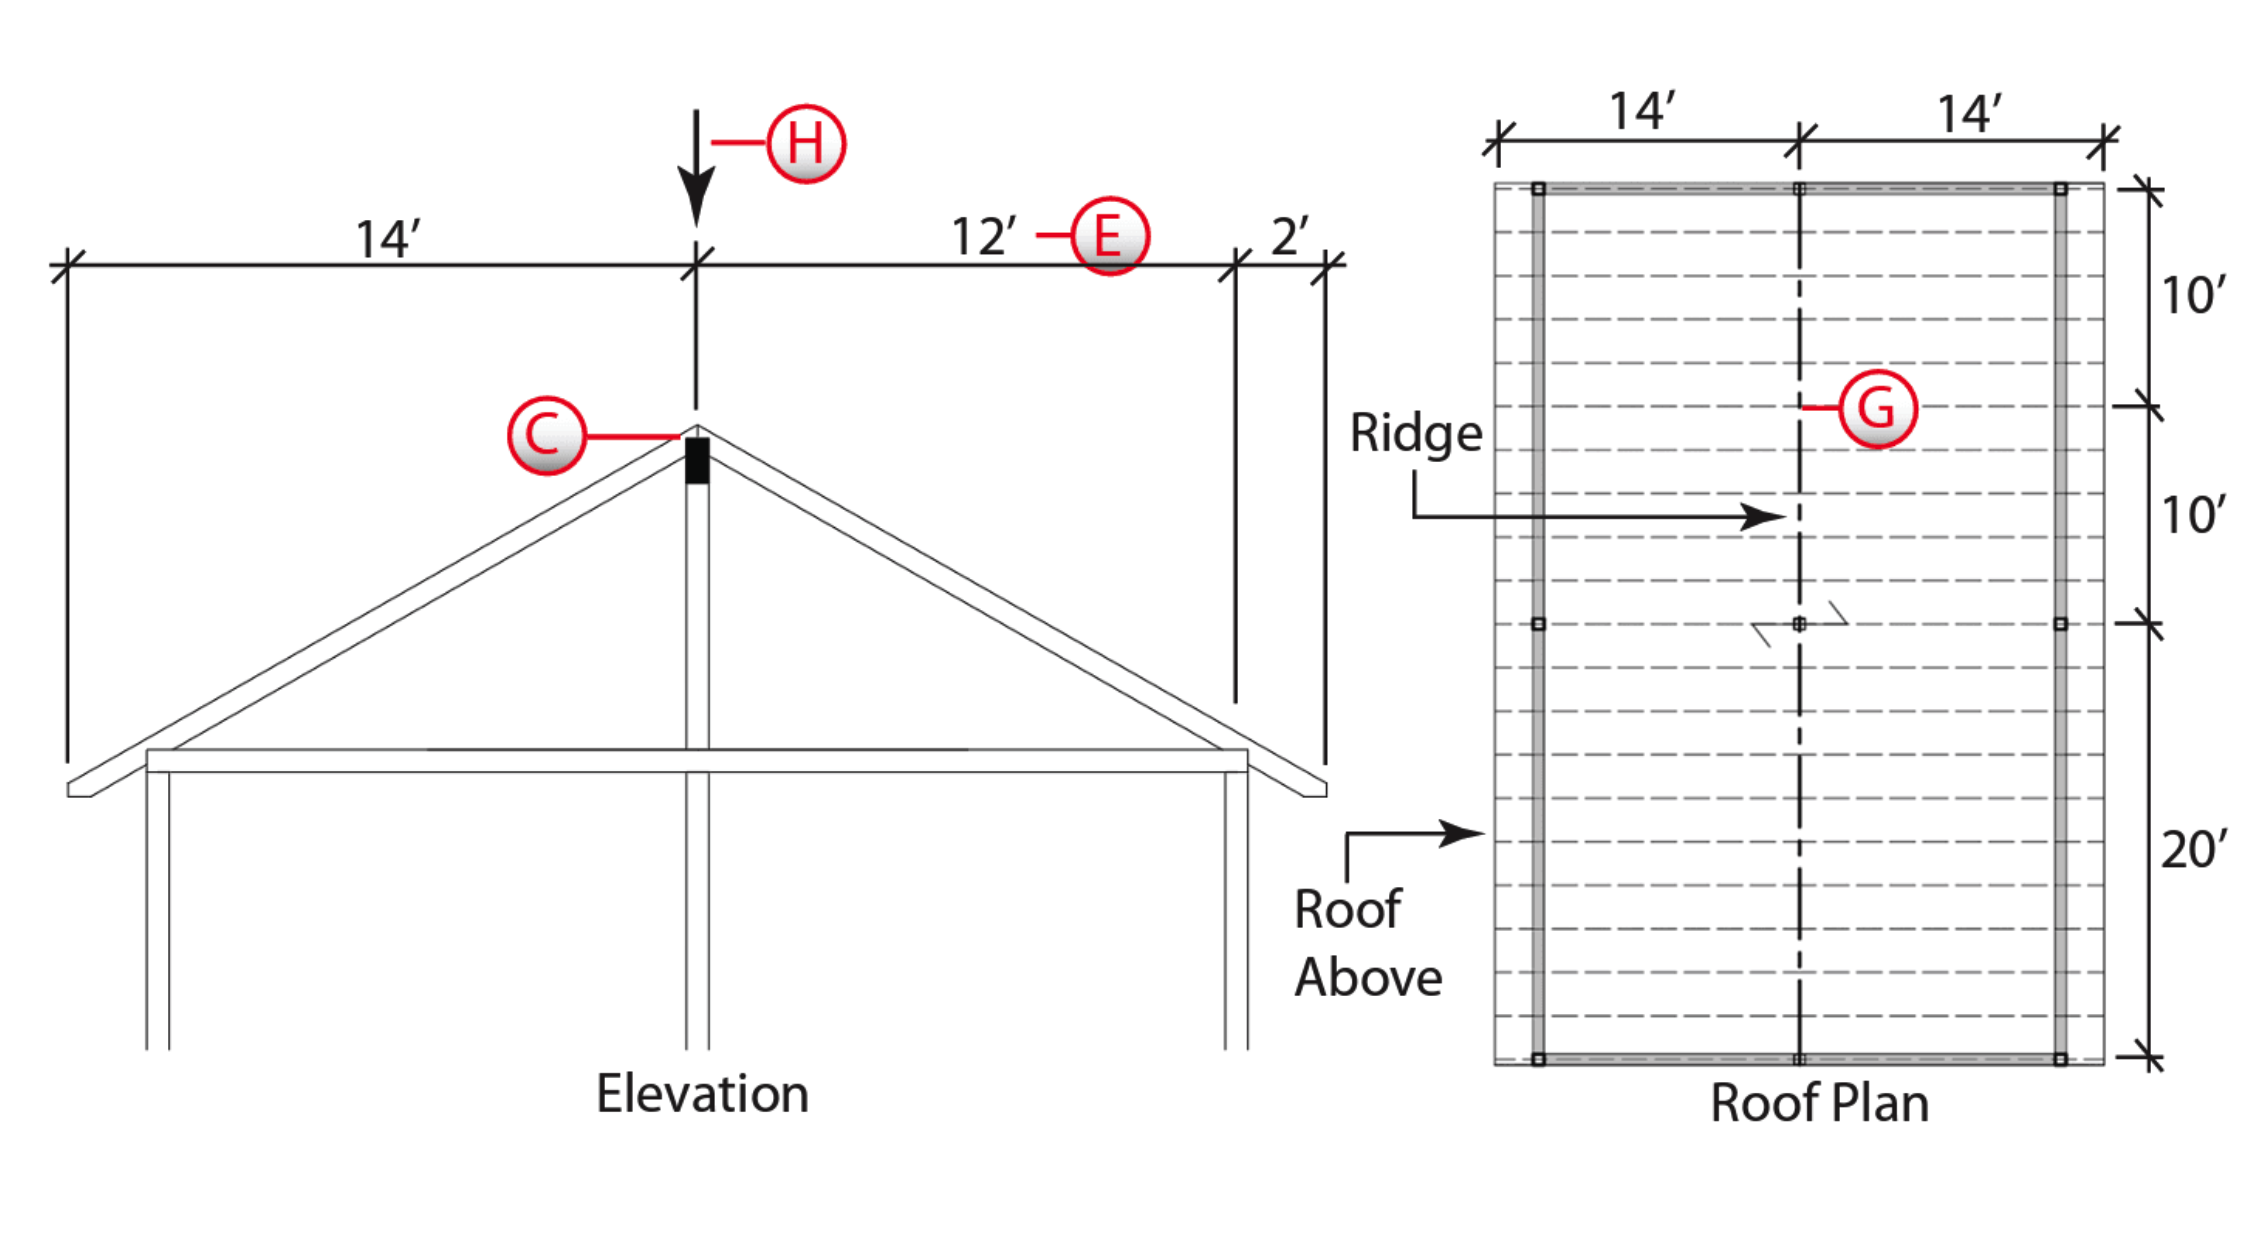
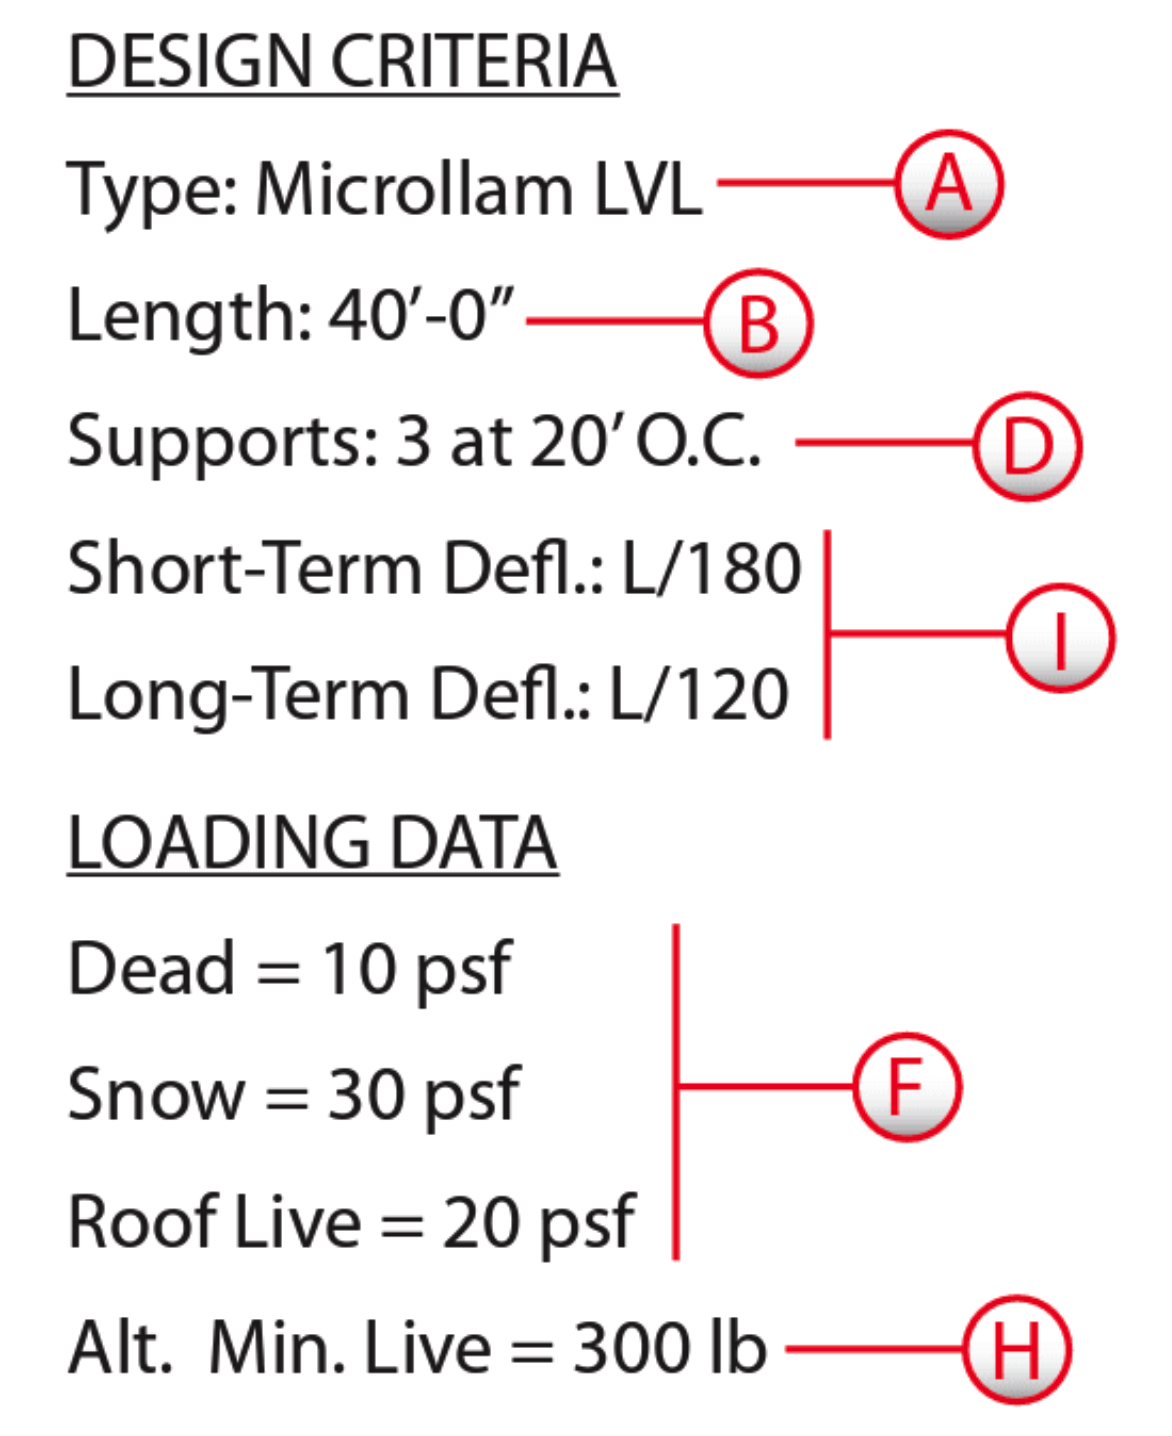
You’ll see screenshots of a simple CAD Elevation and Roof Plan below. By the time you’re coming into ClearCalcs to design your ridge beam, you’ll likely have these plans drawn up (or at least the preliminary plans done) to know the geometry of your roof. You’ll also see your “Design Criteria” (determined by your roof geometry, your client, the code, and/or your business standards of practice) and “Loading Data” (determined by the local jurisdiction in which you’re designing this ridge beam). Note that you can disregard the letter callouts (A, B, C, etc.) in red circles as these are specifically relevant in our one-page PDF example.

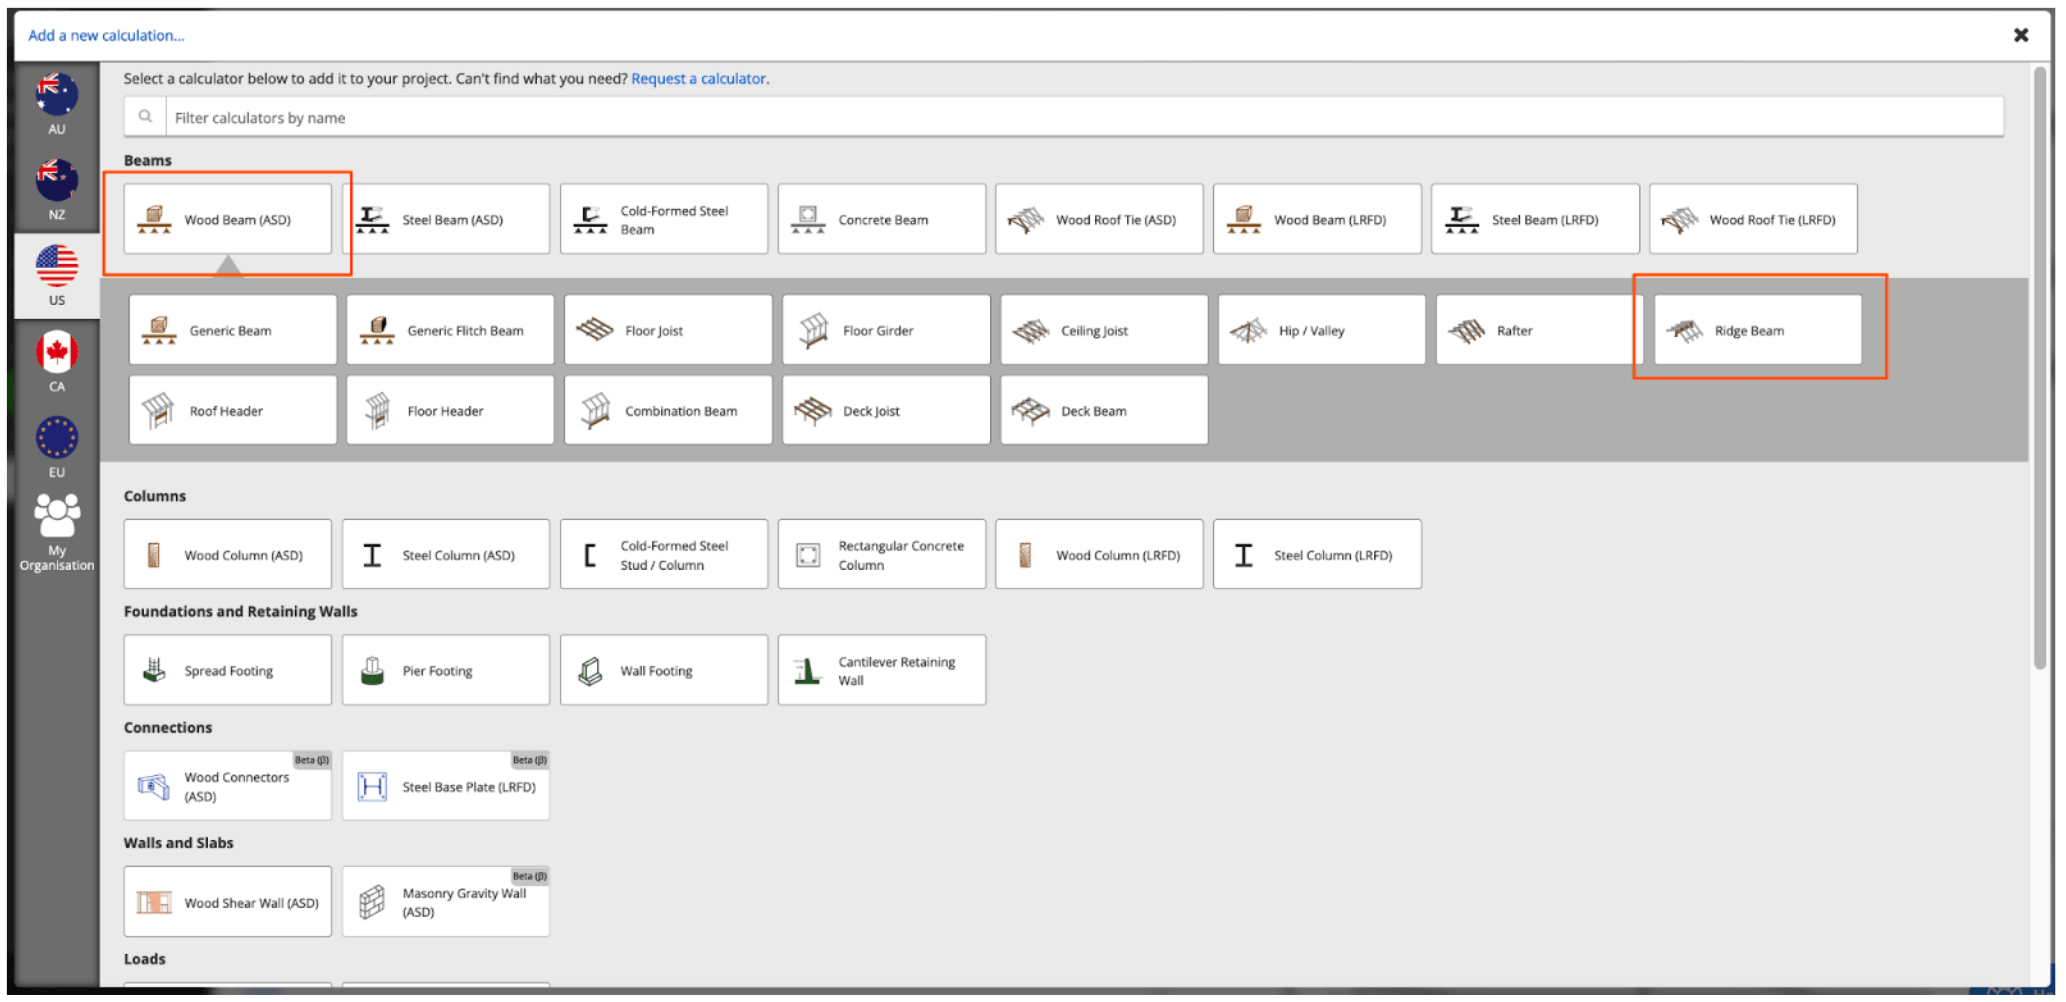
Opening the US Wood Beam - Ridge Beam calculator preset
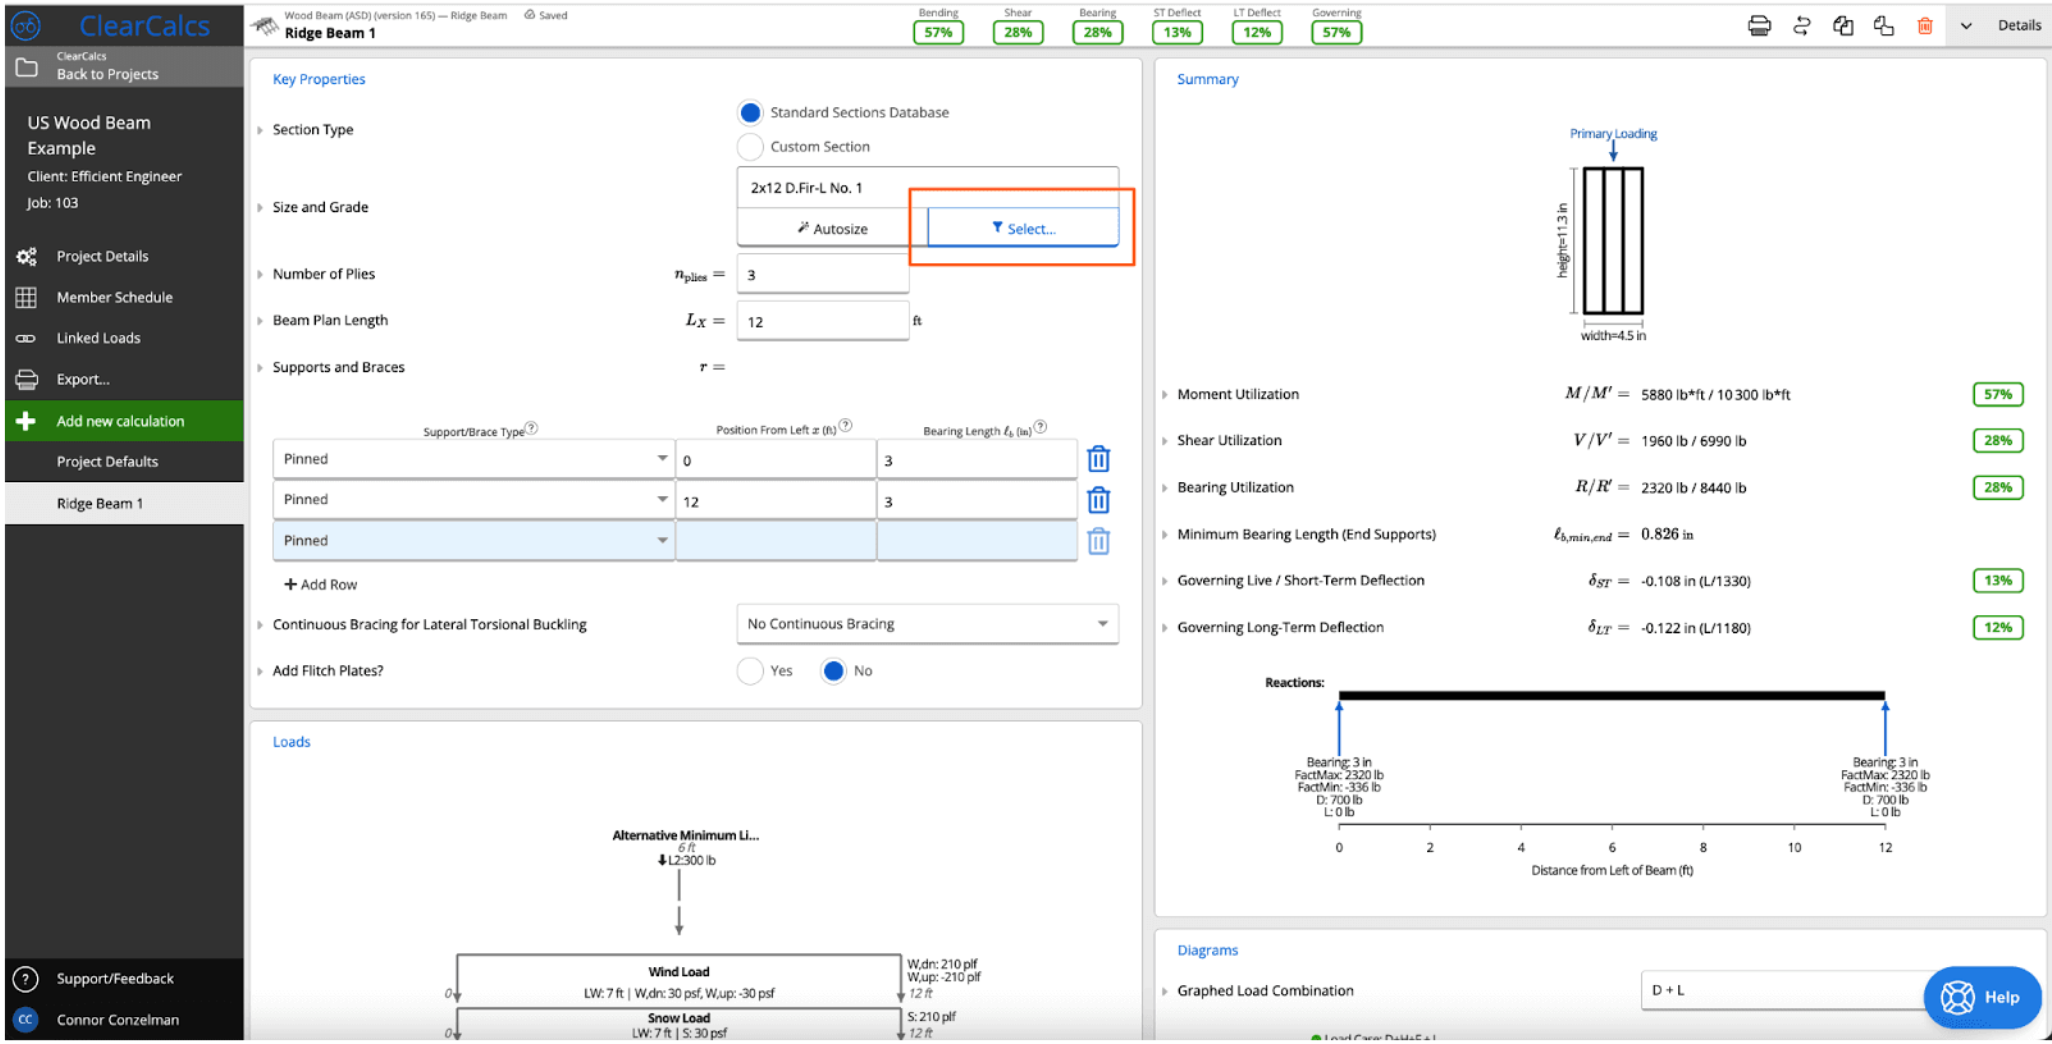
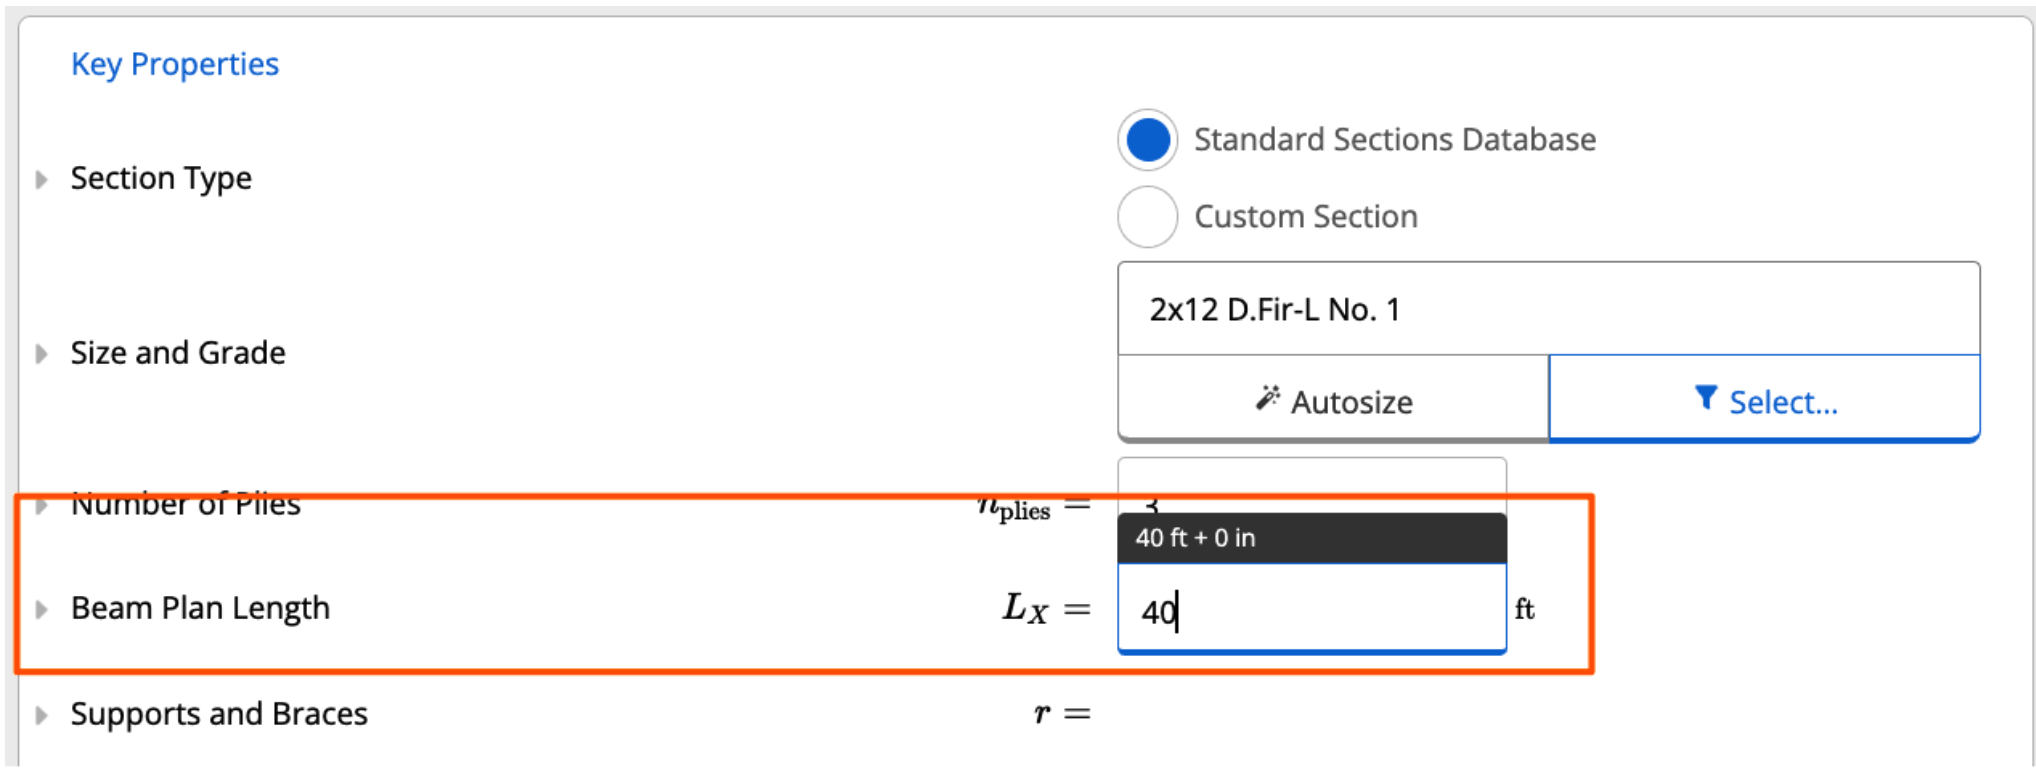
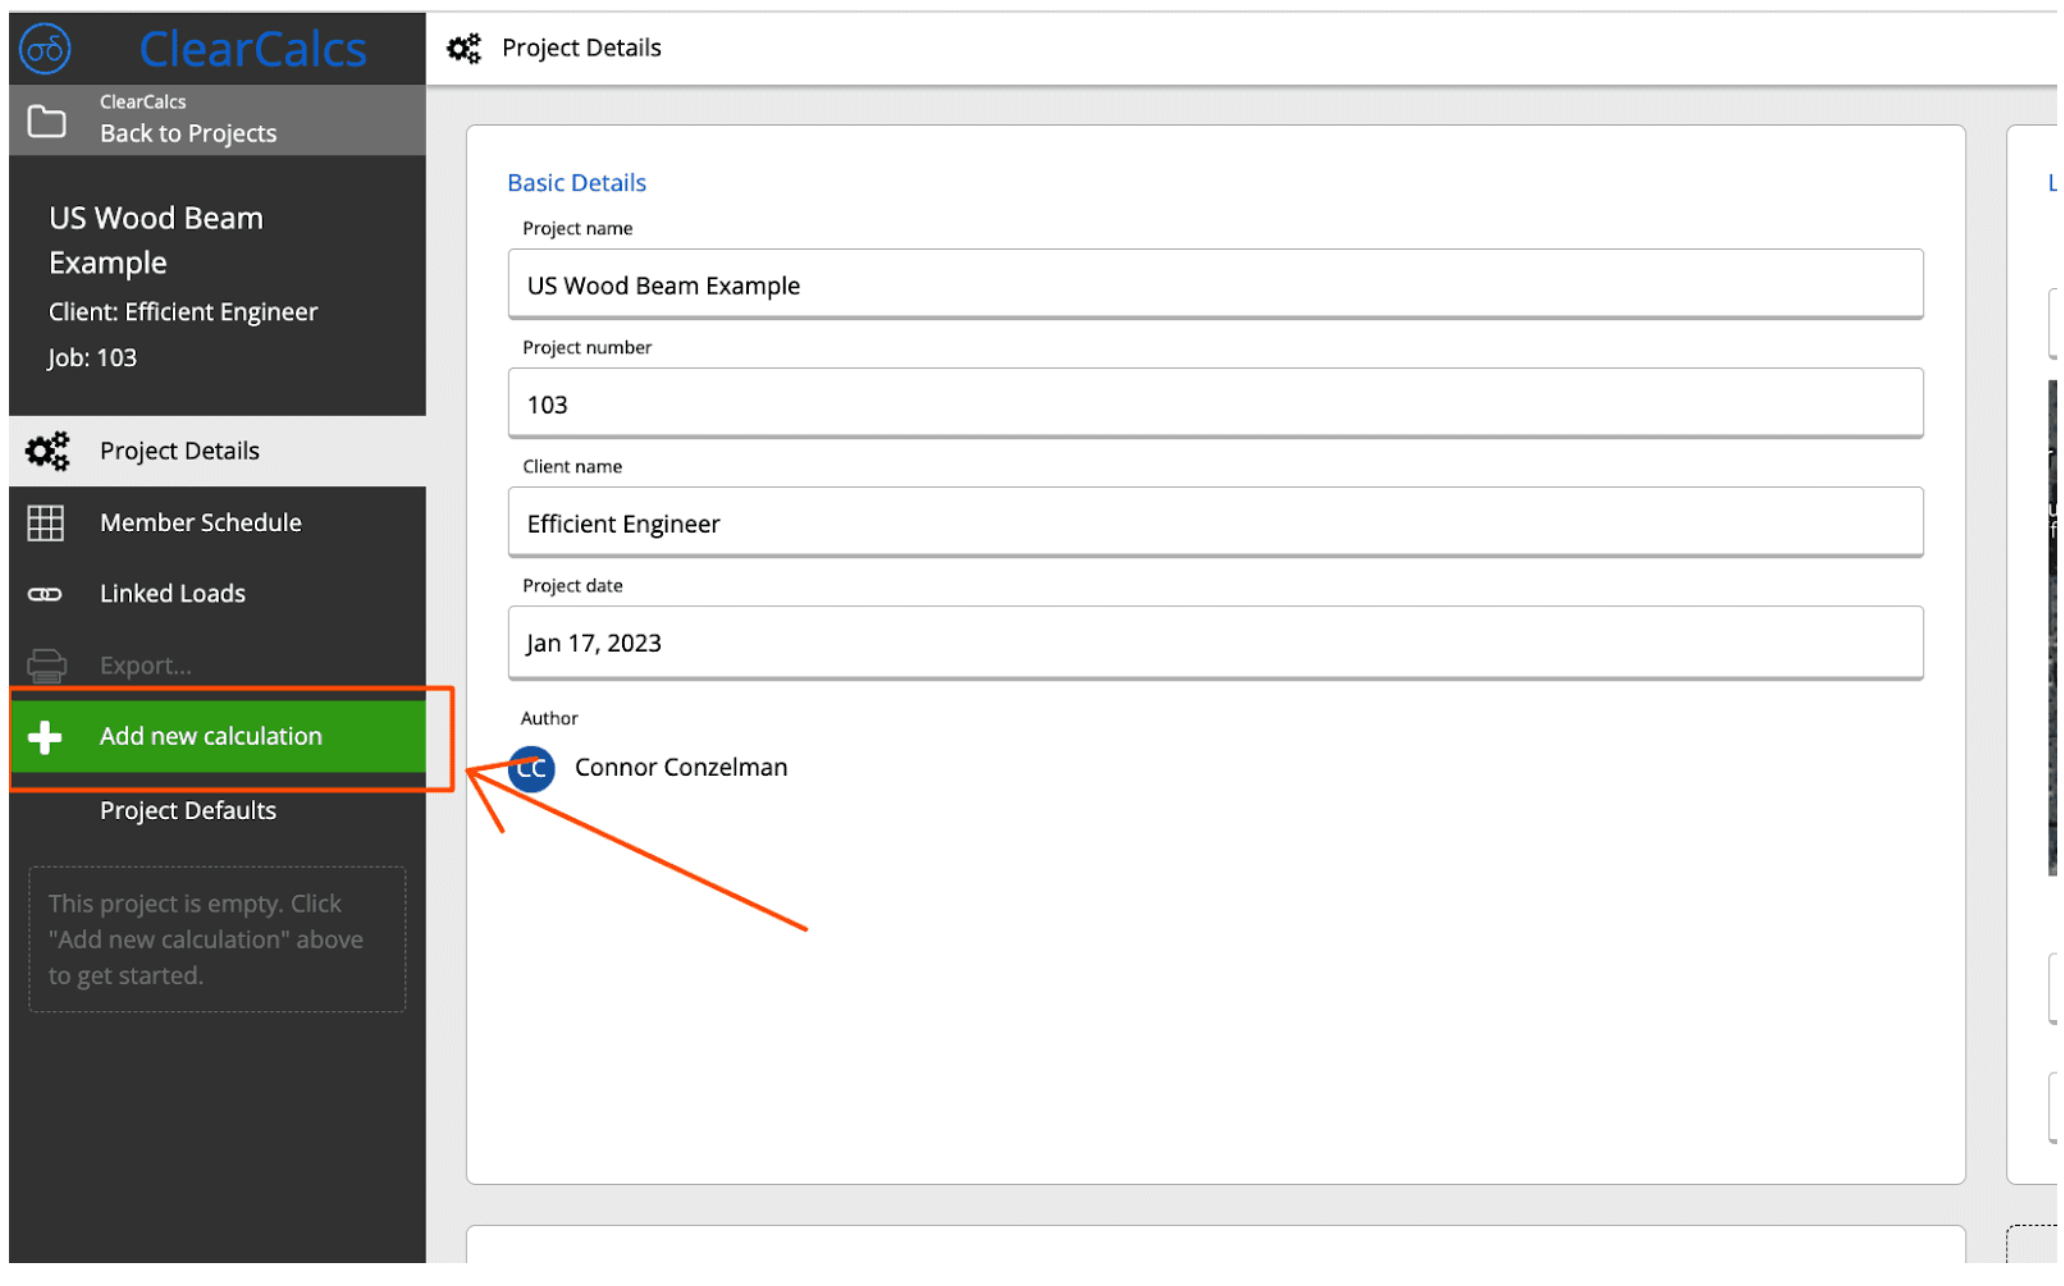
To speed up the design process, ClearCalcs offers common calculator presets where information is pre-filled based on your Project Defaults. In this case, you can select the Ridge Beam preset under “Wood Beam (ASD)” (note that the workflow will be the exact same if you use LRFD). Learn more about calculator presets in ClearCalcs here.


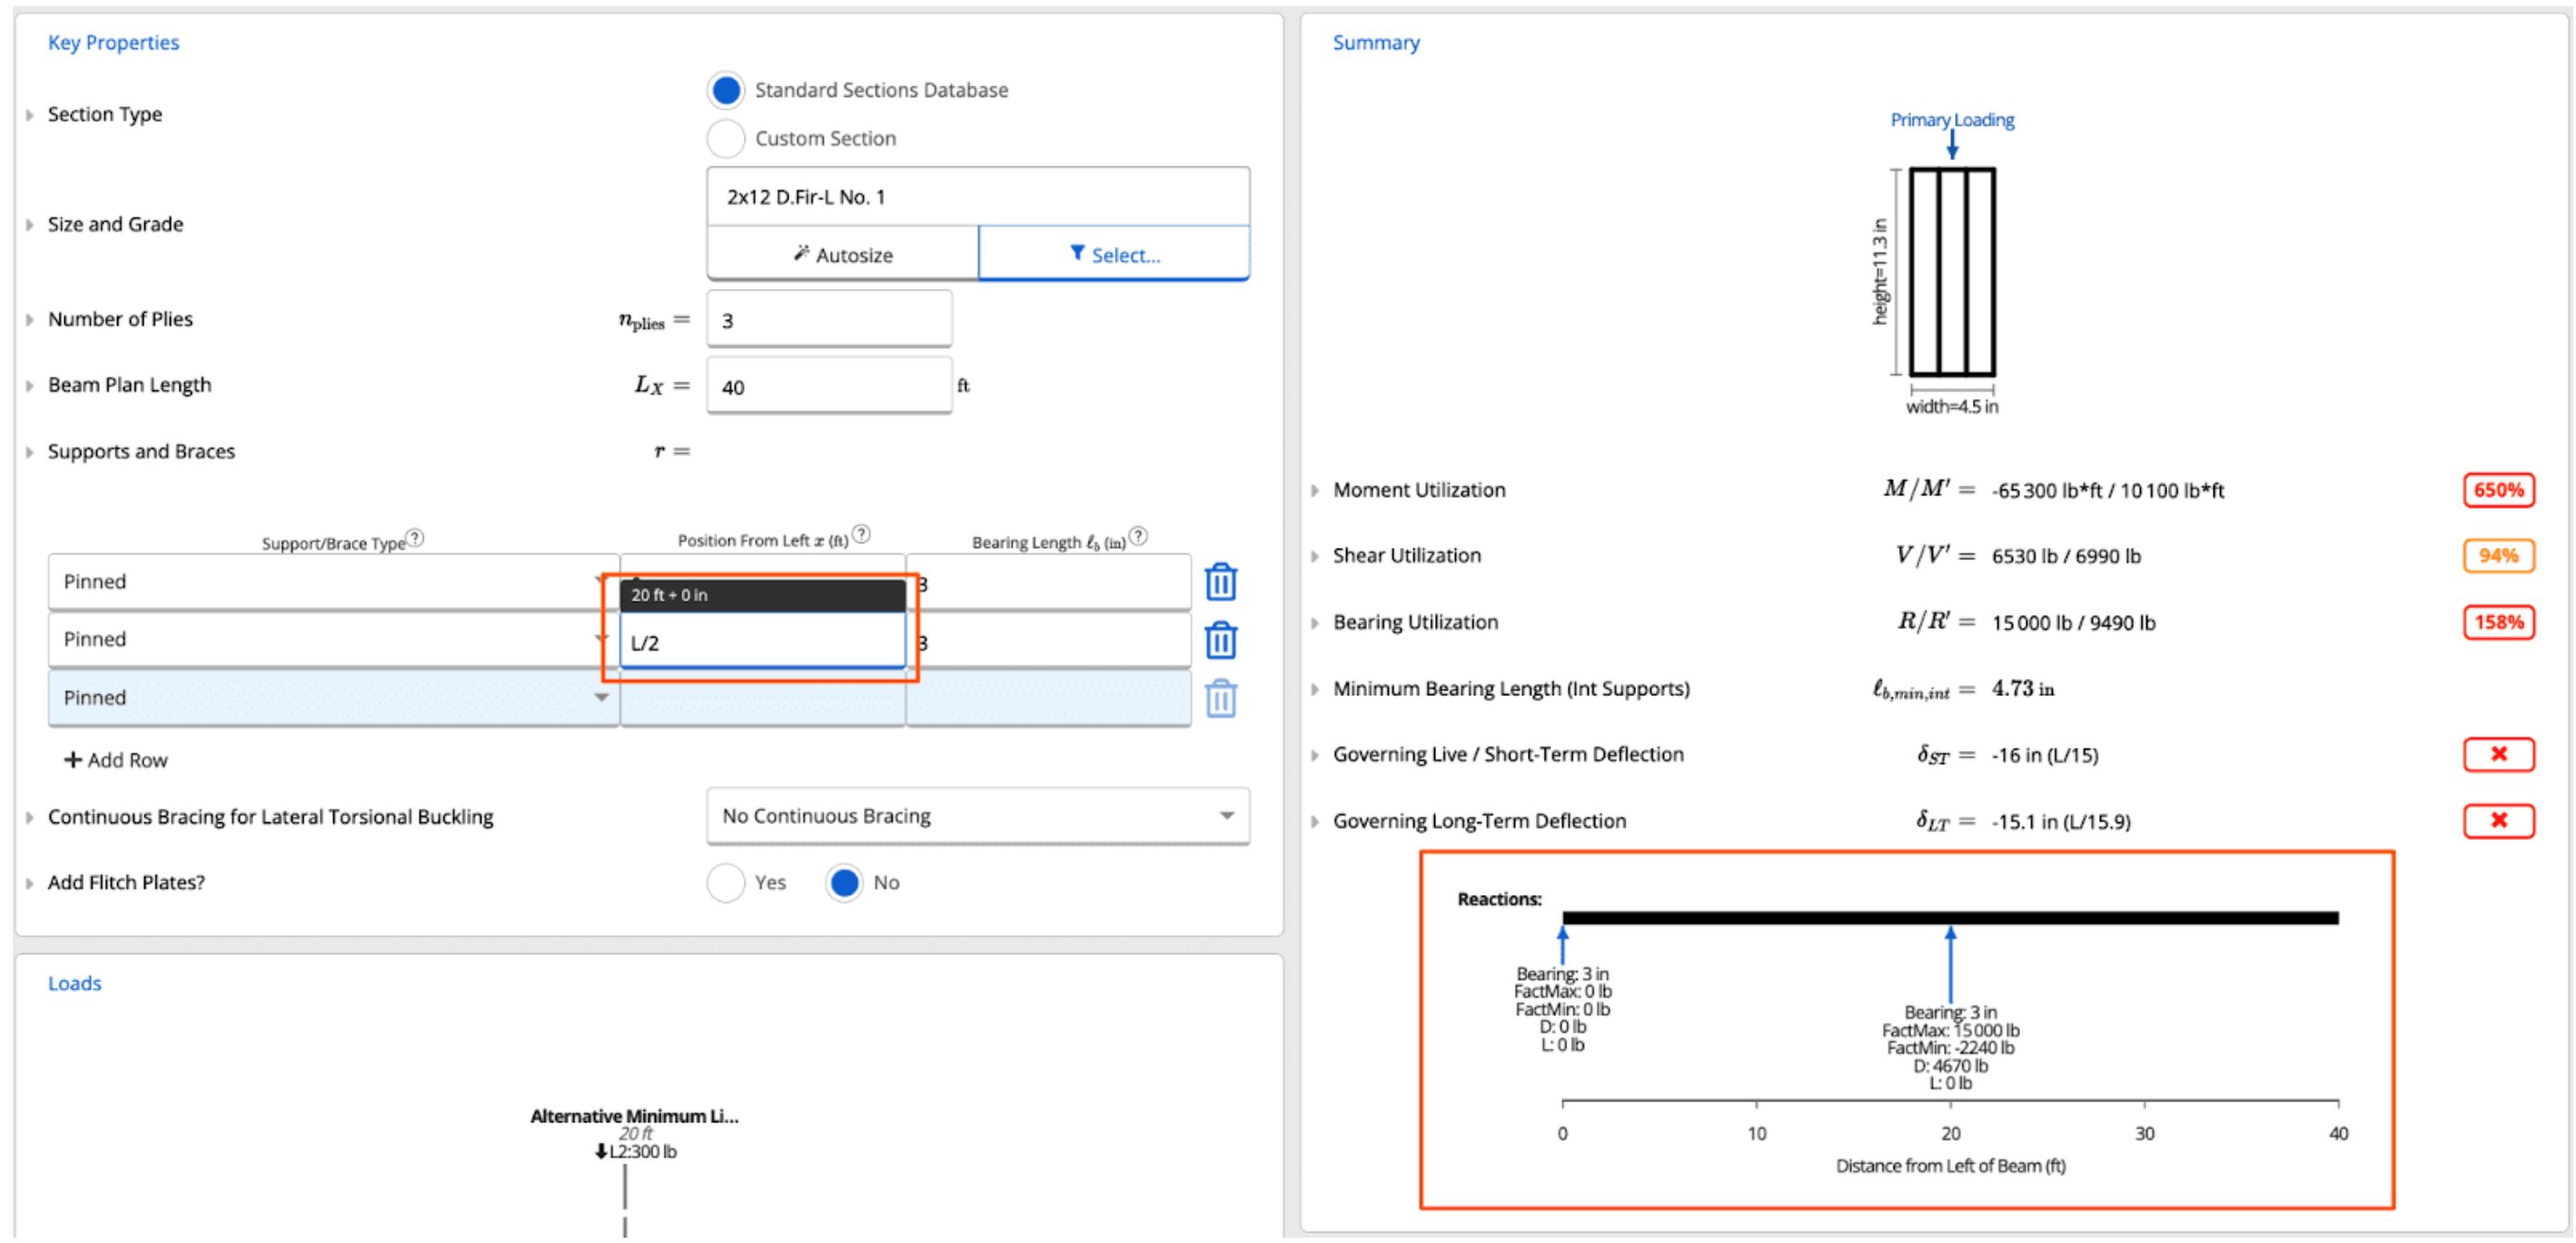
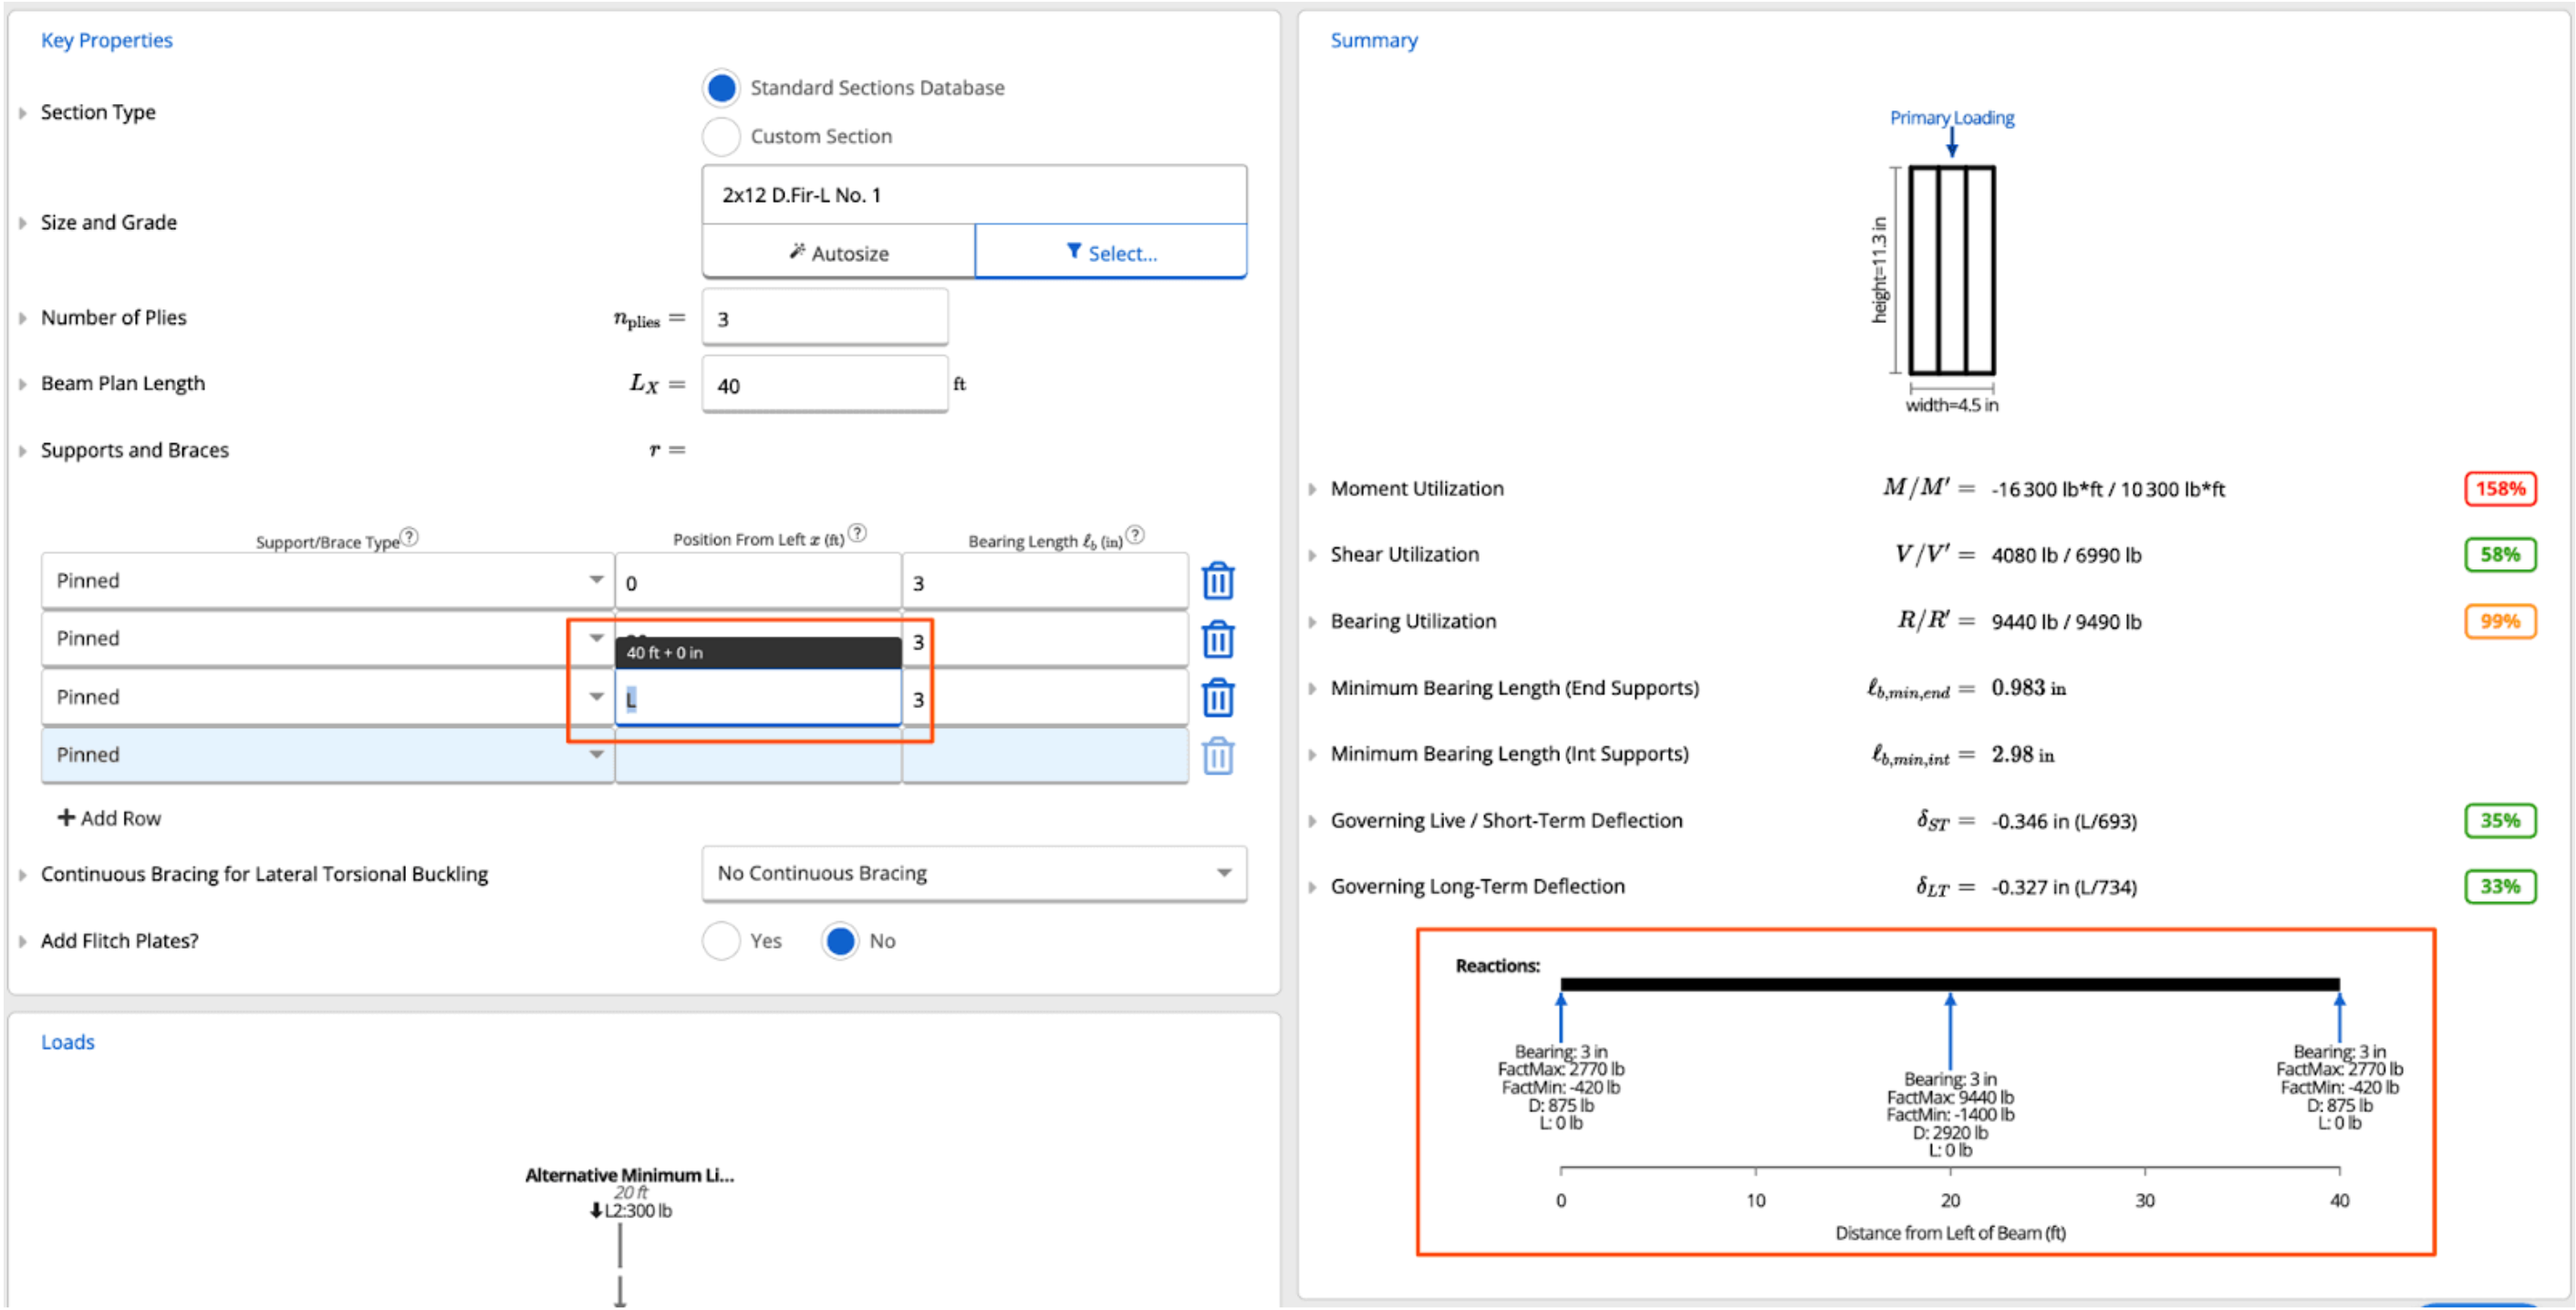
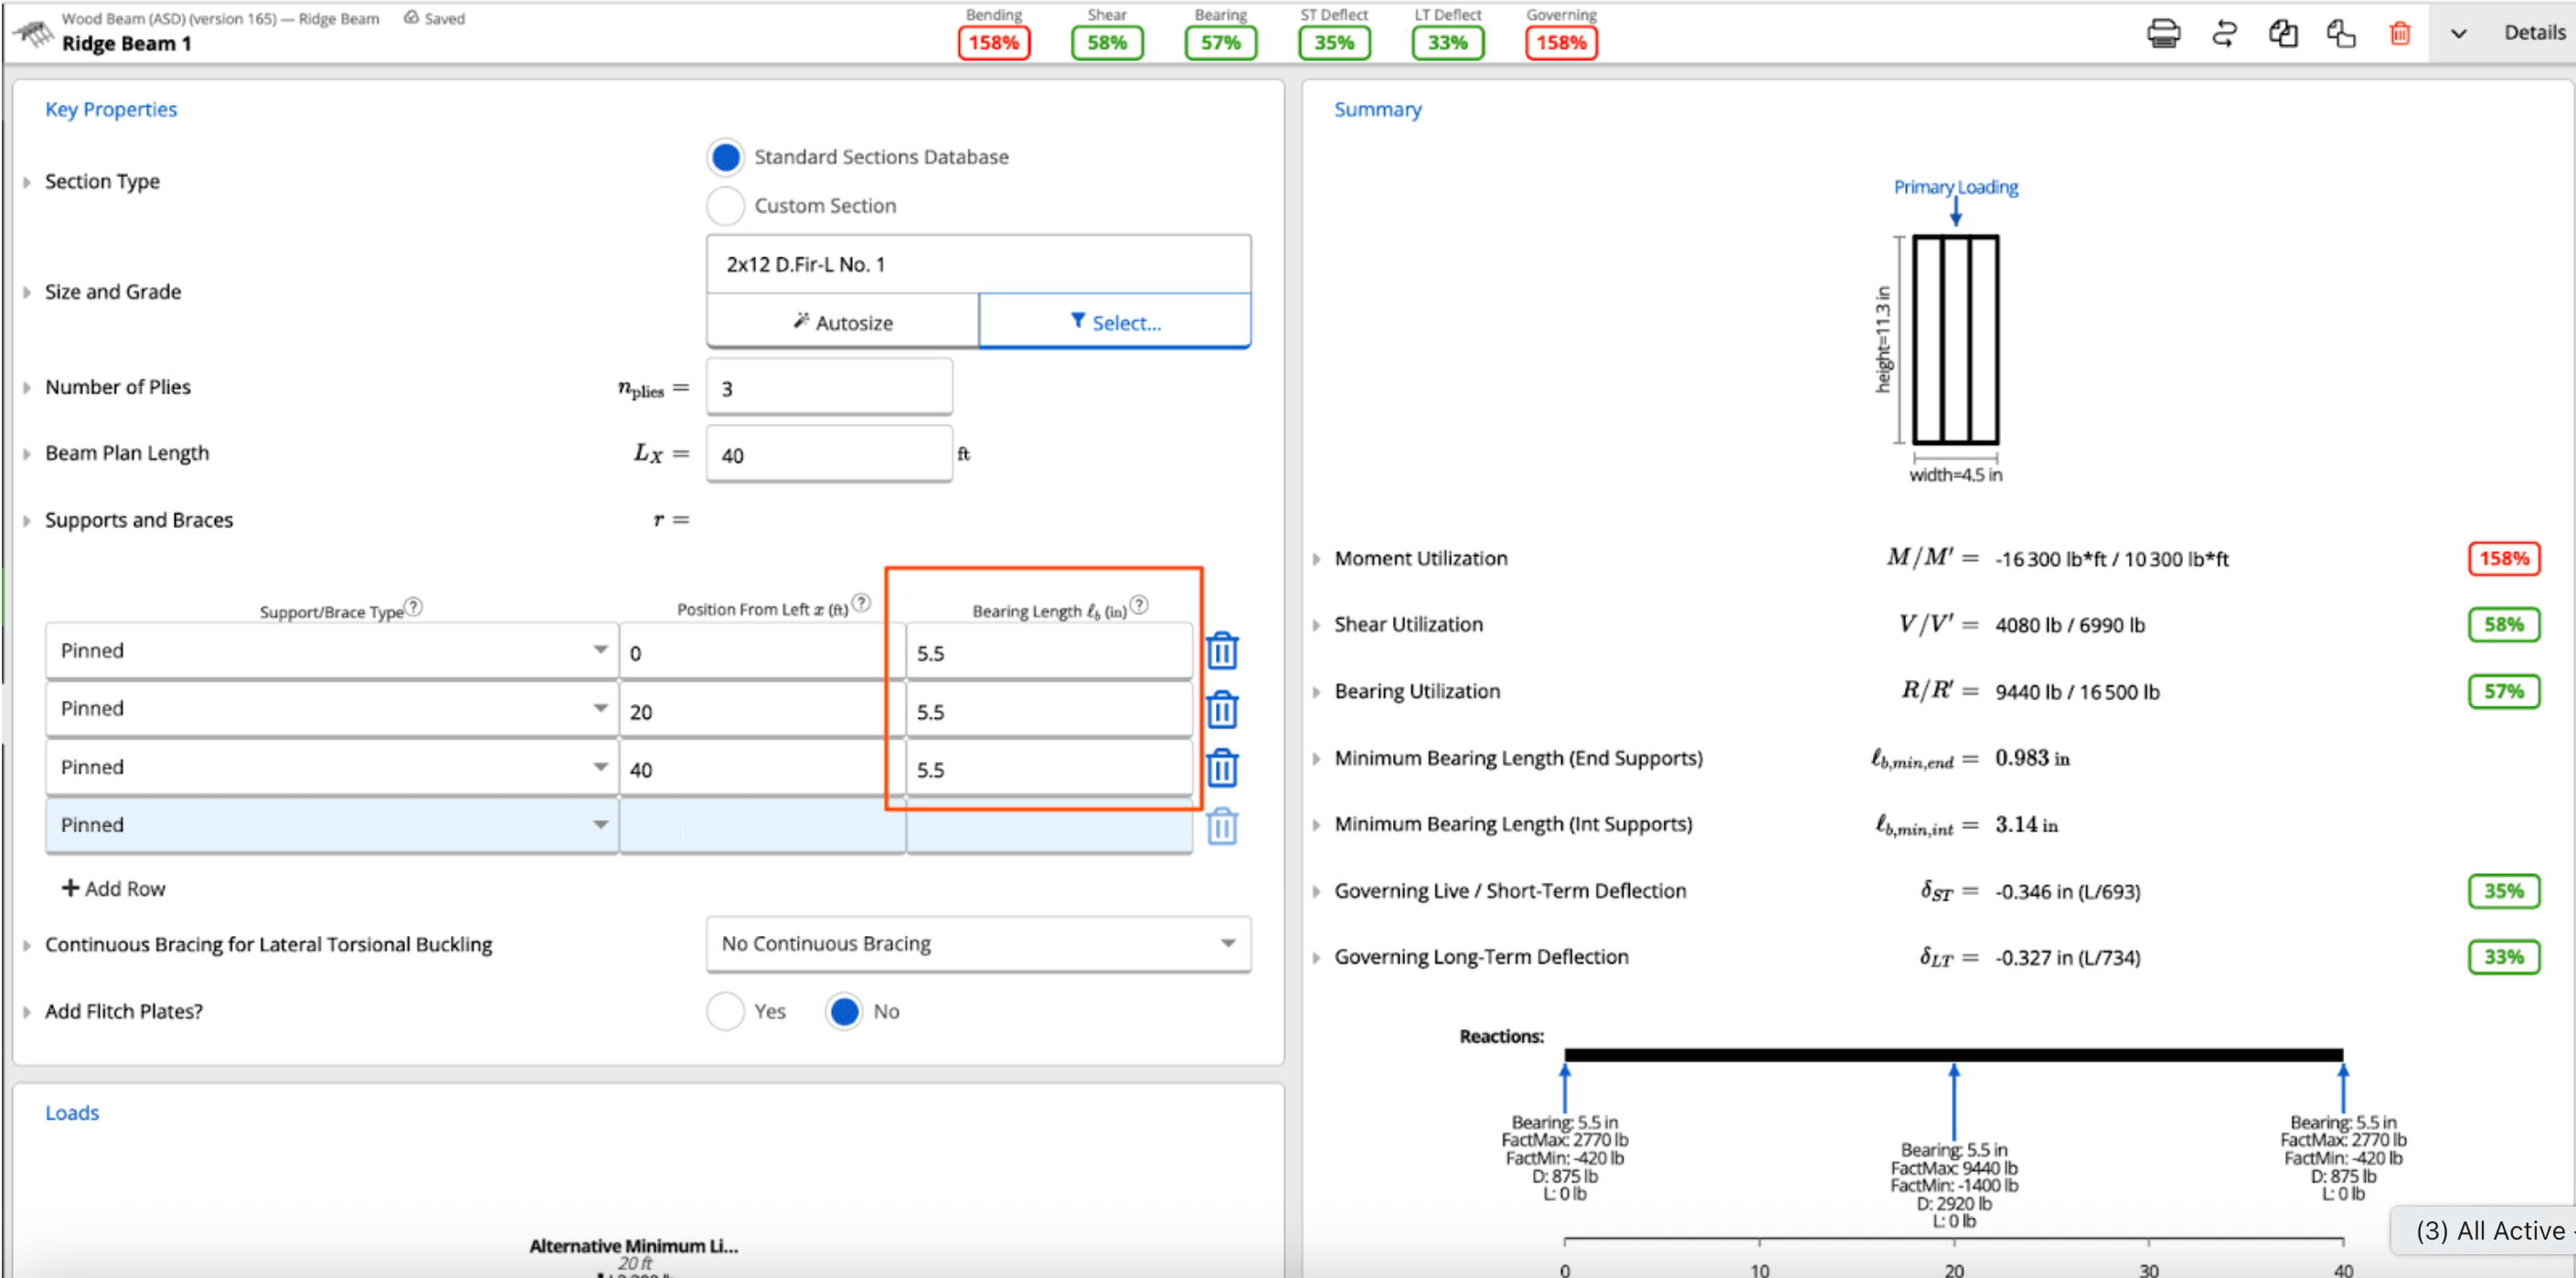
Entering your Design Criteria
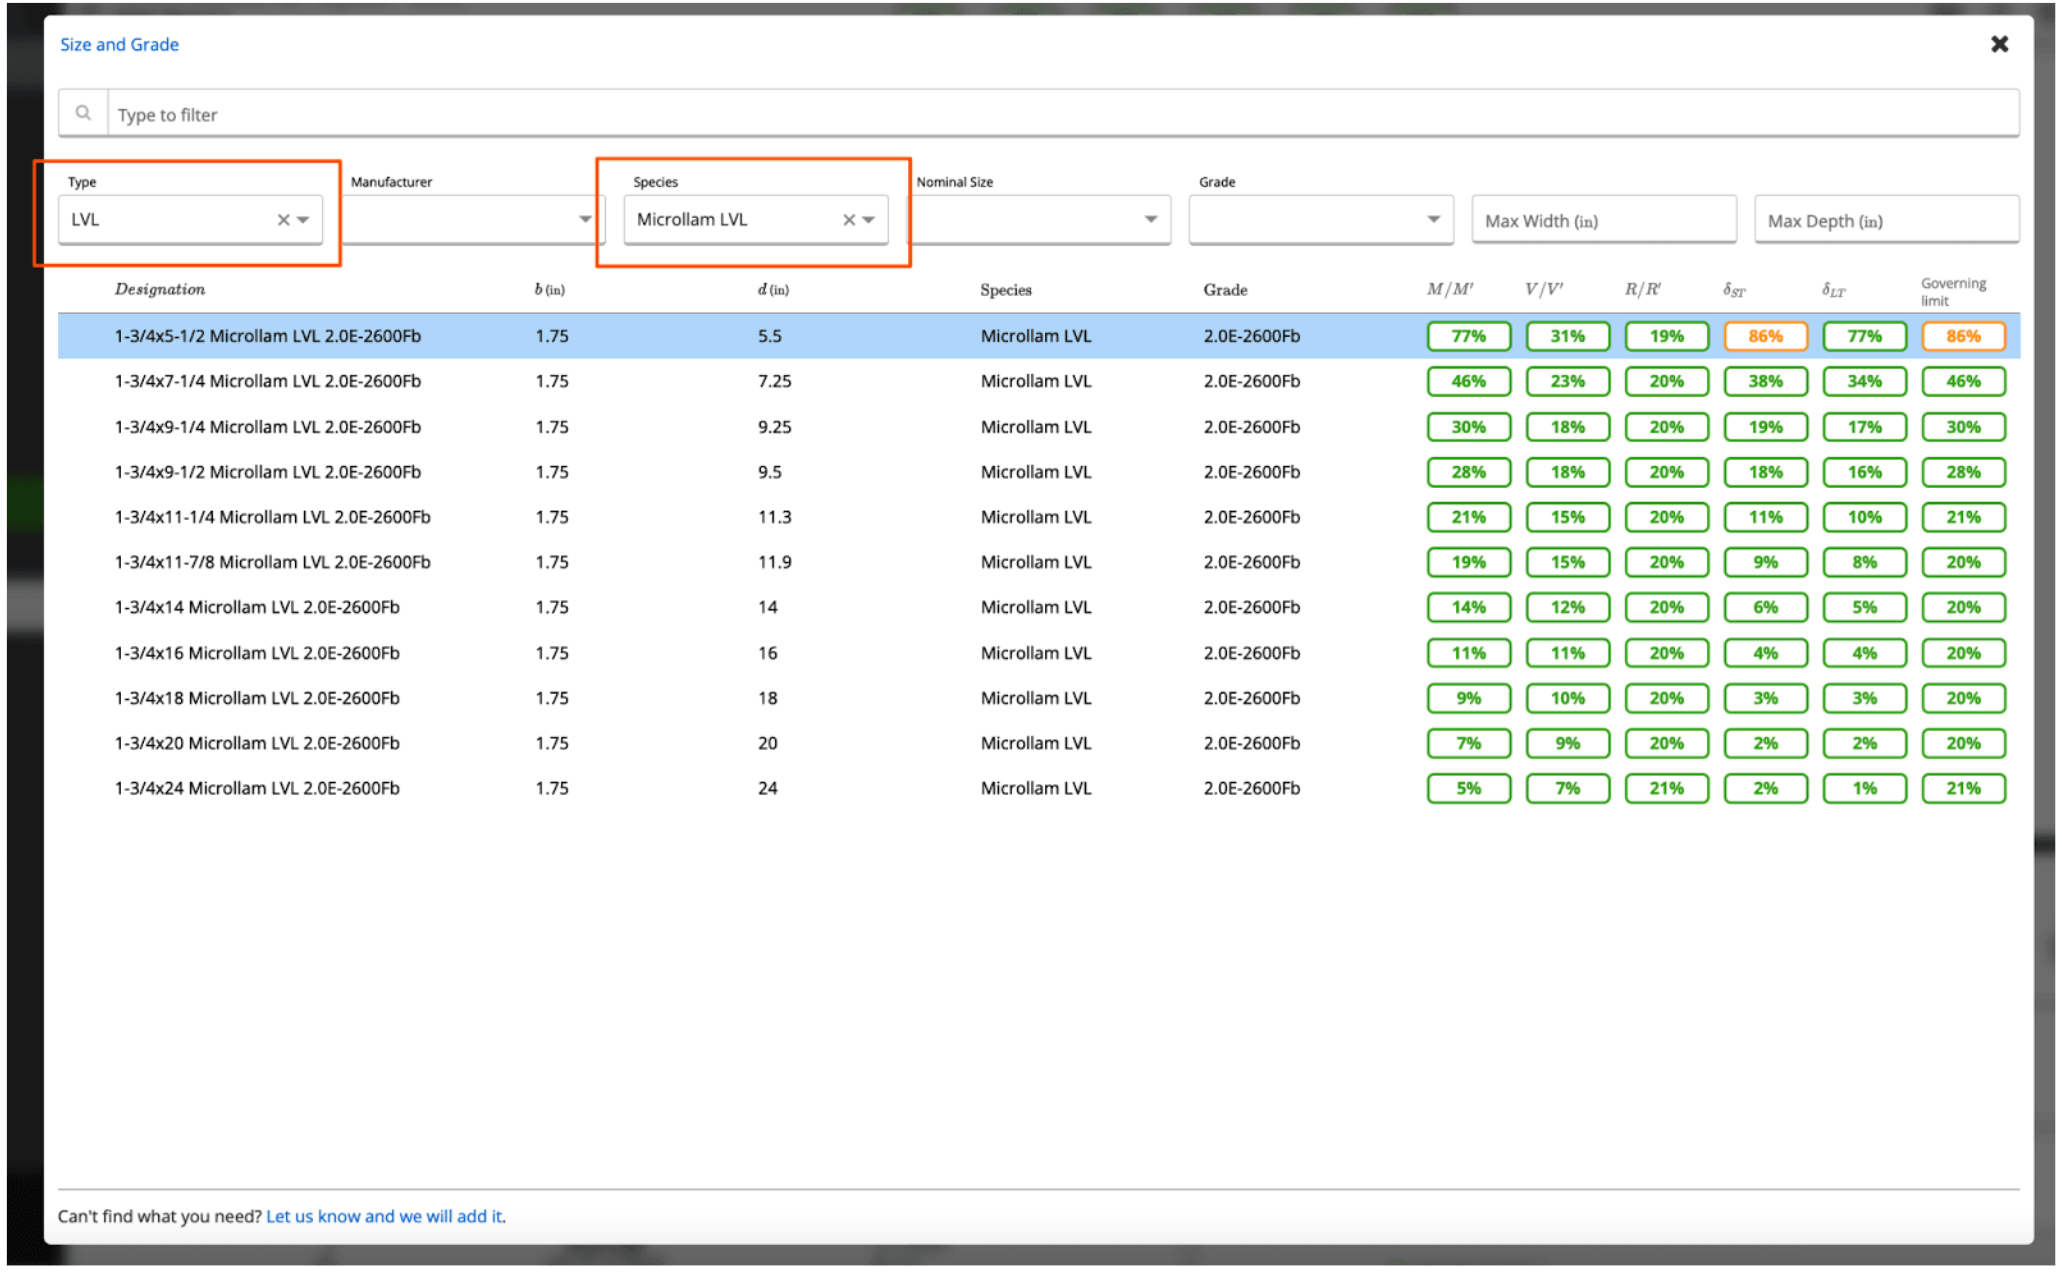
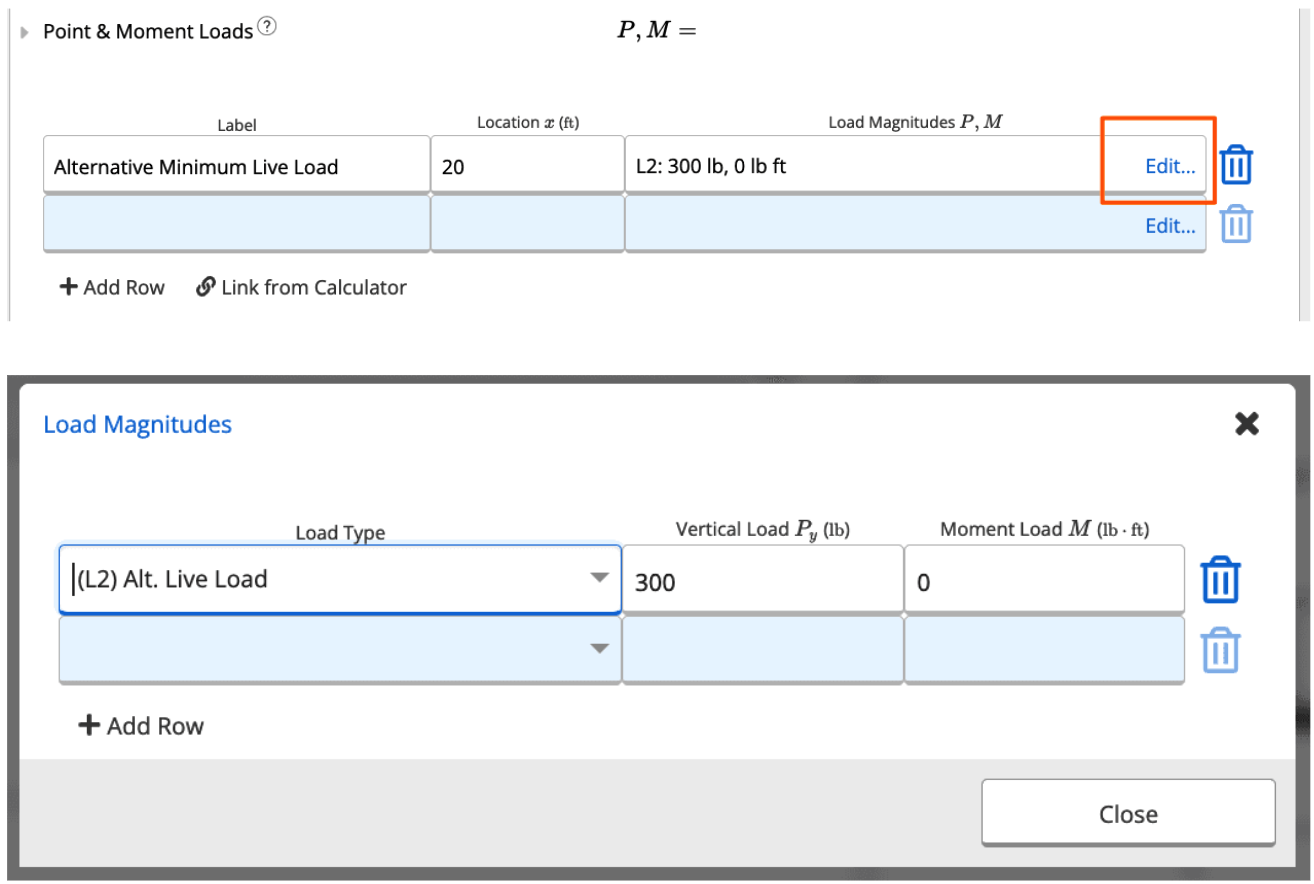
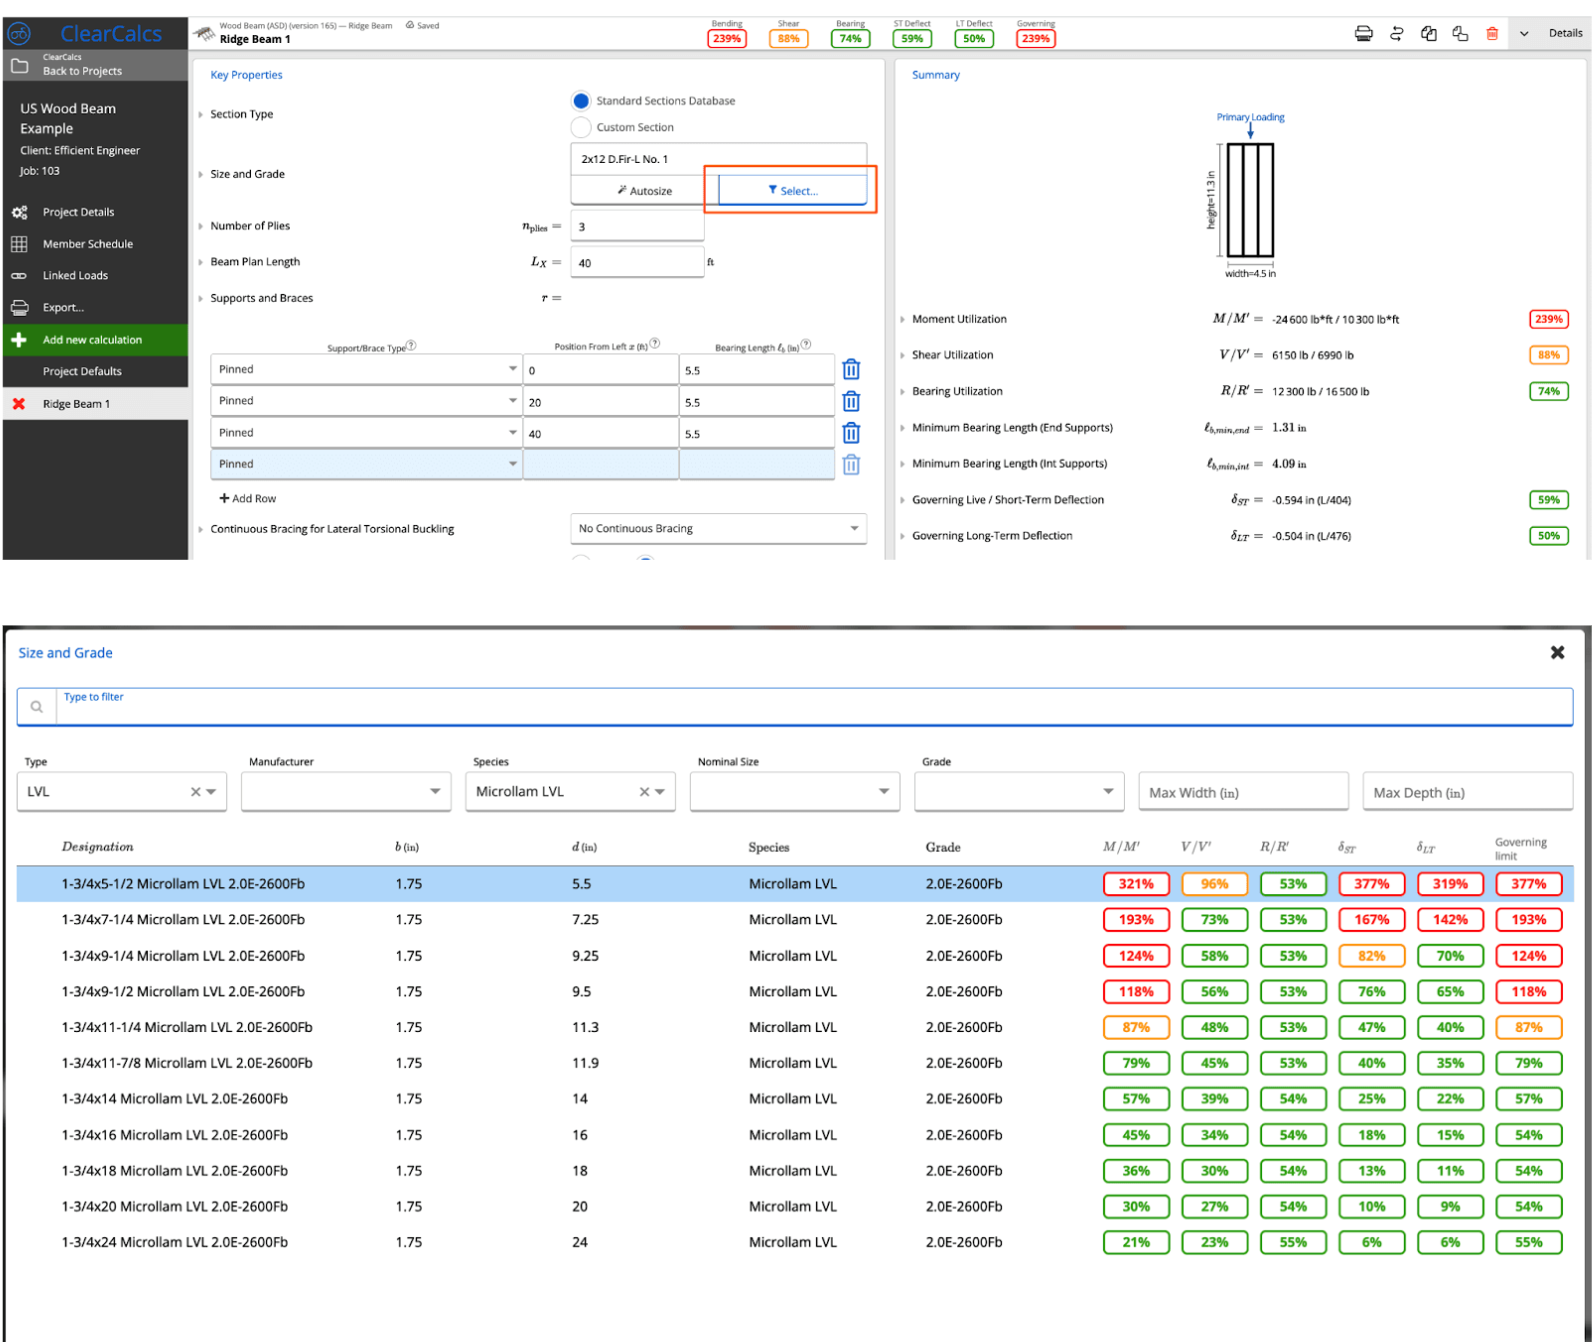
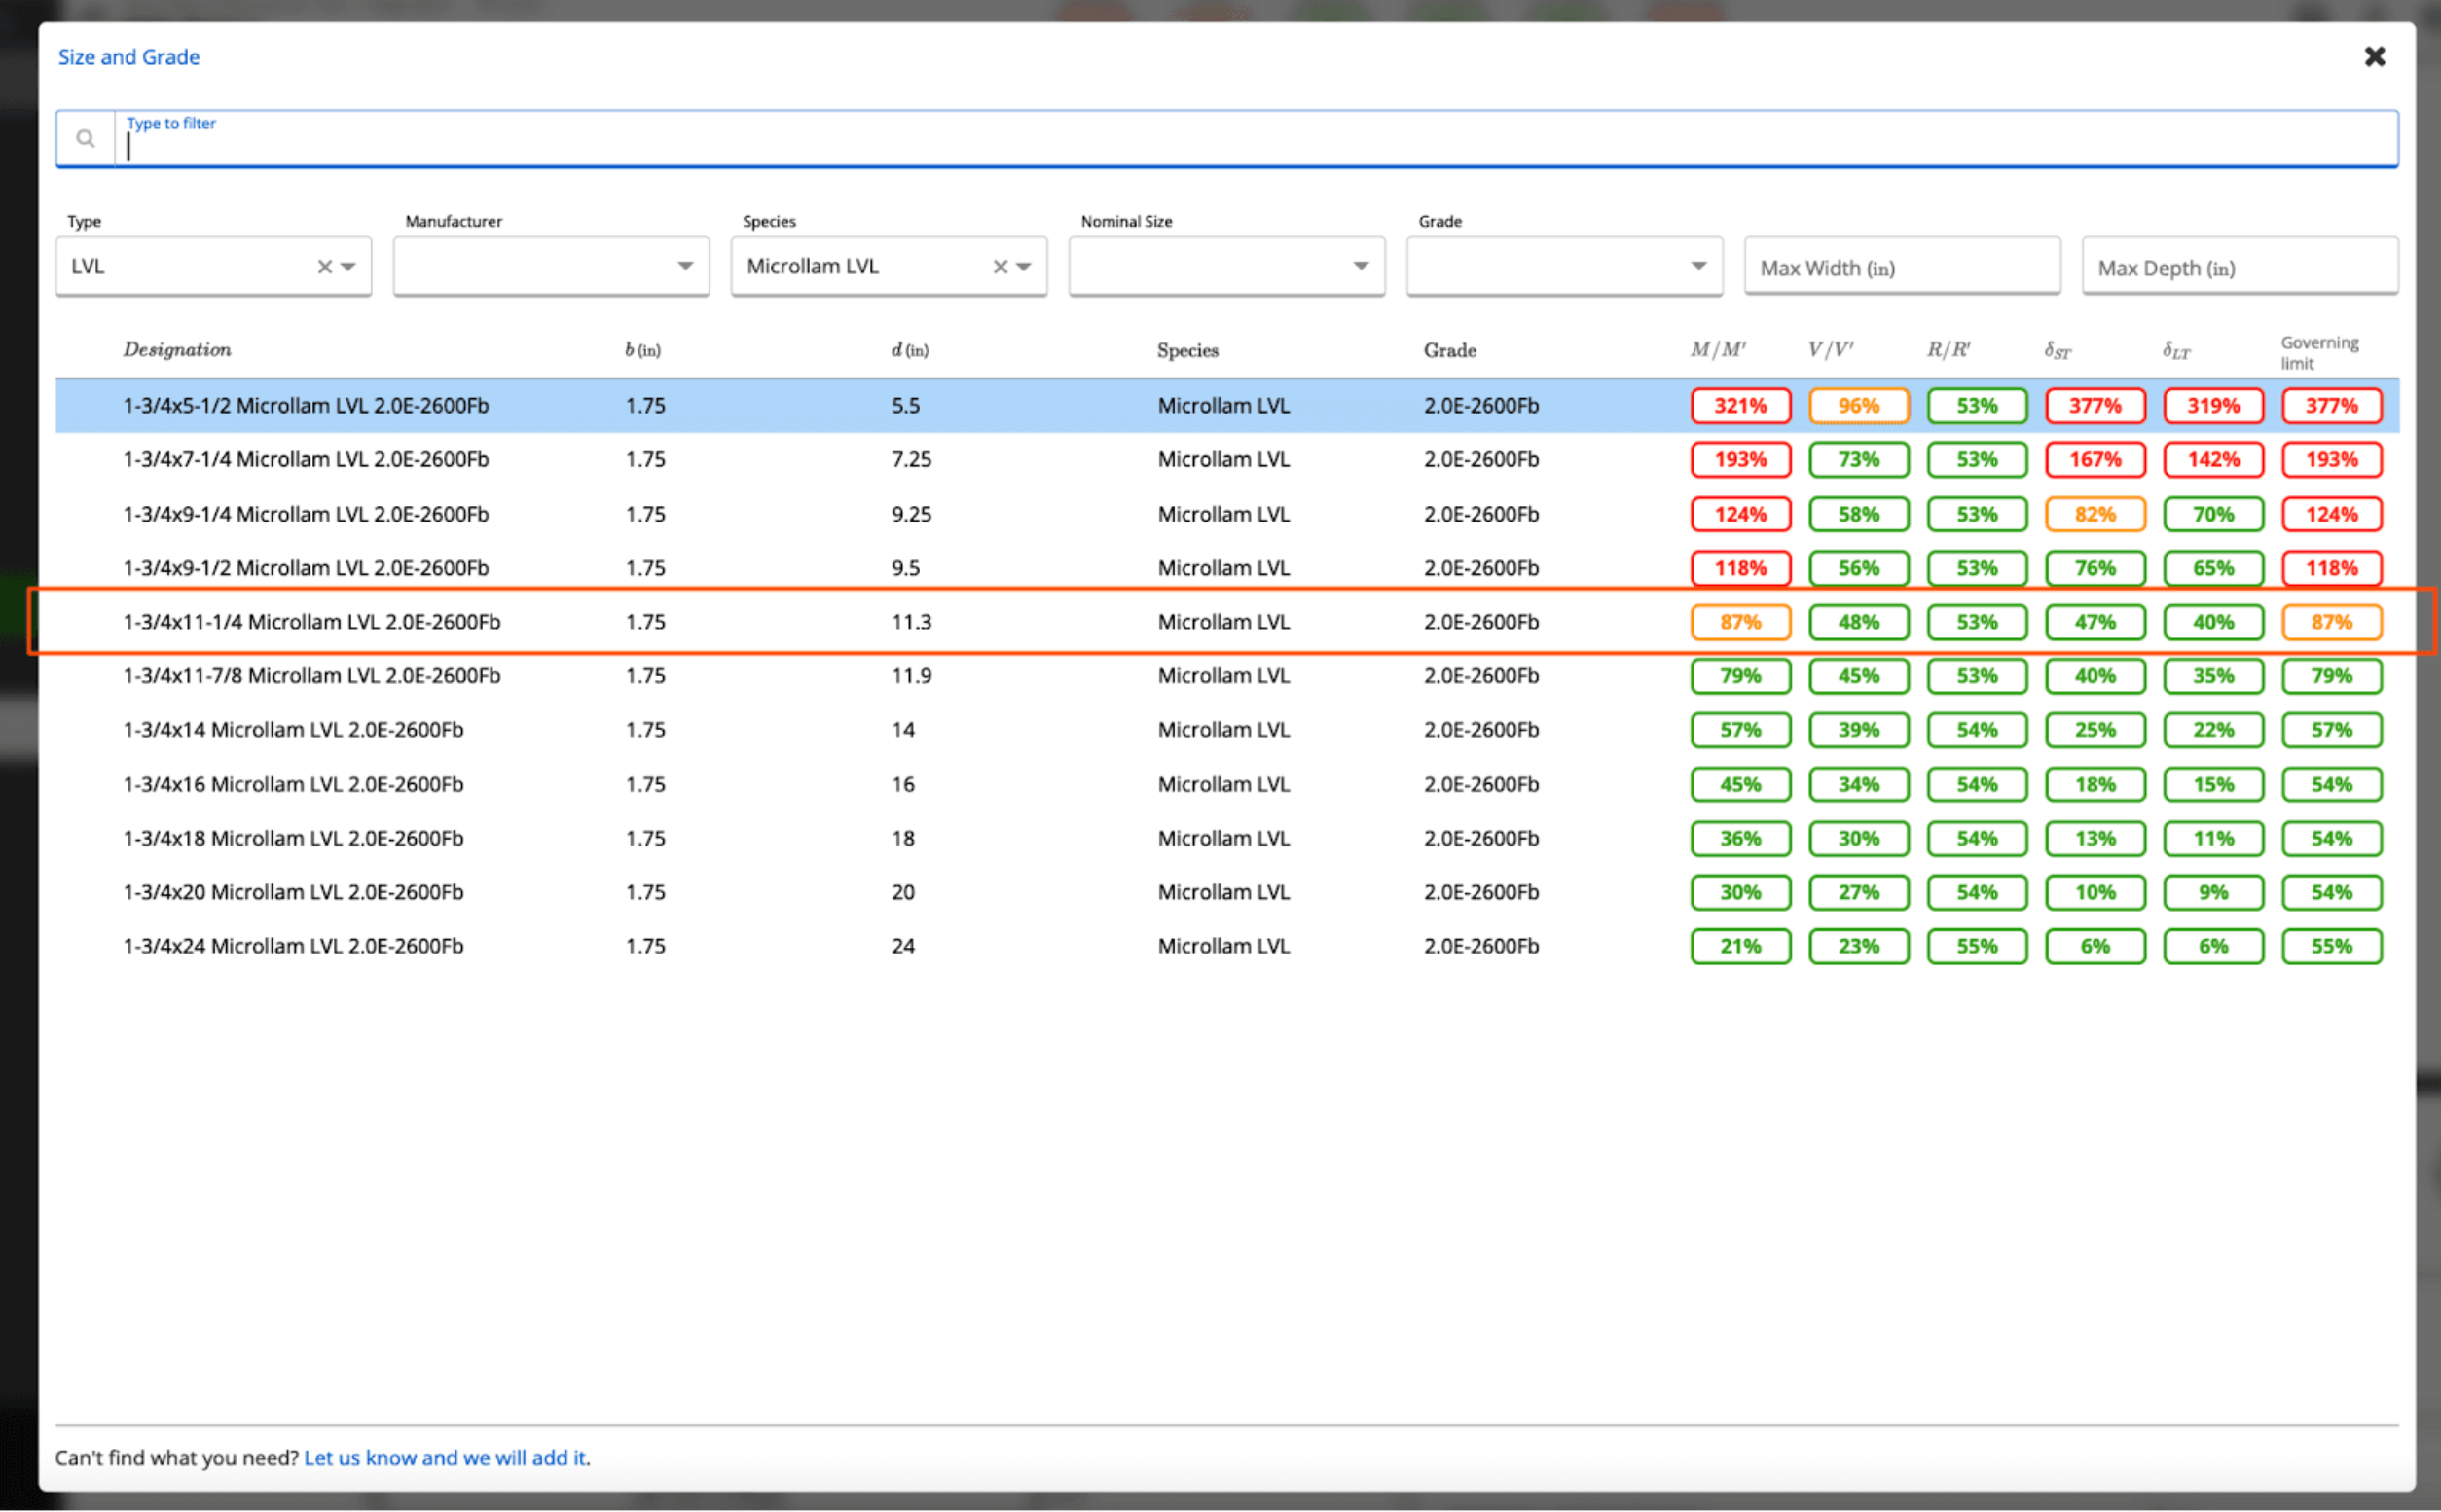
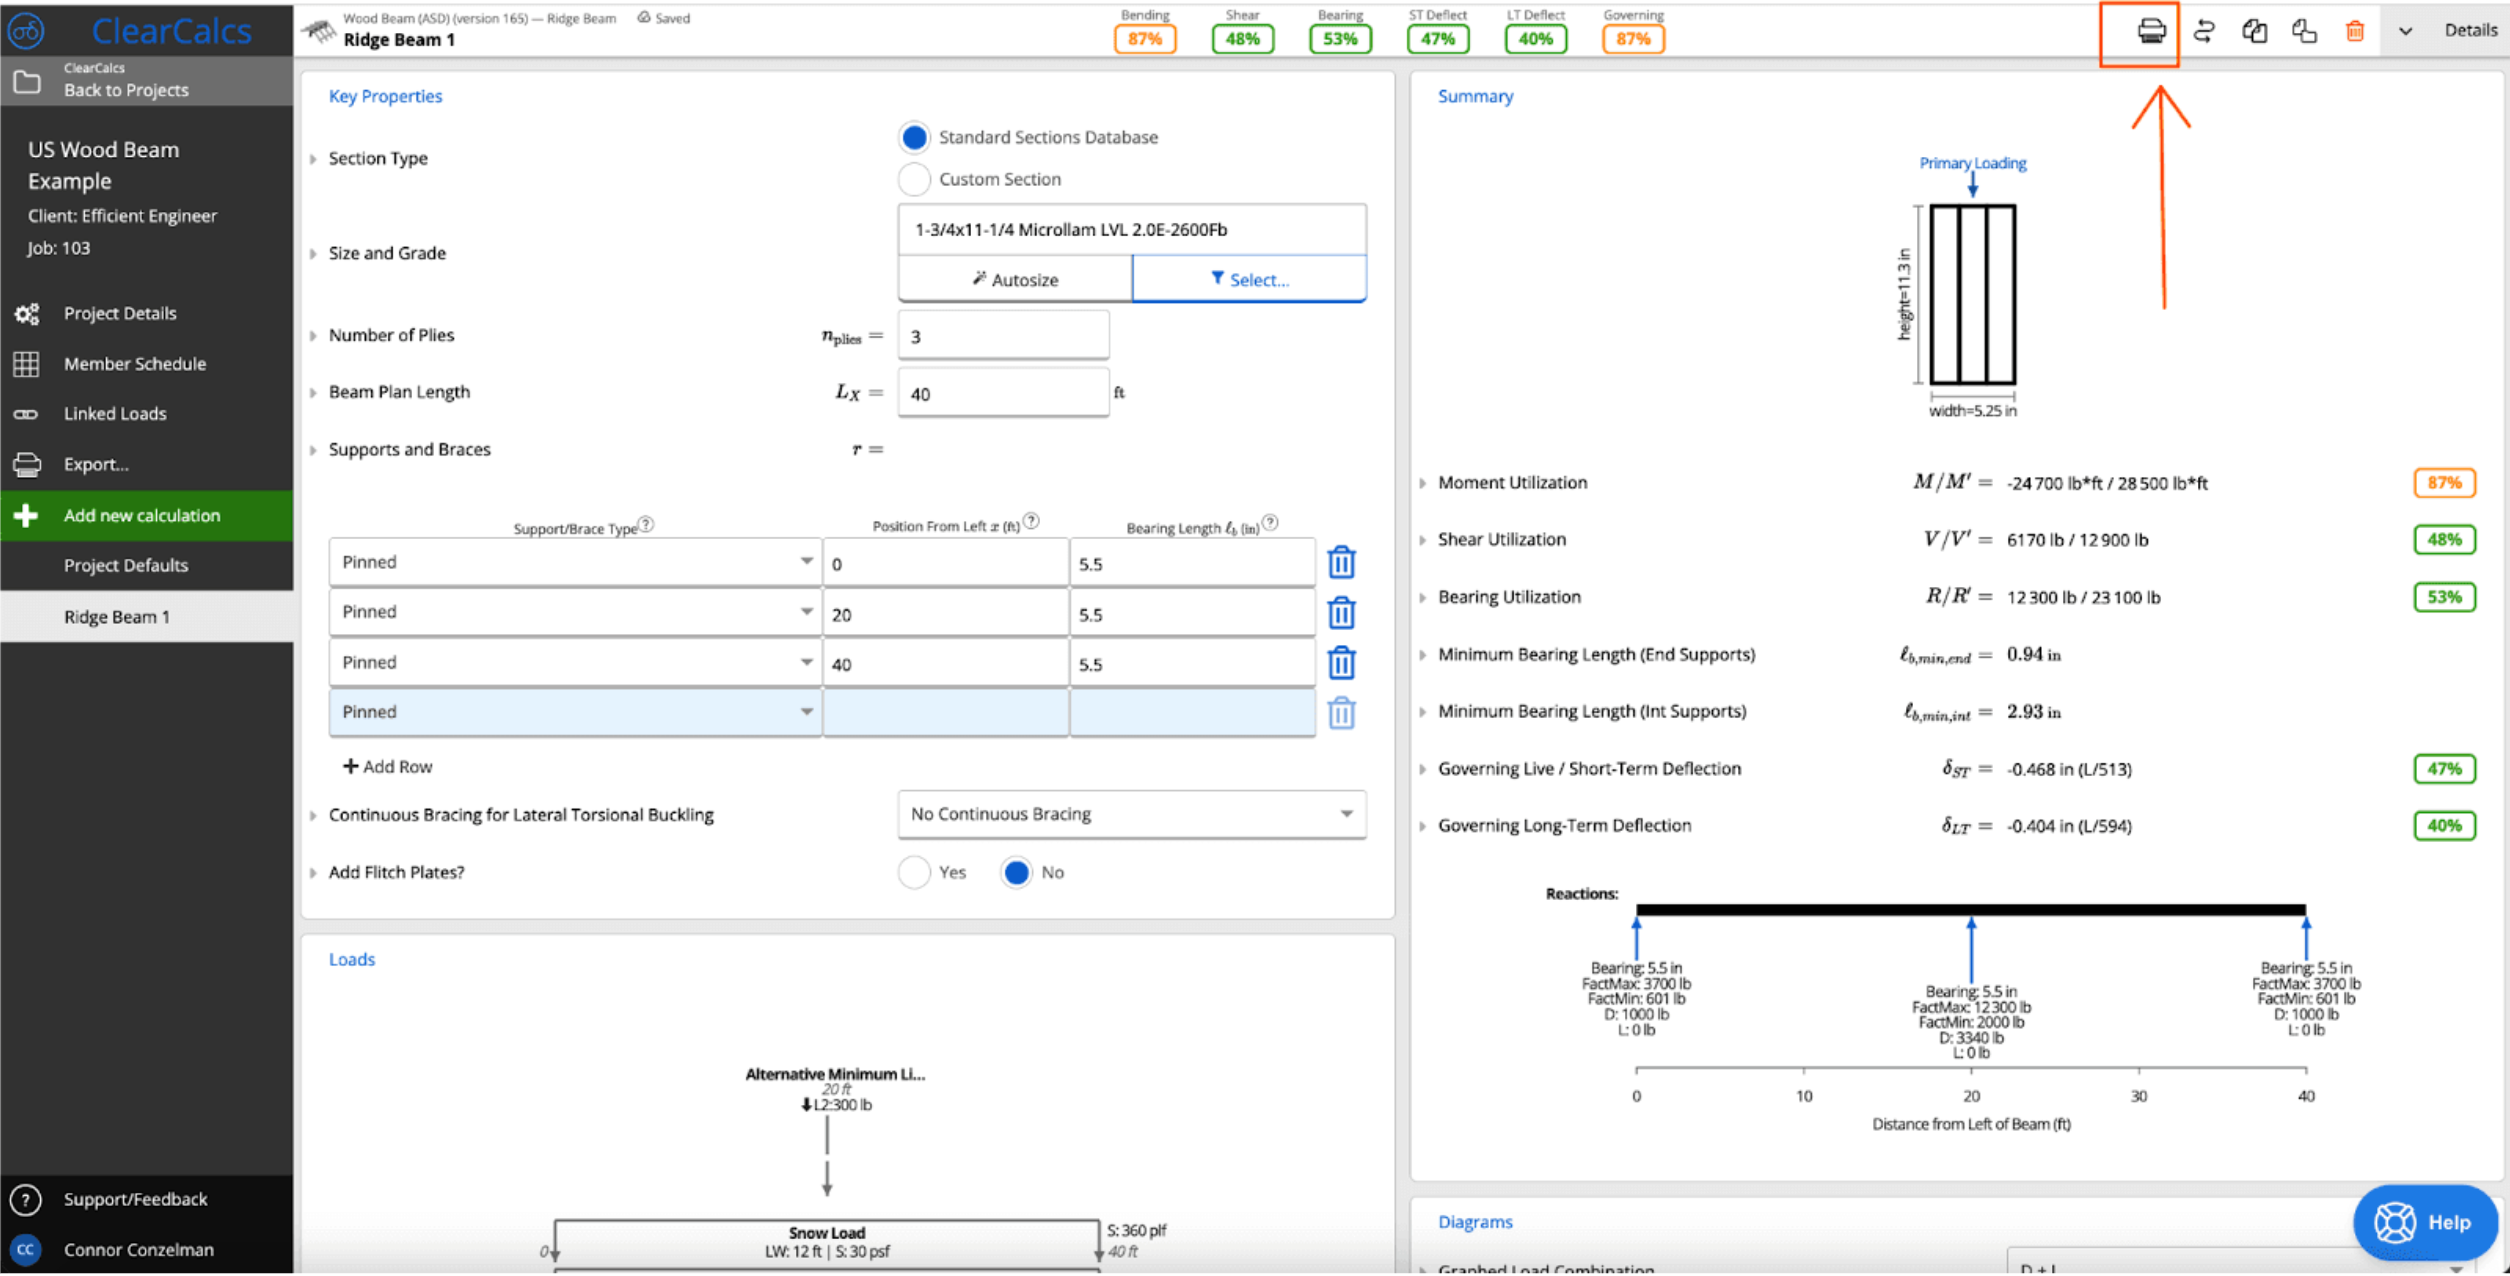
First, it has been decided that this ridge beam will be a Microllam LVL (see “Design Criteria” in our Given section above). You can assume that you have a good relationship with the local supplier and can get Microllam LVLs at a good price, plus you’ve had positive experience in the past using this type of LVL for ridge beams. You can use the Member Selector and filter down the list to only see what you’re interested in. We’ll come back to this later once we’ve set up the rest of our Design Criteria and Loading Data.